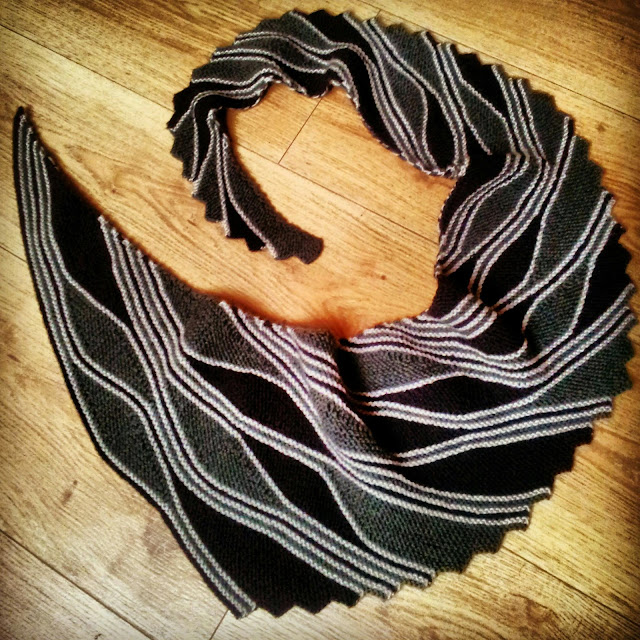
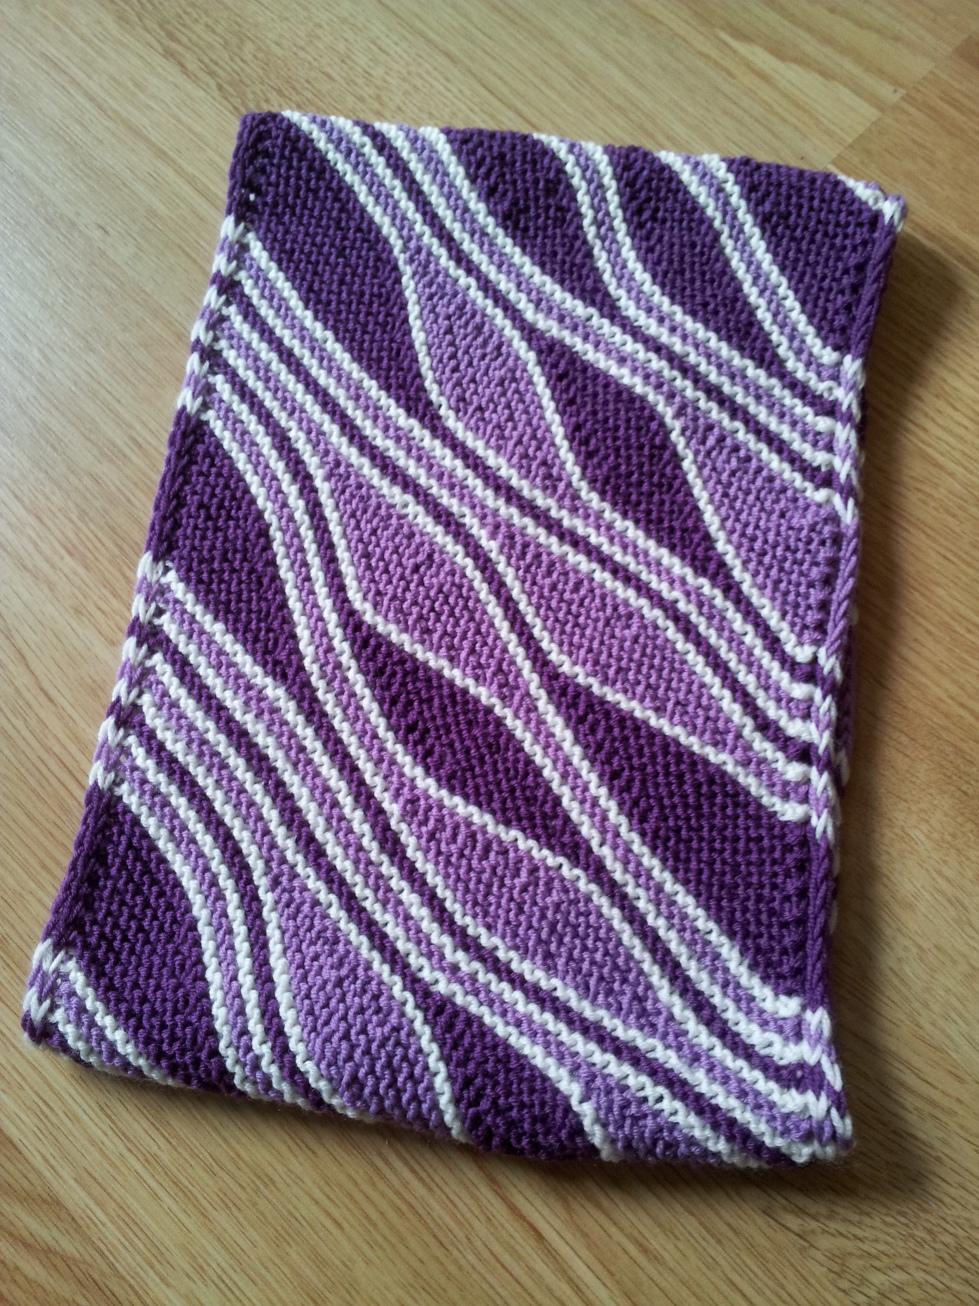
Knit yourself a warm winter cowl with a fascinating graphic pattern. Easily adaptable to either fit snugly around your neck or long enough to wind around twice.
This cowl is knitted flat and in a rhomboid shape - beginning and end are grafted when finishing. The wavy design is created by stacks of short rows interspersed with full garter stitch rows of a contrasting colour. A regular edging is added by knitting 3 stitches on each side on the RS and slipping them on the WS.
Before starting to knit, the general idea how to stack short rows should be understood – I have tried to explain my thoughts and I think it is advisable to read the explanations first … or just give it a try and use the
example given in this blog post and read the theory section afterwards - or not at all.
A
Danish translation was provided by Marianne Holmen. It can be
found here on strikkeglad.dk.


This work by
Knitting and so on is licensed under a
Creative Commons Attribution-NonCommercial-ShareAlike 4.0 International License.
My Experience with Short Rows
When I started using short rows, I first created a rectangle with very neatly stacked short rows (
Short Wave Mitts), then I made it more „organic“ knitting the same sections but in a different order (
Mixed Wave Mitts) – only afterwards I figured out how to include the tilt (i.e. creating the rhomboid shape). So the two mitt patterns lead up to the cowl pattern you're reading right now. If you start with this pattern without any experience in short row stacks, the explanation might seem complicated – it is. I'm sorry, but that's how my mind works. If you have ideas for explaining it better or easier to understand, let me know and I will gladly include it or link to it.
A
PDF-File of this pattern is available, too. This PDF includes the example mentioned above.
(Edit: 03.10.2021: updated PDF pattern link - somehow google seems to have changed the links on GoogleDrive so the old links weren't working anymore)
 Materials
This is the amount I used for a small cowl that fits once around my neck.
- ~25 grams of DK weight yarn in neutral colour (NC, white in the
photo)
- ~30
grams of DK weight yarn in colour 1 (C1, dark purple in the
photo)
- ~30
grams of DK weight yarn in colour 2 (C2, light purple in the
photo)
- 3.5
mm needles
- 8
stitch markers
- (2
edge markers and 6 markers for the
- waves pattern)
- tapestry
needle
General
Construction
The pictures below show how the cowl is generally construced. The
rhomboid shape is created by increasing (with kfb) one stitch on one
side every two rows and while decreasing at the same rate (with ssk)
on the other side. In the end the shorter edges are grafted together.
Short Rows
The following paragraphs explains how the knitter should proceed to build the cowl from sections of short rows, to shape the piece as suggested and to get a smooth and consistent fabric.
The pattern is made up of
sections that are constructed of short rows, i.e. rows with 10 stitches on one side of your knitting and 8 stitches on the other side. To mark where the sections begin and end 6 „pattern markers“ are used – these are placed with a distance of 10 stitches inbetween. There are be
left leaning sections (10 stitches on RS and 8 stitches on WS, called L1 to L6) and
right leaning sections (8 stitches on RS and 10 stitches on WS, called R1 to R6).
At its highest point, a section is made up of 7 garter stitch ridges.
In a set-up row, markers are placed – there are edge markers and pattern markers. The 2 edge markers mark the borders between the 3 edge stitches on each side and the 60 stitches that make up the wave pattern. 6 pattern markers are placed at a fixed distance of 10 stitches between each other. The pattern markers are refered to a marker 1 to 6 (always numbered from 1 to 6 from right to left when viewed from the RS at any given time) throughout this pattern. Their behaviour will be discussed below.

The picture on the left shows possible sections. Each section has a central marker (marker X) and is placed between the two markers around that central marker (marker X-1 and marker X+1). E.g. for both R3 and L3 marker 3 is the central marker and they have their highest stack at that central marker (marker 3), R3 starts at marker 4 and ends at marker 2; whereas L3 starts at marker 2 and ends at marker 4. (When a section X has been knitted its central marker will be called „used“. E.g. after knitting a left-leaning section L3 – its central marker (marker 3) will be considered as „used“.) The section is highest at its central marker.
There are mid sections (i.e. sections where the short row stack does not reach an edge, e.g. L2 or R4 in the picture above) and edge sections (i.e. sections where the short row stack reaches one of the edges, e.g. L1 or R6 in the picture above).
- Left leaning sections (all knitted in colour C1) start with the complete knit row on RS, the short row part (i.e. wrapping and turning) starts on WS; to make them lean to the left, on RS you knit 2 stitches over the the last wrapped stitch (10 stitches in the pattern) and on the WS you knit until 2 stitches before the last wrapped stitch (8 stitches in the pattern) before you do a w+t.
- Right leaning sections (all knitted in colour C2) start with the short row part on RS and end with the complete knit row on WS. Here, you knit until two stitches before the last wrapped stitch (8 stitches) on the RS and two stitches over the last wrapped stitch (10 stitches) on the WS.
- Left leaning and right leaning sections are knitted alternately
- Two rows (or one garter stitch ridge) knitted in a neutral colour (called NC) are placed inbetween the sections – to outline the wave pattern.
While knitting the piece the knitter must keep track of two things
- that the number of stitches stays the same (66 stitches) to keep the fabric at a consistent width and
- that the number of rows below each stitch is roughly the same – that way the fabric stays consistent and does not get bumpy
First 1) will be discussed, i.e.
how to keep the number of stitches.
- Knitting NC rows is will not change the number of stitches, the ssk at the beginning of the row is balanced by the kfb at the end.
- Similarly, knitting a mid section will not affect the number of stitches since there is only one ssk at the beginning – balanced out by an kfb at the end.
- However, after an edge section is knitted, the number of of stitches will have (temporarily) been increased or decreased by 6 stitches. E.g., when a section at the decreasing edge has been knitted, only one kfb (at the increasing edge) was knitted, but 7 ssk's at the decreasing edge; the total number of stitches has been reduced by 6. This must be balanced out by knitting a section at the other edge, i.e. after knitting a section at the decreasing edge, a section at the increasing edge should be knitted (and vice versa).
Now for b), i.e. how to
make sure that there is an equal number of rows below each stitch.
When the knitter has knitted the very first section (say a mid section), the knitted piece is something slim on the edges with a bump in the middle. This bump is around the central marker of the section that has just been knitted. The next section – if knitted around a different central marker – will make up another bump. If these bumps are distributed evenly, the result after a few sections will be a consistent piece of knitting (i.e. with an even height or with the same number of garter stitch ridges below all stitches).
To achieve this even distribution the knitter has to make sure of the following:
- Choose a next section without a bump under its central marker.
- Distribute the number of edge sections and mid sections with a 2 to 3 ratio, i.e. when having knitted 3 mid sections, the next sections should be 2 edge sections; or – put differently – 2 sections out of 5 should be edge sections (one on each side).
- Ideally, for each five sections knitted five different markers should be used as central markers, so that the upper edge is smooth and that below each stitch is the same amount of rows.
The following paragraphs will explain the section selection process in more detail.
But first it must be discussed
how the markers shift position: As explained above, when first casting on several markers will be placed: 2 edge markers (3 stitches from each side edge) and 6 pattern markers (with 10 sts inbetween) that will show where to start and end the sections.
- Throughout the pattern the edge markers stay in place while the pattern markers shift towards the decreasing edge – when decreasing by one stitch (ssk) on one side just after slipping the edge marker the distance between the decreasing edge and the pattern markers is reduced by one stitch. From the point of view of the uppermost row, it seems as if the pattern markers travel towards the decreasing edge.
- When a patten marker reaches the edge marker (decreasing side), it can be removed – similarly, when there are more than ten stitches between the edge marker on the increasing side and the next pattern marker, a new marker must be placed ten stitches away from the next pattern marker. So when marker 1 on the decreasing edge is removed, the former marker 2 becomes the new marker 1 etc. – and when a new marker is placed at the increasing edge, it becomes the new marker 6. In summary, while the markers are shifted, they change their names/numbers.
Returning to the topic of choosing the next section: Once the knitter has knit a section around a marker, this section will (at least temporarily) show up as a bump within the fabric – correspondingly, sections with central markers that haven't been used for the last few sections will show up as holes or dents. The next sections should be knitted into a dent, i.e. knitted around markers that haven't been „used“ as central markers recently. Therefore, markers that have already been used (i.e. are central markers for a section that has just been knitted) must be remembered. For example, if the knitter has just knitted L3 (left leaning section 3, which has its highest point at the current marker 3), this marker should be not to be used again within the next 4 or 5 sections.
When the markers travel (or are shifted), the structure of „used“ and not yet „used“ sections travels with them. Therefore, it is important that not the marker number should be remembered (they change as explained above), but the physical marker around which the section was knitted.

After a while it will become obvious which sections have already been knitted (i.e. which markers have already been „used“) and which should be knitted. Until that time the knitter needs to remember which sections have already been knitted, i.e. which central markers have been used.
Selecting the next sections may also require a certain amount of forward planning, keeping in mind that markers that are currently in the middle of the piece (and therefore markers for a mid section) may soon be markers for a section at the decreasing edge.
The picture shows an example how the the first 6 sections can be arranged. But there are other choices as well.
Shaping the rhomboid and giving it a nice edge
- Each RS row is decreased on the right hand side and increased by one on the left hand side, this means it starts with k3 (slip edge marker) ssk and ends with kfb (slip edge marker) k3
- Each WS row (except the set-up row) starts with sl3 wyif and ends with sl3 wyif
- The RS k3s and WS sl3s wyif will draw the 3 edge stitches partly to the WS (see picture) - giving you a neat edge that my even hide the stranded yarn. They have got nothing to do with the waves pattern or the tilt.
Furthermore
- remember to strand your yarn - especially when knitting the decreasing edge sections and
- when you encounter a wrapped stitch, pick it up.
Instructions
Provisionally CO66 sts (3 edge sts + 60 pattern sts + 3 edge sts) with scrap yarn
Row 1 (WS, in NC): k3 pm (→ edge marker) k5 pm (→ marker 6) k10 pm (→ marker 5) k10 pm (→ marker 4) k10 pm (→ marker 3) k10 pm (→ marker 2) k10 pm (→ marker 1) → k5 pm (→ edge marker) k3
In C1: Knit a left leaning section (choose a section)
In NC: RS: k3 (slip edge marker) ssk k to last stitch before edge marker kfb (slip edge marker) k3
WS: sl3 wyif (slip edge marker) k to edge marker (slip edge marker) sl3 wyif
In C2: Knit a right leaning section (choose a section)
In NC: RS: k3 (slip edge marker) ssk k to last stitch before edge marker kfb (slip edge marker) k3
WS: sl3 wyif (slip edge marker) k to edge marker (slip edge marker) sl3 wyif
Continue until the edge side (marked as „length of cowl“ in figure) measures 60 cm or the desired length. However, end with a section in C2 and do not knit the last two rows in NC. Cut yarn but leave enough of NC for grafting.
Block the cowl.
In NC: Graft ends in pattern, i.e. the edge stitches in stockinette stitch and the others in garter stitch. (Detailled grafting instructions can be found below.)
How
to Knit the Different Sections
This paragraph gives detailed descriptions how to knit the different sections.
Remember to pick up all wrapped stitches as you encounter them.
- Left leaning mid section X (in C1):
RS: k3 (slip edge marker) ssk k to last stitch before edge marker kfb (slip edge marker) k3
WS: sl3 wyif (slip edge marker) k to marker X-1 w+t
* RS: k10 w+t
WS: k8 w+t * repeat from * a total number of 5 times
RS: k10 w+t
WS: k to edge marker (slip edge marker) sl3 wyif
- Left leaning decreasing edge section (in C1):
RS: k3 (slip edge marker) ssk k to last stitch before edge marker kfb (slip edge marker) k3
WS: sl3 wyif (slip edge marker) k to edge marker (slip edge marker) sl3 wyif
RS: k3 (slip edge marker) ssk k to marker 2 w+t
* WS: k to edge marker (slip edge marker) sl3 wyif
RS: k3 (slip edge marker) ssk k to last wrapped stitch, k2 sts w+t * repeat from * a total of 5 times
WS: k to edge marker (slip edge marker) sl3 wyif
(if marker 1 reaches the edge marker, remove marker 1)
- Left leaning increasing edge section (in C1):
RS: k3 (slip edge marker) ssk k to last stitch before edge marker kfb (slip edge marker) k3
WS: sl3 wyif (slip edge marker) k to marker 5 w+t
RS: k to last stitch before edge marker kfb (slip edge marker) k3
* WS: sl3 wyif (slip edge marker) k to 2 sts before last wrapped stitch w+t
RS: k to last stitch before edge marker kfb (slip edge marker) k3 repeat from * a total of 5 times
WS: sl3 wyif (slip edge marker) k to edge marker (slip edge marker) sl3 wyif
(remember to put in a new pattern marker, if the number of stitches between the edge marker and the next pattern marker exceeds 10 stitches)
- Right leaning mid section X (in C2):
RS: k3 (slip edge marker) ssk k to marker X+1 w+t
* WS: k10 w+t
RS: k8 w+t * repeat from * a total number of 5 times
WS: k10 w+t
RS: k to last stitch before edge marker kfb (slip edge marker) k3
WS: sl3 wyif (slip edge marker) k to edge marker (slip edge marker) sl3 wyif
- Right leaning decreasing edge section (in C2):
RS: k3 (slip edge marker) ssk k to marker 2* w+t
WS: k to edge marker (slip edge marker) sl3 wyif
* RS: k3 (slip edge marker) ssk k to 2 sts before last wrapped stitch w+t
WS: k to edge marker (slip edge marker) sl3 wyif * repeat from * a total of 5 times
RS: k3 (slip edge marker) ssk k to last stitch before edge marker kfb (slip edge marker) k3
WS: sl3 wyif (slip edge marker) k to edge marker (slip edge marker) sl3 wyif
(if marker 1 reaches the edge marker, remove marker 1)
- Right leaning increasing edge section (in C2):
RS: k3 (slip edge marker) ssk k to last stitch before edge marker kfb (slip edge marker) k3
WS: sl3 wyif (slip edge marker) k to marker 5 w+t
* RS: k to last stitch before edge marker kfb (slip edge marker) k3
WS: sl3 wyif (slip edge marker) k to last wrapped stitch k2 w+t * repeat from * a total of 5 times
RS: k to last stitch before edge marker kfb (slip edge marker) k3
WS: sl3 wyif (slip edge marker) k to edge marker (slip edge marker) sl3 wyif
(remember to put in a new pattern marker, if the number of stitches between the edge marker and the next pattern marker exceeds 10 stitches)
How to Graft the Ends in Pattern
joniconiglio on Ravelry (author of the knittingdaily-column on „grafting in pattern“ as linked below) has kindly provided detailled grafting instructions for this cowl.
Work once:
FN (front needle): p leave (p = insert tapestry needle purlwise)
BN (back needle): k leave (k = insert tapestry needle knitwise)
Work 2 times:
FN: k slip, p leave
BN: p slip, k leave
Work once:
FN: k slip, p leave
BN: p slip, p leave
Repeat until there are 4 sts remaining on each needle:
FN: k slip, p leave
BN: k slip, p leave
Work once:
FN: k slip, p leave
BN: k slip, k leave
Work 2 times:
FN: k slip, p leave
BN: p slip, k leave
Work once:
FN: k slip
BN: p slip
Useful
links
Since
some of the techniques used in this pattern might not be known – I
searched (and found) some links (videos and text) explaning them.


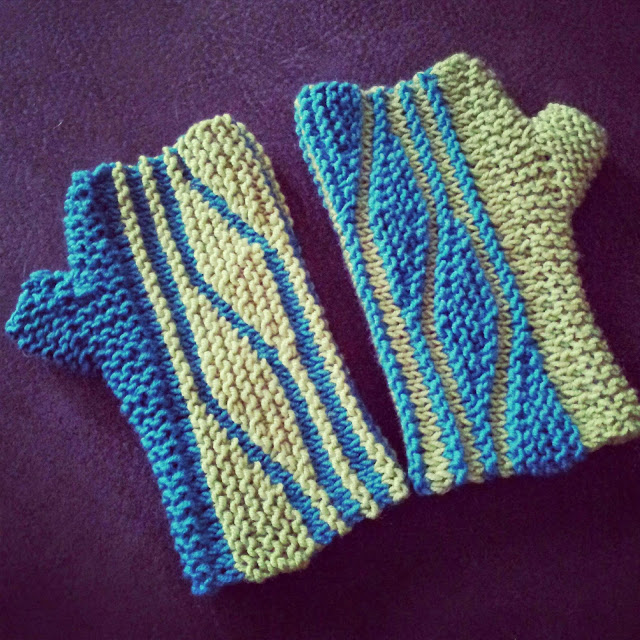 I knitted this DK version of the Short Wave Mitts to match a cowl I had made earlier - pinching the idea of inversing the colours from another knitter on Ravelry.
)


 Materials

 The picture on the left shows possible sections. Each section has a central marker (marker X) and is placed between the two markers around that central marker (marker X-1 and marker X+1). E.g. for both R3 and L3 marker 3 is the central marker and they have their highest stack at that central marker (marker 3), R3 starts at marker 4 and ends at marker 2; whereas L3 starts at marker 2 and ends at marker 4. (When a section X has been knitted its central marker will be called „used“. E.g. after knitting a left-leaning section L3 – its central marker (marker 3) will be considered as „used“.) The section is highest at its central marker.

