Montag, 25. Juni 2018

Bella Paquita

Bella Paquita is a beautiful free sweater pattern by Marnie MacLean - available via Ravelry or directly on her website. I discovered it in my early Ravelry days (in 2011) and wanted to knit it right then, even though I wasn't a good knitter back then and lacked some of the skills necessary for it.


I even bought a beautiful and quite expensive (at least I thought so at the time :) grey alpaca yarn for it, but I was a bit too afraid to use it. So I first tried the pattern with some really old old bordeaux red yarn from a sweater I had started in the 1980s and frogged (here's the Ravelry page of the project). I made quite a few mistakes when knitting it for the first time - some due to my lack of knitting experience other due to not reading the pattern :/

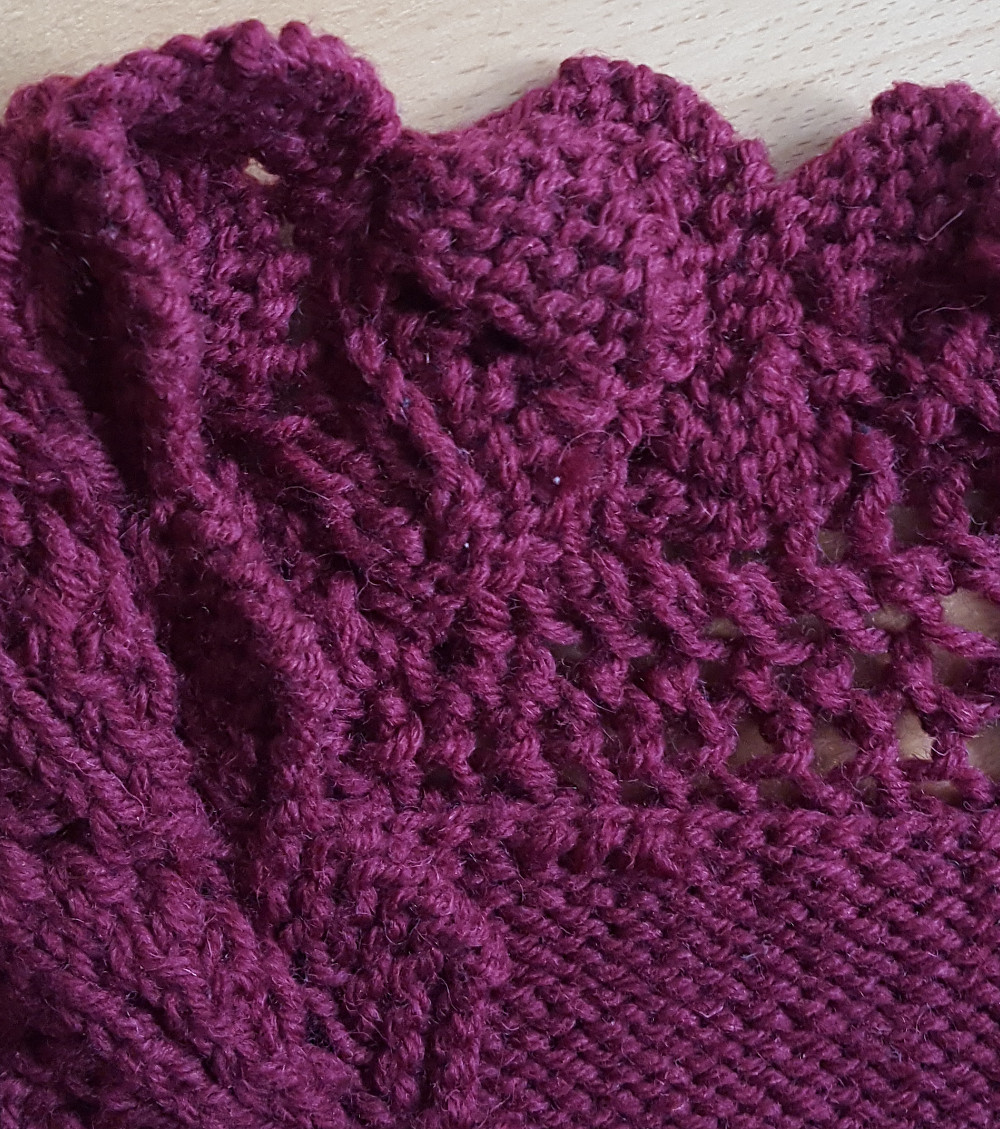
But I finished it and really liked the look of it - except for the curve of the lace collar. To make the lace collar fit, the pattern suggests: "to sew two small darts in the lace" and later after you've sewn it with your sewing machine to "clip the excess fabric about a quarter inch from the outer most seam line". Cutting into my knitting is something that I don't think I could ever do. So when I knitted the first one, I just sewed the collar to lay flat on my shoulders, but I didn't cut the excess. The picture on the right shows how that looked from the inside.

So I resolved to use to use short rows to shape the collar - when knitting it again with my beautiful alpaca yarn. A project that I started soon after finishing the first sweater. I quickly did the main pieces (front, back and sleeves) - and then started the lace. It took me a few attempts to get a) the short rows and b) the curve right, but I guess I got it right in December 2012. And I know I knitted a piece of the collar on the train home after New Year's Day of 2013.

And then it became a WIP - a hibernating WIP. For a loooong time ...

I don't even know why I abandoned it, but this year (more than 5 years later, when I was going through a bit of an inspirational crisis :) I finally picked it up again and
  • finished the lace collar (even though I had to try the lace pattern with the short rows a few times with scrap yarn)
  • sewed up the pieces and
  • inserted the lace collar.
It was finished (fireworks!), and I'm really happy with it ...

As it may help somebody else who also wants to knit this lovely sweater, here are the modifications I did. More photos can be seen on my Ravelry project page.

Firstly, I didn't knit the pieces in the order as given in the pattern. I started from the hip and knitted the front and back piece together in the round. After ribbing, I put 12 stitches (in the middle of the front part on a stitch holder (or rather scrap yarn) and started to knit in rows. When reaching the sleeves, I devided it into two front and one back part, that I finished seperately.

But the major modification was knitting the collar in short rows, which I did as follows:
  • Short row (ridge) for regular lace: (RS) k3, yo, p2tog, yo, p2tog, ktbl, turn (just a normal turn, no w+t), (WS) sl1, p1, k2, yo, p2tog, yo, p2tog, k1
    Since this increases the stitch count by 1, in the next row I did a k2tog just over the gap, i.e. the two stitches I knitted together were the last stitch of the short row (RS) and the next stitch. If that next stitch was to be a k2tog (as stated by the lace pattern), I did a k3tog.
  • Short row (ridge) for reverse lace: (WS), k1, p2tog, yo, p2tog, yo k2, p1, turn, (RS) sl1, yo, p2tog, yo, p2tog, k3
    As with the regular lace, this increases the stitch count by one, so I had to decrease by one in the following in row. And I did this also at the gap, where I did a p2tog instead of the normal p (as given in the lace pattern without short rows). 
On both sides (regular and reverse) I first knitted one normal repeat of the lace pattern (A in the picture below). Then 3 repeats with the short rows inserted every 2nd row (B, before rows 1, 3, 5, 7 and 9 for the regular lace and before rows 2, 4, 6, 8 and 10 for the reverse lace). Then one repeat with only two short rows (C, before the 3rd and 7th row for the regular lace, and before the 4th and 8th for the revers). Then I went on with normal pattern repeats (D).


Since I rarely knit sweaters that are sewn up (for my own stuff, I prefer top-down raglan constructions, e.g. this one), I had a hard time inserting the sleeves. On YouTube I found these helpful videos:
This was the first time I actually finished a long term WIP - usually, I tend to frog them.
Do you have a WIP that has been lying around for quite a while? If so, do you think you'll ever finish it?

By the way, the background picture of my blog (the grey knitted ribbing) is a photo of the ribbing of this project :) ... and it has been the background picture for more than five years.

Montag, 18. Juni 2018

Fingerlose Handschuhe "Inbetween Mitts" - Gratis-Strickanleitung

Bernadette von „Törtchens Blog“ hat sich die Mühe gemacht, die Anleitung für die Inbetween Mitts in Deutsche zu übersetzen. Vielen lieben Dank dafür!

Dabei hat sie diverse Fehler und Ungenauigkeiten gefunden, die ich dadurch in der Originalanleitung korrigieren konnte. Solche Kommentare sind äußerst wertvoll und hilfreich für mich - daher bin ich sehr dankbar dafür. Ihre Erfahrungen hat sie in diesem Blogpost beschrieben.

Die deutsche Gratis-Strickanleitung als PDF gibt es hier.
Neben der Übersetzung enthält die Datei auch noch eine zusätzliche Variante von Bernadette für den Teil 3.
(Edit 03.10.2021: Update des Links auf die PDF-Datei, da sich offenbar die Links auf GoogleDrive geändert hatten.)

The (corrected) original pattern in english is available here.
Die (korrigierte) Originalanleitung auf Englisch gibt es hier.


Creative Commons License
This work by Knitting and so on is licensed under a Creative Commons Attribution-NonCommercial-ShareAlike 4.0 International License.


Mittwoch, 13. Juni 2018

Lateral Knitting

It's summer and in summer I don't really like knitting scarfs and gloves (except when I have a really good idea, but currently I have no such luck :), but summer projects.
So I decided to knit myself a simple summer sweater from old (and bulky) cotton yarn, that I had reclaimed from a failed project. Another top I knitted with this yarn was last year's Waterfall Tunic.
This sweater is knitted sideways and in one big piece. It starts at one sleeve, and ends at the second one. Since is it knitted in one piece, only minimal seaming is required :) It is also knit in plain garter stitch and (except for the neckline) in right-angled pieces. So it's a quick and easy project.


As with many of my pattern, this is NOT a stitch-by-stitch knitting pattern for various sizes. It is rather a tutorial how to contruct and knit a similar tunic - and of course you don't have to use bulky yarn but can use other yarn weights as well. I will give you my numbers and calculations as an example written in purple.

Creative Commons License
This work by Knitting and so on is licensed under a Creative Commons Attribution-NonCommercial-ShareAlike 4.0 International License.


Materials
  • a tape measure to take your measurements
  • 400 to 500 grams of Bulky weight cotton yarn
  • 6mm knitting needles
  • one stitch marker (to mark the middle of the piece) and some removable stitch markers (I put them in just below the ridge of a new part, to make counting the ridges a bit easier)
  • something that acts as a big stitch holder - or a knitting needle that's roughly the same size as your original needle or scrap yarn
  • a tapestry needle to weave in ends and to sew the pieces together

Construction
This piece is knitted from sleeve to sleeve in one piece. When reaching the shoulder stitches are cast on on each side (to reach the total length on the front and back).
When you reach the neckline, the piece is parted into a front (part 2) and back (part 3) part that are knitted one after the other. Afterwards both parts are joined again and knitted until you've reached the width of the body part. Then stitches on both sides of the arm are bound off and the second sleeve is knitted.


Swatching and Measurements
The schematic below shows the measurements that you should take


A = circumference of the sleeve (since there are not increases it should fit your arm at its widest point)
B = total length of your sweater (I wanted mine to be quite short)
C = depth of V-neck (to simplify the decreases here, I decided that the depth would be exactly one half of the width of the neck. Of course you can use a different ratio here, but with bulky yarn, there isn't much of a margin to play with.)
D = total width (at least half of your hip circumference)
E = length of arm
F = neck opening to start of arm
G = neck opening (please note: E times 2 plus F should equal D)
H = lower edge to just below the arm (H equals B-A/2)

Knit a swatch! And block it.
Then carefully count your stitches and rows and calculate the numbers of the measurements you've taken.

My swatch gave the following numbers: 10 cm = 12 to 12.5 sts in width and 10 cm = 12 to 13 ridges in height. Since I used cotton, I chose to use the smaller number. This is due to the fact that - in my experience - cotton tends to extend over time, i.e. gets wider and longer, especially if it's heavy.

Then I calculated: 
A = 40 cm: 40 / 10 x 12 = 48 => 48 sts
B = 52 cm: 52 / 10 x 12 = 62.4 => 62 sts
C = 11 cm: 11 / 10 x 12 = 13,2 => 13 sts
D = 52 cm: 52 / 10 x 12 = 62.4 => 62 ridges ( i.e. 124 garter stitch rows)
E = 16 cm: 16 / 10 x 12 = 19,2 => 19 ridges (i.e. 38 rows)
F = 15 cm: 15 / 10 x 12 = 18 => 18 ridges (i.e. 36 rows)
G = 22 cm: 22 / 10 x 12 = 26,4 => 26 ridges (i.e. 52 rows)
H = B-A/2: 62 - 48/2 = 62 - 24 = 38 => 38 sts


Instructions

Part 1
CO A stitches
Knit E garter stitch ridges starting each row with a slipped stitch - in the last row, insert a stitch marker at the middle of the row (i.e. after knitting A/2 stitches)

(I CO 48 sts and knitted 19 ridges of garter stitch. I inserted my middle marker after the 24th stitch.)

CO-Ridge: With knitted CO, cast on H stitches on one side (front part), knit one row and CO H more stitches on the other side (back side), then knit back. Now you have Bx2 stitches on your needles.

Knit F-1 more garter stitch ridges.

(I did a knitted CO of 38 stitches on the front and 38 stitches on the back part. Afterwards, I had 124 stitches on my needles. Then I knitted 17 more garter stitch ridges.)

Part 2 - Front
Ridge 1: sl1, k to 3 bef middle marker, k2tog, k1 (you've now reached the middle marker), put the stitches of the back part on a stitch holder. For the next G ridges you'll only be knitting the stitches of the front part. Turn. k to end.

(I knitted 59 sts (62-3) before doing the k2tog, k1, then I put the stitches of the back part on a spare knitting needle. I turned and knitted back.)

Ridge 2: sl1, k to 3 bef turn, k2tog, k1; turn, sl1, k to end
Repeat ridge 2 G/2-2 more times. Now you've reached the tip of the V-shape.

(After doing ridge 2 once, I repeated it 11 times (26/2 - 2 = 13-2 = 11).)

Next ridge: sl1, k to last stitch, mk1, k1, turn, sl1, k to end.
Repeat this ridge G/2-1 more times.
You should now have the same number of stitches that you started part 2 with.

(After doing this ridge once, I repeated it 12 more times (26/2 - 1 = 13-1 = 12). And I was back to my original 62 stitches for the front part.)

Cut yarn.

Part 3 - Back
Put the stitches from the front part on a stitch holder and the stitches of the back part back on your needles.

Attach yarn and start from the middle of the piece.
Ridge 1: sl1, ssk, k to end, turn, k to end
Ridge 2 = Ridge 1
Ridge 3= sl1, k to end, turn, sl1, k to end
Repeat Ridge 3 G-5 more times. (After knitting ridge 3 once, I repeated it 21 times (26-5=21).)

Last but one ridge: sl1, k1, mk1, k to end, turn, sl1, k to end
Last Ridge: sl1, k1, mk1, k to end, turn, sl1, k to end

Now you've knitted the same number of rows you knitted for part 2, and you're back to the original number of stitches that you started part 3.

Cut yarn.

Part 4
Part 4 is basically part 1 knitted backwards.

Put all your stitches on your active needle again. And start from the bottom of the front.
Ridge 1: sl1, k to end, turn, sl1, k to end
Repeat ridge 1 F-1 more times. (In my case, 17 times.)

BO-Ridge: BO H stitches, k to end, turn, BO H stitches, k to end. There should be A stitches left on your needles.
Knit E-1 garter stitch ridges starting each row with a slipped stitch.
Then bind off.

Cut yarn, weave in ends and block.
Then seam the sides. I left about 5cm at the bottom hem.


Freitag, 8. Juni 2018

Fingerless Gloves Worked Flat

If you've read some of the posts from this blog you know that I like constructions a bit out of the ordinary - especially when knitting fingerless gloves.

In this blogpost I've compiled a list of fingerless gloves that are worked flat, which means that they don't have the loom construction of other fingerless gloves.


The photos above only show patterns from my blog, but further below I have listed quite a few other interesting patterns that I found on Ravelry and that I liked. Here are the (free!) patterns shown above:
  1. Helix Mitts: Fingerless gloves knitted in a ten-stitch wide strip that winds around the hand.
  2. Starburst Mitts: These mitts use short rows to form a circle around the thumb.
  3. Xmas Star: Similar construction as the Starburst Mitts, but in two colors with an intarsia pattern to form a star around the thumb.
  4. Serpentina Mitts: Knitted sideways in simple stockinette stitch, these mitts are decorated with random surface crochet
  5. Sparkler Mitts: The same construction as the Starburst Mitts, but in crochet.
  6. Inclination Wrist Warmers: Knitted slanted - all in garter stitch. 
  7. Double Helix Mitts: Similar to the Helix Mitts, but knitted in two 8-stitch wide strips.
  8. Color Explosion Mitts: The opposite construction to my Starburst Mitts, i.e. the short rows don't focus around the thumb but around a point close to the outer wrist.
Other patterns that use interesting techniques and can be found on Ravelry are the following (patterns not pictured above). I have not tried to knit or crochet any of them, but I did like the design when I saw them on Ravelry:
And if that's not enough, here's a list of all fingerless gloves patterns that have the "knitted flat" attribute (free and paid) - you must be logged in to Ravelry for access.

Freitag, 1. Juni 2018

Ammonite Potholders

I always wanted to knit a spiral from within, but I didn't quite know how to go about it. I got a first idea when I thought about it waiting for my train in the morning ... something like: knit small triangles with short rows, increase one stitch per triangle and so on. Then I tried it the next time I had some time as well as the materials (yarn and needles - on a longer train journey :)
It made me quite proud to manage it in one color, but you need the right yarn to make the shape show up nicely ... and I didn't find that sort of yarn in cotton. So the obvious solution was to use a second color for contours.
These pieces can be used as potholders or coasters or as washcloths. Since they are done in intarsia, they look good from WS, too. They are knitted all in garter stitch which gives them a nice squishy texture.


Creative Commons License
This work by Knitting and so on is licensed under a Creative Commons Attribution-NonCommercial-ShareAlike 4.0 International License.


Materials
  • a total of about 25-30 grams cotton yarn in two colors - I used Aran weight for both (about 9 grams for C1 (blue) and 15 grams for C2 (white), but my scales are not really exact)
  • 3.5mm knitting needles - I used short dpns
  • a tapestry needle to weave in ends

Techniques
  • Throughout the pattern, the following notation will be used: "C1 (k2); C2 (k3, w+t, k3); C1 (k2)" means "knit 2 sts with C1; change to C2 and knit 3 sts with C2, wrap and turn, knit another 3 sts with C2, then change back to C1 and knit 2 sts with it".
     I.e. color is indicated before the knitting instructions for that yarn. the knitting instructions for that yarn are given in brackets after the color and color changes are indicated by a semicolon.
  • Short rows with wrap and turn (w+t) - as shown in this YouTube video by Very Pink Knits
  • Joining to rows at the edges: There are various ways to connect the last stitch of one ridge to the first stitch of another. I used the following one where I joined from the RS: I knitted to the RS row, drew a loop through the edge stitch (see pictures below), then turned and did a k2tog of the the newly picked up stitch and the next stitch of WS. I will call this sequence "connect" in the pattern.
    However, there are other methods to join rows at the edges, one method is shown here: http://youtu.be/3zPXZ4cu66Q . Please note that whatever you do, please stay consistent throughout the piece.

Gauge and Size
In garter stitch 4 ridges (i.e. 8 rows) gave 2 cm.
The pieces I knitted measured 18 cm in width and 16 cm in height.


Construction
The piece is started right in the middle with only a couple of stitches. During the first 7 sections, the stitch cound is increased by one stitch per section. Each of these section consists of one (complete) row in C1 and short rows in C2.
After finishing the first round of the spiral, the stitch count stays the same, but the sections consist of are full rows in C2 as well as of the short rows. The number of these full rows in C2 increases by one per section.
The last section is made up of full rows entirely.


Instructions

Setup Section - completely in C1
CO2
Row 0 (WS): kfb, k1
Ridge 1: sl1, k to end, TURN, sl1, k to end
Ridge 2: sl1, k1, w+t, k to end
Ridge 3: sl1, w+t, k to end

Section 1
Ridge 1: C1 (sl1, k to end, and pick up a stitch from the side, TURN, sl1, k to end) - on illustration 1 I have marked the point where I picked up the stitch in pink, and on illustration 2 how the piece looked afterwards. Picking up stitches from somewhere at the end of the RS row helps to close the potential hole in the middle of the piece. Alternatively, you can knit RS to the end, turn, and do a kfb into the next stitch of ridge 1. Then you have to sew the hole shut at the end. - This applies to all ridges 1 in sections 1 to 7.
Illustrations
Ridge 2: C1 (sl1, k1); C2 (k1, w+t, k1), C1 (k2)
Ridge 3: C1 (sl1, k1); C2 (w+t), C1 (k2)
Ridge 4: C1 (sl1, w+t, k1)

Section 2
Ridge 1: C1 (sl1, k to end, pick up a stitch from the side, TURN, sl1, k to end) 
Ridge 2: C1 (sl1, k1); C2 (k to 1 bef end, w+t, k to 2 bef end); C1 (k2)
Ridge 3: C1 (sl1, k1); C2 (k to 1 bef last turn, w+t, k to 2 bef end); C1 (k2)
Next to Last Ridge: C1 (sl1, k1); C2 (w+t), C1 (k2)
Last Ridge: C1 (sl1, w+t, k1)

Section 3
Ridge 1: C1 (sl1, k to end, pick up a stitch from the side, TURN, sl1, k to end)
Ridge 2: C1 (sl1, k1); C2 (k to 1 bef end, w+t, k to 2 bef end); C1 (k2)
Ridge 3 - 4: C1 (sl1, k1); C2 (k to 1 bef last turn, w+t, k to 2 bef end); C1 (k2)
Next to Last Ridge: C1 (sl1, k1); C2 (w+t), C1 (k2)
Last Ridge: C1 (sl1, w+t, k1)

Section 4
Ridge 1: C1 (sl1, k to end, pick up a stitch from the side, TURN, sl1, k to end)
Ridge 2: C1 (sl1, k1); C2 (k to 1 bef end, w+t, k to 2 bef end); C1 (k2)
Ridge 3 - 5: C1 (sl1, k1); C2 (k to 1 bef last turn, w+t, k to 2 bef end); C1 (k2)
Next to Last Ridge: C1 (sl1, k1); C2 (w+t), C1 (k2)
Last Ridge: C1 (sl1, w+t, k1)

Section 5
Ridge 1: C1 (sl1, k to end, pick up a stitch from the side, TURN, sl1, k to end)
Ridge 2: C1 (sl1, k1); C2 (k to 1 bef end, w+t, k to 2 bef end); C1 (k2)
Ridge 3 - 6: C1 (sl1, k1); C2 (k to 1 bef last turn, w+t, k to 2 bef end); C1 (k2)
Next to Last Ridge: C1 (sl1, k1); C2 (w+t), C1 (k2)
Last Ridge: C1 (sl1, w+t, k1)


Section 6
Ridge 1: C1 (sl1, k to end, pick up a stitch from the side, TURN, sl1, k to end)
Ridge 2: C1 (sl1, k1); C2 (k to 1 bef end, w+t, k to 2 bef end); C1 (k2)
Ridge 3 - 7: C1 (sl1, k1); C2 (k to 1 bef last turn, w+t, k to 2 bef end); C1 (k2)
Next to Last Ridge: C1 (sl1, k1); C2 (w+t), C1 (k2)
Last Ridge: C1 (sl1, w+t, k1)

Section 7
Ridge 1: C1 (sl1, k to end, pick up a stitch from the side, TURN, sl1, k to end)
Ridge 2: C1 (sl1, k1); C2 (k to 1 bef end, w+t, k to 2 bef end); C1 (k2)
Ridge 3 - 8: C1 (sl1, k1); C2 (k to 1 bef last turn, w+t, k to 2 bef end); C1 (k2)
Next to Last Ridge: C1 (sl1, k1); C2 (w+t), C1 (k2)
Last Ridge: C1 (sl1, w+t, k1)

Now you've finished one turn of the spiral (i.e. the inner spiral).


Section 8
Ridge 1: C1 (sl1, k to end, connect, k to end)
Ridge 2: C1 (sl1, k1); C2 (k to end, connect, k to 2 bef end), C1 (k2)
Ridge 3: C1 (sl1, k1); C2 (k to 1 bef end, w+t, k to 2 bef end); C1 (k2)
Ridges 4 - 9: C1 (sl1, k1); C2 (k to 1 bef last turn, w+t, k to 2 bef end); C1 (k2)
Next to Last Ridge: C1 (sl1, k1); C2 (w+t), C1 (k2)
Last Ridge: C1 (sl1, w+t, k1)

Section 9
Ridge 1: C1 (sl1, k to end, connect, k to end)
Ridges 2 and 3: C1 (sl1, k1); C2 (k to end, connect, k to 2 bef end), C1 (k2)
Ridge 4: C1 (sl1, k1); C2 (k to 1 bef end, w+t, k to 2 bef end); C1 (k2)
Ridges 5 - 10: C1 (sl1, k1); C2 (k to 1 bef last turn, w+t, k to 2 bef end); C1 (k2)
Next to Last Ridge: C1 (sl1, k1); C2 (w+t), C1 (k2)
Last Ridge: C1 (sl1, w+t, k1)

Section 10
Ridge 1: C1 (sl1, k to end, connect, k to end)
Ridges 2 - 4 : C1 (sl1, k1); C2 (k to end, connect, k to 2 bef end), C1 (k2)
Ridge 5: C1 (sl1, k1); C2 (k to 1 bef end, w+t, k to 2 bef end); C1 (k2)
Ridges 6 - 11: C1 (sl1, k1); C2 (k to 1 bef last turn, w+t, k to 2 bef end); C1 (k2)
Next to Last Ridge: C1 (sl1, k1); C2 (w+t), C1 (k2)
Last Ridge: C1 (sl1, w+t, k1)

Section 11
Ridge 1: C1 (sl1, k to end, connect, k to end)
Ridges 2 - 5: C1 (sl1, k1); C2 (k to end, connect, k to 2 bef end), C1 (k2)
Ridge 6: C1 (sl1, k1); C2 (k to 1 bef end, w+t, k to 2 bef end); C1 (k2)
Ridges 7 - 12: C1 (sl1, k1); C2 (k to 1 bef last turn, w+t, k to 2 bef end); C1 (k2)
Next to Last Ridge: C1 (sl1, k1); C2 (w+t), C1 (k2)
Last Ridge: C1 (sl1, w+t, k1)

Section 12
Ridge 1: C1 (sl1, k to end, connect, k to end)
Ridges 2 - 6: C1 (sl1, k1); C2 (k to end, connect, k to 2 bef end), C1 (k2)
Ridge 7: C1 (sl1, k1); C2 (k to 1 bef end, w+t, k to 2 bef end); C1 (k2)
Ridges 8 - 13: C1 (sl1, k1); C2 (k to 1 bef last turn, w+t, k to 2 bef end); C1 (k2)
Next to Last Ridge: C1 (sl1, k1); C2 (w+t), C1 (k2)
Last Ridge: C1 (sl1, w+t, k1)


Section 13
Ridge 1: C1 (sl1, k to end, connect, k to end)
Ridges 2 - 7: C1 (sl1, k1); C2 (k to end, connect, k to 2 bef end), C1 (k2)
Ridge 8: C1 (sl1, k1); C2 (k to 1 bef end, w+t, k to 2 bef end); C1 (k2)
Ridges 9 - 14: C1 (sl1, k1); C2 (k to 1 bef last turn, w+t, k to 2 bef end); C1 (k2)
Next to Last Ridge: C1 (sl1, k1); C2 (w+t), C1 (k2)
Last Ridge: C1 (sl1, w+t, k1)

Section 14
Ridge 1: C1 (sl1, k to end, connect, k to end)
Ridges 2 - 8: C1 (sl1, k1); C2 (k to end, connect, k to 2 bef end), C1 (k2)
Ridge 9: C1 (sl1, k1); C2 (k to 1 bef end, w+t, k to 2 bef end); C1 (k2)
Ridges 10 - 15: C1 (sl1, k1); C2 (k to 1 bef last turn, w+t, k to 2 bef end); C1 (k2)
Next to Last Ridge: C1 (sl1, k1); C2 (w+t), C1 (k2)
Last Ridge: C1 (sl1, w+t, k1)

Section 15
Ridge 1: C1 (sl1, k to end, connect, k to end)
Ridges 2 - 14: C1 (sl1, k1); C2 (k to end, connect, k to 2 bef end), C1 (k2)
Ridge 15: C1 (sl1, k to end, connect, BO all stitches loosely)

Cut yarn and weave in ends.

With my favorite cake (Greek Orange and Chocolate Cake) - here's the recipe (in German)