In the end, I knitted another (slightly wider) scarf in this random manner - and I am currently knitting a third one. Actually, knitting in this manner - just seeing where the increases and decreases take you - is quite fun, and it's great travel knitting, too :)
So, if you want to have a completely special - and certainly unique - scarf, why not knit yourself a random brioche scarf, too.
This tutorial explains how to knit a scarf in the random brioche. Please note that this is not a knitting pattern in the classic sense with detailed stitch by stitch and row by row sequences, but a set of instructions and tips that allow you to knit a scarf and achieve a similar result and perhaps an invitation (inspiration) to try out how different brioche increases and decreases work.

In contrast to random lace technique that I tried out several years ago, with random brioche it's actually easy to see your progress.

This work by Knitting and so on is licensed under a Creative Commons Attribution-NonCommercial-NoDerivatives 4.0 International License.

Materials
- yarn in two colors of the same weight:
- For the red and beige one, I used a total of 80 grams of lace weight merino yarn (Wollmeise Lace and Lana Grossa Cool Wool Fine).
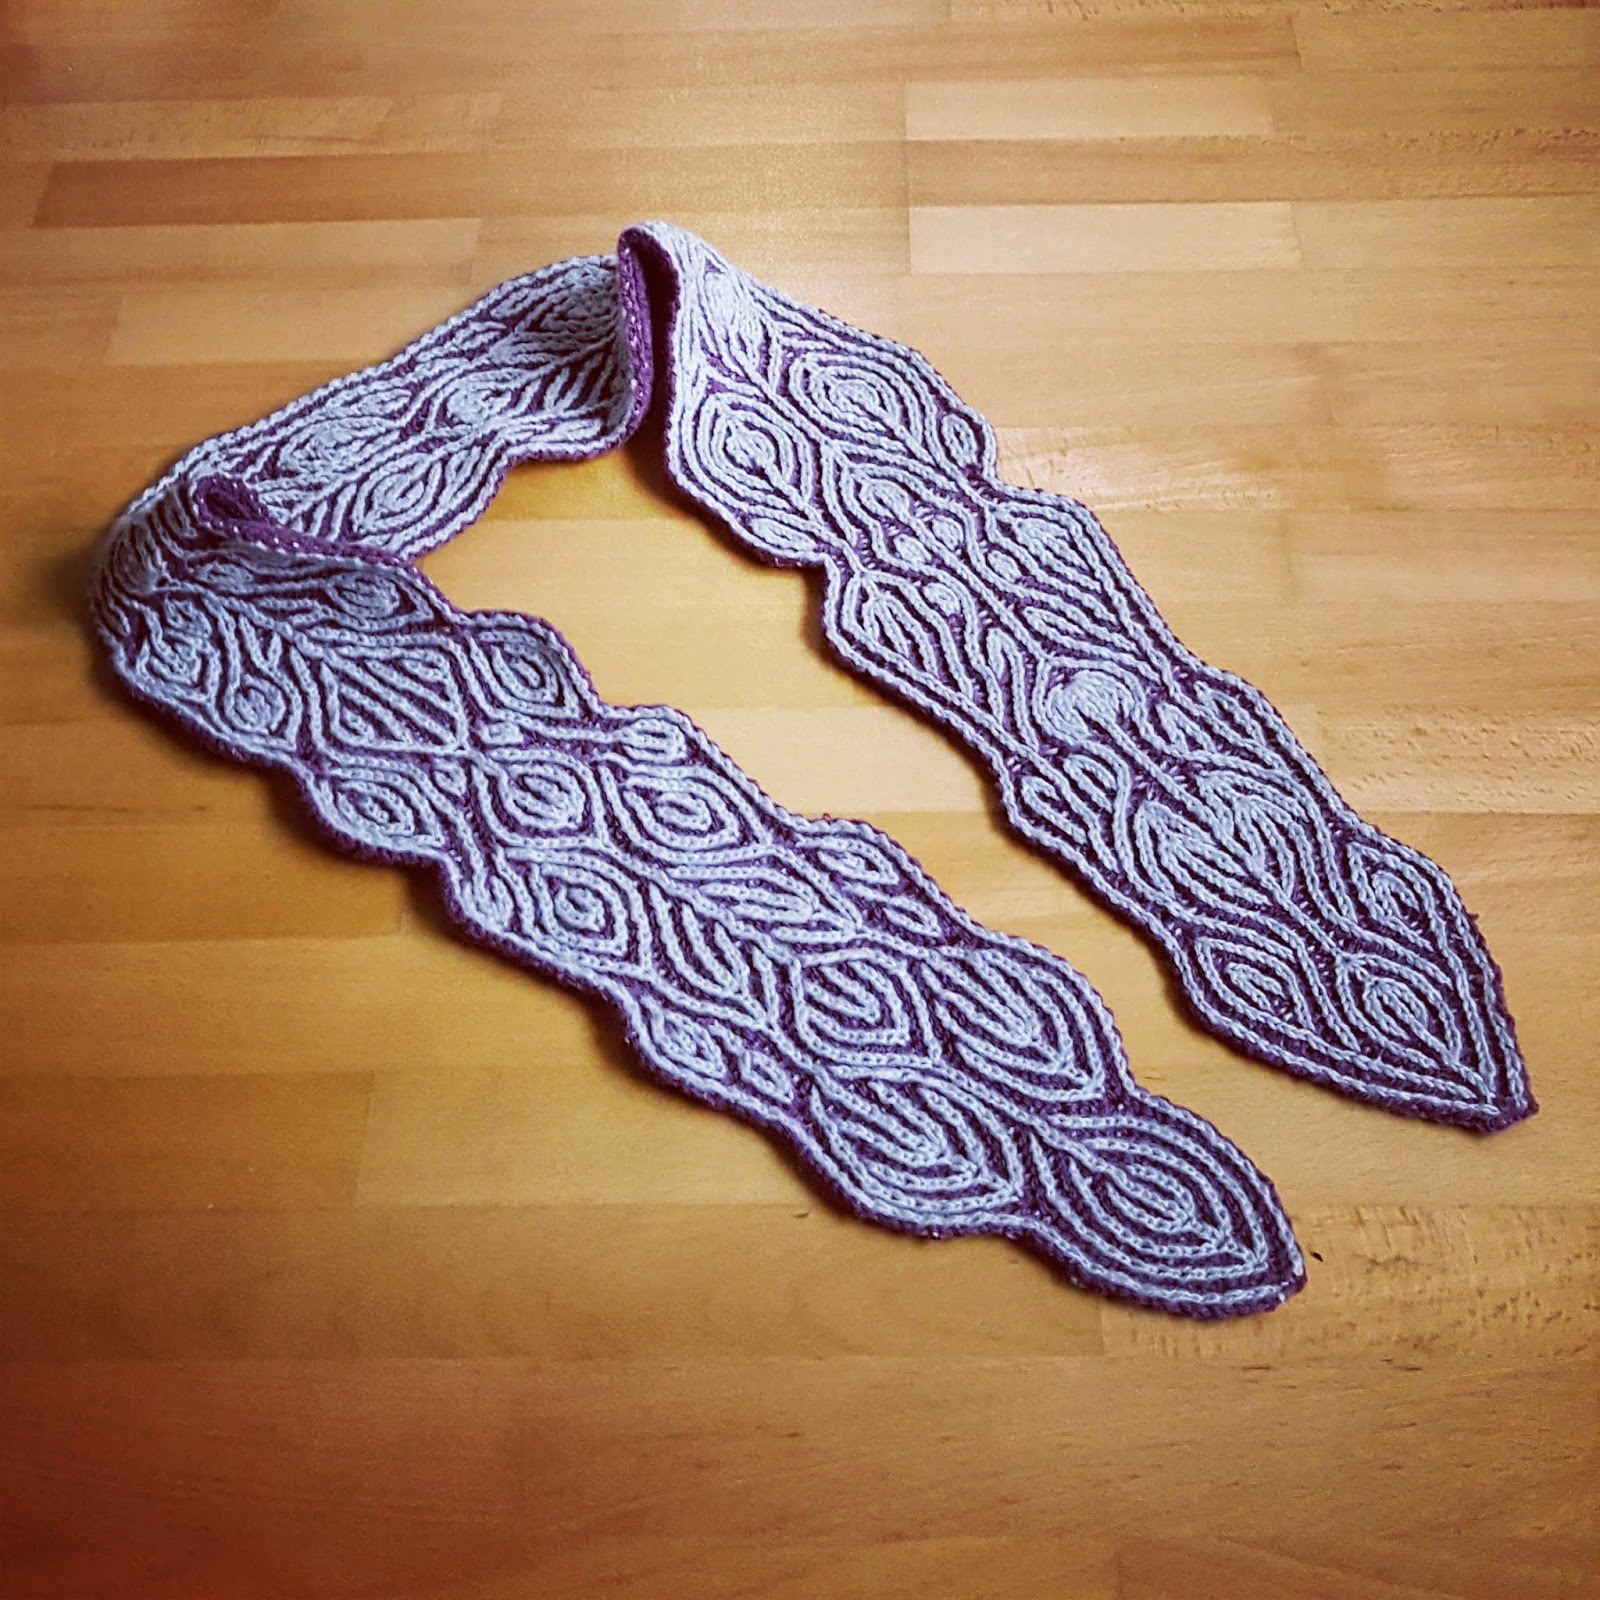
- For the violet and grey one, I used a total 130 grams of (really old, and I don't know the yarn weight) acryllic yarn.
- knitting needles that the yarn calls for - with two tips (so either dpns or circulars) - for the lace weight merino I used 3mm needles
- a clippy stitch marker (for the 4 stitch decreases)
- a tapestry needle to weave in ends

Techniques, Brioche Stitches and Abbreviations
If you search YouTube for brioche increases and decreases, you will find many videos and ressources. Here are links to some of them:
- The Basics of Two-Color Brioche are shown in this YouTube video by Voolenvine
- Increases in Brioche Knitting:
- brkyobrk: a two stitch increase - as shown in this YouTube video by The Unapologetic Knitter
- brk4st inc: a four stitch increase - as shown in this YouTube video by The Blue Mouse Knits
- Decreases in Brioche Knitting
- brk2st dec: decrease by two stitches (like k2tog and like ssk) - as shown in this YouTube video by Knitting with Suzanne Bryan - there is a right-leaning and a left-leaning decrease
- brk4st dec: a four stitch decrease - as shown in this YouTube video by the Unapologetic Knitter
- DC: dark color
- LC: light color
- DS: side where the DC is prominent
- LS: side where the LC is prominent
- I used a Two Color Long-Tail Cast-On - as shown in this YouTube video by knitwithpat, but any other CO will do. I'd suggest casting on in DC.
- Weaving in ends on Brioche: as shown in this YouTube video by New Stitch a Day
Basic Two-Color Brioche
Here are the basic knitting instructions for two-color brioche (without any increases or decreases) with an uneven stitch number:
Row 1a (WS, DC): k1, yos, * brk, yos repeat from * to last st, p1
Row 1b (WS, LC): sl1wyib, brp, * yos, brp repeat from * to last st, sl1wyib
Row 2a (RS, DC): k1, yos, * brp, yos repeat from * to last st, p1
Row 2b (RS, LC): sl1wyib, brk, * yos, brk repeat from * to last st, sl1wyib
Repeat.
Rows like this will be referred to as "basic two-color brioche" below.
How to Do the Edges
As you can see in the basic instructions above, I started and ended every row with a stitch in DC and the edge stitches were handled as follows:
- With DC yarn always knit the first stitch of a row – making sure to put it under the LC yarn in order to attach it – and purl the last stitch of a row
- With LC yarn always slip the first stitch with yarn in back (sl1wyib) and slip the last stitch with yarn in front (sl1wyif)

Instructions
To get you started, I will give you instructions as to a (possible) start and finish - and the general "rules" I used when knitting the scarf.
In general:
- Start with 5 stitches and increase gradually. I had a maximum of 41 stitches on my needles, since I wanted a) a slim scarf and b) be able to keep a clear view of where to put my increases and decreases (i.e. symmetrically to the middle stitch).
- I didn't care whether the stitch count stayed the same, so my scarfs don't have straight edges but curvy ones - as you can see in the pictures. That means, I could do increases and decreases as I liked.
- Make sure to keep your pattern symmetrical to the middle stitch to give a certain order to the randomness, i.e.
- if you do a two stitch increase (brkyobrk) 4 stitches before the middle stitch, do a two stitch increase 4 stitches after the middle stitch as well,
- and if you do a left-leaning decrease 6 stitches before the middle stitch, do a right-leaning decrease 6 sts after the middle stitch
- Looking at the LC of your piece you have several choices to increase. I mainly used the two shown in the picture below:

- A) "branching out" of a column of LC brk-stitches: you need to increase with LC, e.g. with a brkyobrk while working on LS; in the next row (DS) you do "yos, k1, yos" at this place with DC, and "brp, yos, brp" with LC. This is an increase by 2 stitches.
- B) from a column of DC brp-stitches: then you need to increase with DC, e.g. with a brkyobrk while working on DS, when you knit the same row in LC, you do a "yos, p1, yos" at this point. In the next row, I knitted "normal" 2-color brioche in DC (brp, yos, brp) and another increase in LC (yos, brkyobrk, yos). This is an increase by 4 stitches.
- For decreases, I mainly used decreases while knitting with LC on the LS.
- End by gradually decreasing the overall number of stitches back to 5 and then bind off in DC.

Start

If you want to start small (as I did in the grey and violet scarf) - here are the first rows
CO5
Row 1a (LS, DC): k1, yos, p1, yos, p1
Row 1b (LS, LC): sl1wyib, brk, yos, brk, sl1wyif
Row 2a (DS, DC): k1, yos, brkyobrk, yos, p1
Row 2b (DS, LC): sl1wyib, brp, yos, p1, yos, brp, sl1wyif
Row 3a (LS, DC): k1, yos, brp, yos, brp, yos, p1
Row 3b (LS, LC): sl1wyib, brk, yos, brk4st inc, yos, brk, sl1wyif
Row 4a (DS, DC): k1, yos, brk, yos, k1, yos, k1, yos, brk, yos, p1
Rows 4b - 7a: basic 2-color brioche
Row 7b (LS, LC): sl1wyib, brk, yos, brk, yos, brk4st inc, yos, brk, yos, brk, sl1wyif
Row 8a (DS, DC): k1, yos, brk, yos, brk, yos, k1, yos, k1, yos, brk, yos, brk, yos, p1
Rows 8b - 11a: basic 2-color brioche
Row 11b (LS, LC): sl1wyib, brk, yos, brk, yos, brk, yos, brk4st inc, yos, brk, yos, brk, yos, brk,, sl1wyif
Row 12a (DS, DC): k1, yos, brk, yos, brk, yos, brk, yos, k1, yos, k1, yos, brk, yos, brk, yos, brk, yos, p1
Rows 12b - 17a: basic 2-color brioche
Row 17b (LS, LC): sl1wyib, brk, yos, brk, yos, brk, yos, brk4st dec, yos, brk, yos, brk, yos, brk,, sl1wyif
Rows 18a - 21a: basic 2-color brioche
Row 21b (LS, LC): sl1wyib, brk, yos, brk, yos, brk4st dec, yos, brk, yos, brk, sl1wyif
Row 22a (DS, DC): k1, yos, brkyobrk, yos, brk, yos, brk, yos, brkyobrk, yos, p1
Row 22b (DS, LC): sl1wyib, brp, yos, p1, yos, brp, yos, brp, yos, brp, yos, p1, yos, brp. sl1wyif
...
 End
End
Assuming that there are 15 stitches left.
Row 1a (LS, DC): basic 2-color brioche
Row 1b (LS, LC): sl1wyib, brk, yos, brk, yos, brk4st dec, yos, brk, yos, brk, sl1wyif
Rows 2a - 5a: basic 2-color brioche
Row 5b (LS. LC): sl1wyib, brk, yos, brk4st dec, yos, brk, sl1wyif
Row 6a (DS, DC): k1, yos, brk2st dec, yos, p1
Row 6b: basic 2-color brioche
Bind off with DC.

Row 11b (LS, LC): sl1wyib, brk, yos, brk, yos, brk, yos, brk4st inc, yos, brk, yos, brk, yos, brk,, sl1wyif
Row 12a (DS, DC): k1, yos, brk, yos, brk, yos, brk, yos, k1, yos, k1, yos, brk, yos, brk, yos, brk, yos, p1
Rows 12b - 17a: basic 2-color brioche
Row 17b (LS, LC): sl1wyib, brk, yos, brk, yos, brk, yos, brk4st dec, yos, brk, yos, brk, yos, brk,, sl1wyif
Rows 18a - 21a: basic 2-color brioche
Row 21b (LS, LC): sl1wyib, brk, yos, brk, yos, brk4st dec, yos, brk, yos, brk, sl1wyif
Row 22a (DS, DC): k1, yos, brkyobrk, yos, brk, yos, brk, yos, brkyobrk, yos, p1
Row 22b (DS, LC): sl1wyib, brp, yos, p1, yos, brp, yos, brp, yos, brp, yos, p1, yos, brp. sl1wyif
...
 End
EndAssuming that there are 15 stitches left.
Row 1a (LS, DC): basic 2-color brioche
Row 1b (LS, LC): sl1wyib, brk, yos, brk, yos, brk4st dec, yos, brk, yos, brk, sl1wyif
Rows 2a - 5a: basic 2-color brioche
Row 5b (LS. LC): sl1wyib, brk, yos, brk4st dec, yos, brk, sl1wyif
Row 6a (DS, DC): k1, yos, brk2st dec, yos, p1
Row 6b: basic 2-color brioche
Bind off with DC.

 |
| A random brioche scarf with no fixed dark and light side |
Keine Kommentare:
Kommentar veröffentlichen