It took me quite a while to get these mitts right. I had the original idea back in March 2014. At that time it just didn't work, but I had an idea what to do in order to actually make it work. However, it took me a while to start them again. I started again late in 2016 - and finished them in January 2017. Then it took me another nine months to write up the pattern ... but here they are.
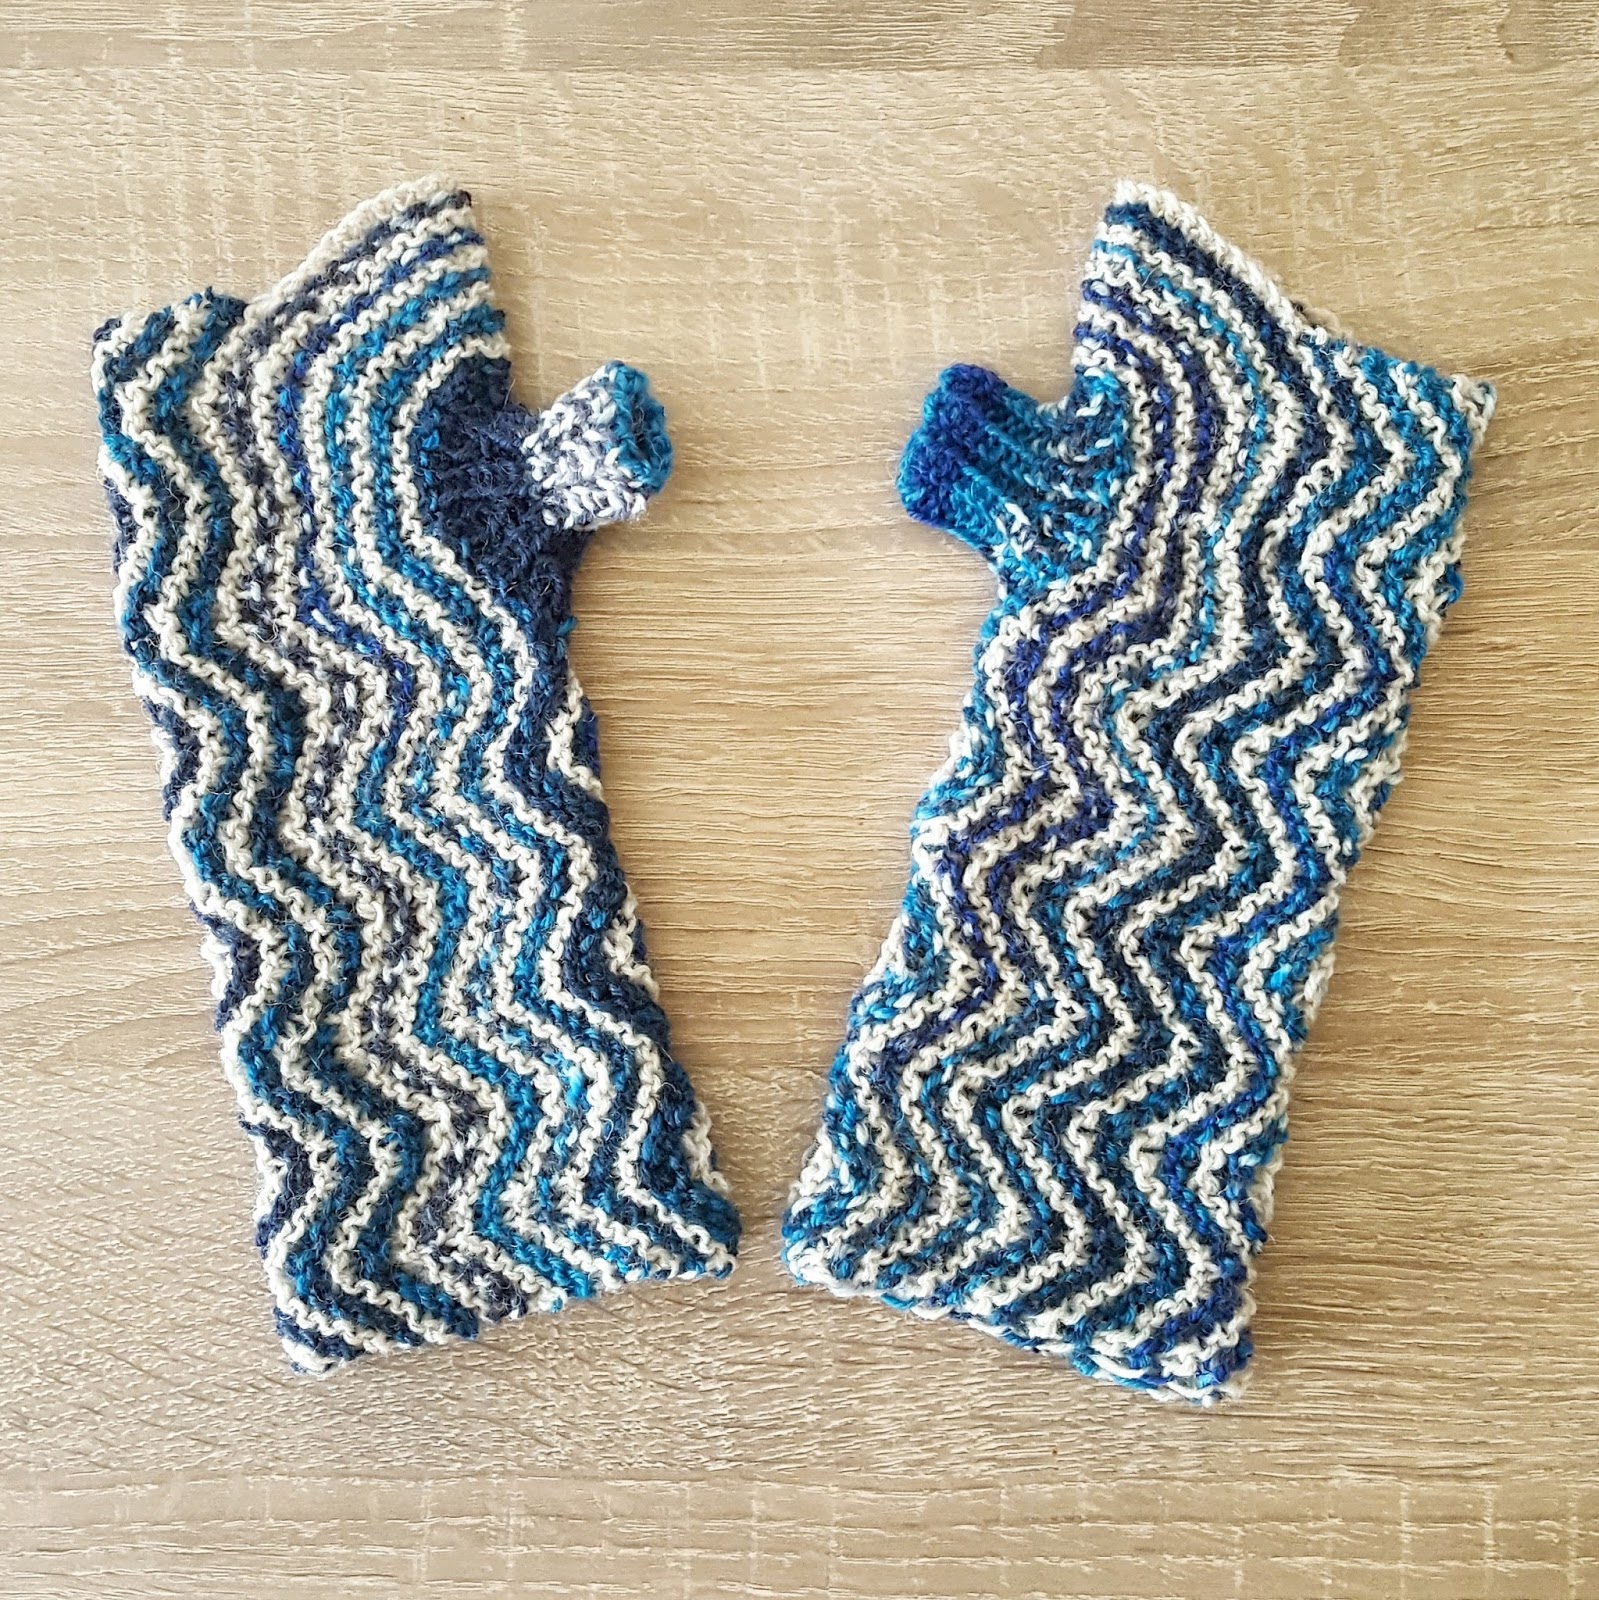
The Helgoland mitts have a unique construction. They are started at the thumb, and afterwards knitted flat and in garter stitch. One mitt is knitted in one piece which minimizes the number of ends to weave in :)
A
Danish version of this pattern has been written by
Marianne Holmen from
strikkeglad.dk . Mange tak!

This work by
Knitting and so on is licensed under a
Creative Commons Attribution-NonCommercial-ShareAlike 4.0 International License.
 Materials
- a total of 40 grams of fingering weight yarn in two colors (C1 and C2)- roughly the same amount of each - for the mitts in the photos I used blue variegated yarn as C1 and beige yarn as C2
- 3mm circular knitting needles - I used 80mm circulars (with magic loop for the thumb)
- one straight 3mm knitting needle to keep half of the remaining stitches after finishing part 2 - alternatively, you can use a (long) stitch holder or scrap yarn
- at least 2 stitch markers (plus optional 8 stitch markers)
- a third needle for three-needle BO
- a tapestry needle to weave in ends
Techniques and Notation
- Knitted Cast-On: http://youtu.be/-nJKC2xT0Q4
- Picking up stitches from a gap or ditch: After both three needle bind-offs there is one left over stitch which tends to have a distance to the stitches next to it. To avoid holes, I usually pick up one stitch from the gap and decrease over the new stitch in the following row (see also this YouTube video where it is shown on the example of a thumb gusset). In my experience (or the way I knit :) it's even better to pick up two stitches and knit decreases over them in the following two rows.
- Three-Needle BO: The three needle bind-off is used to attach two pieces of knitting (or to ends of one piece of knitting) to one another - this technique is shown in this YouTube Video by planetpurl.
- [X] y times: means knit whatever is written within the brackets y times
- There are also abbreviations for the wave sequences that are repeated throughout the pattern, namely:
- A = ssk, k3, kfb, kfb, k3, ssk
- B = kfb, k3, k2tog, k2tog, k3, kfb
Gauge and Measurements
In garter stitch 5 ridges (i.e. 10 rows) gave 2 cm in height, and 5 stitches gave 2 cm in width.
The finished mitts are 20 cm high (at their highest point) and measure about 16 cm circumference at the cuff. However, the circumference is adaptable by knitting more or fewer rows in part 3).
General Construction

These fingerless gloves are knitted in one piece - the instructions are written in three parts.
Part 1 - the thumb - is knitted in the round. Part 2 starts with a knitted cast on and is then knitted back and forth - up the shaft, around the thumb and down the shaft. Around the thumb there will be increases to create a flat circle (or rather upper part of a circle - a
general formula to knit a circle can be found here).
Part 2 ends with a bind off at the top and half of the remaining stitches being kept on a stitch marker (or a spare knitting needle). Part 3 - also knitted flat - widens the mitt to fit your hands and ends with a three-needle bind off.
The second mitt is the mirror image of the first one. That's why there are different instructions for the second mitt.
Instructions
First Mitt
Part 1 - Thumb
With C1:
CO18 and join in round
Rounds 1 to 10: *p1 k1 p1 repeat from * to end
Round 11: *p1 k1 p1 mk1 repeat from * to end
Rounds 12 to 14: *p1 k1 repeat from * to end
 |
| Illustrations |
Part 2
Row 1 (C1, RS): Place marker and with knitted cast on CO36. The piece now looks like a thumb part with a tail (see illustration 1). Now it is knitted back up that "tail", around the thumb and then back down at the underside of the "tail".
Row 2 (C1, WS): k to m, [k1, kfb, k1] 8 times, place marker, pick up 1 sts from the gap between the last stitch and the underside of the knitted CO, then pick up 36 sts from the underside of the knitted CO of row 1 - your piece should now look like in illustration 2.
One row now starts at the bottom of the shaft, leads around the thumb and down the shaft again. The two markers divide one row into 3 parts: the upwards shaft, the part around the thumb, and the downwards shaft.
In the upwards shaft a wave pattern will be knitted, a mirror image of this wave pattern will be knitted in the downwards shaft part, and around the thumb there will be increases in every 2nd row. These markers will be called "divider markers". As you can see on the illustrations, I've also put in stitch markers between the wave sequences on the shaft parts. Strictly speaking, these markers are not necessary, but helpful to keep your stitch count correct - however, they won't be mentioned in the pattern text.
Row 3 (C2, RS): k35, k2tog, k to end
Row 4 (C2, WS): [A] 3 times (you've reached the 1st dividing marker), [kfb, k3] 8 times, (you've reached the 2nd dividing marker), [B] 3 times
Row 5 (C1, RS): k to 1st marker remove marker, k6, replace marker, k to end
Row 6 (C1, WS): [A] 3 times, remove marker, k6, replace marker, [k2, kfb, k2] until there are 2 sts or fewer before the 2nd marker, k to marker, k6, [B] 3 times
Row 7 (C2, RS): k to 1st marker,
ssk, k to 2 sts before 2nd marker,
k2tog, k to end
Row 8 (C2, WS): [A] 3 times, k to 1st marker, k6, [k4, kbf, k1] until there are 4 sts or fewer before the 2nd marker, k to marker, k6, [B] 3 times
Row 9 (C1, RS): k to 1st marker,
ssk, k to 2 sts before 2nd marker,
k2tog, k to end
Row 10 (C1, WS): [A] 3 times, k to 2 sts bef 1st marker,
ssk, [k3, kbf, k3] until there are 3 sts or fewer before the 2nd marker, k to marker marker,
k2tog, k6, [B] 3 times
Row 11 (C2, RS): k to 1st marker,
ssk, k to 2 sts before 2nd marker,
k2tog, k to end
Row 12 (C2, WS): [A] 3 times, ssk, k3, kfb, [k2, kfb, k5] until there are 2 sts or fewer before 2nd marker, k to marker, k2tog, k3, kfb, [B] 3 times
Your piece should now look similar to illustration 3.
Row 13 (C1, RS): k to 1st marker remove marker, k6, replace marker, k to 2nd marker, remove marker, k to end
Row 14 (C1, WS): [A] 3 times, ssk, k3, kfb, k6, replace marker, [k6, kfb, k1] until there are 6 sts or fewer before the 2nd marker, k to marker, k6, k2tog, k3, kfb, [B] 3 times
Row 15 (C2, RS): k all sts
Row 16 (C2, WS): [A] 4 times, [k1, kfb, k8] until there is 1 sts or no stitch left before marker , B [4 times]
Row 17 (C1, RS): k all sts
Row 18 (C1, WS): [A] 4 times, [k3, kfb, k7] until there are 3 sts or fewer left before marker , B [4 times]
Row 19 (C2, RS): k to marker, remove marker, k12, replace marker, k to end
Row 20 (C2, WS), [A] 5 times (you can remove the stitch marker when you reach it), BO all sts to marker, [B] 5 times - if you're using a second 3mm needle you can knit the first part of the round (5*A) with the second needle. Alternatively, you can put these 60 sts on a stitch holder or scrap yarn afterwards after finishing row 20.
Part 3
Row 21 (C1, RS): k all sts
Row 22 (C1, WS): [B] 5 times
Row 23 (C2, RS): k all sts
Row 24 (C2, WS): [B] 5 times
Your piece should now look similar to illustration 4.
Repeat rows 21 to 24 until the mitt fits around your hands. Make sure to finish with a C2 row.
Put the stitches from the stitch holder back on a knitting needle - hold both edges right sides together and do a three needle BO in C2.
Break yarn and weave in ends.
In order to have the second mitt mirror the wave pattern of the first mitt, the waves need to be in opposite direction. That means that everytime the pattern for the first mitt states to knit sequence A, it needs to be replaced by B, and vice versa.
So, the first part (thumb) is knitted without any changes.
During the second part, the upwards part (on WS) is always knitted with sequence B and the downwards part with sequence A.
And during the third part, only sequence A is knitted.


