Mittwoch, 8. August 2018

Dreieck - Kraus rechts gestrickter Untersetzer

Derzeit habe ich das Gefühl, dass alle meine "größeren" Strick-Ideen (z.B. für Schals oder Tücher) nicht wirklich funktionieren - außerdem ist es derzeit sowieso zu heiß, um ein großes Teil beim Stricken auf dem Schoß liegen zu haben. Daher habe ich angefangen, kleinere geometrische Formen zu stricken (mit Baumwolle, weil es in diesem Wetter angenehmer ist :)
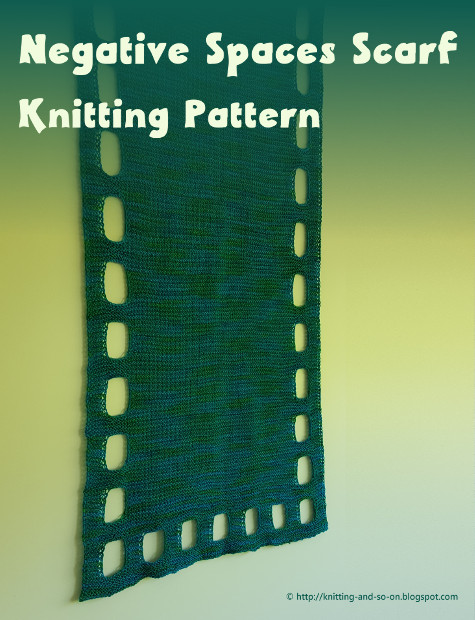
Angefangen habe ich mit einem sehr länglichen Rechteck (hier die Anleitung dazu auf Englisch). Und hier jetzt die Anleitung für ein gleichseitiges Dreieck - komplett kraus rechts gestrickt. Das Projekt ist eine interessante kleine Übung, wie verkürzte Reihen dazu verwendet werden können, um Formen zu stricken.
Das fertige Stück kann als Untersetzer, Topflappen o.ä. verwendet werden.


Creative Commons Lizenzvertrag
Dieses Werk von Knitting and so on ist lizenziert unter einer Creative Commons Namensnennung - Nicht-kommerziell - Weitergabe unter gleichen Bedingungen 4.0 International Lizenz.


Die englische Version dieser Anleitung findet sich hier.
An english Version of this pattern is available here.


Material
  • Garn - ich habe Catania Color von Schachenmayr verwendet (wahrscheinlich, finde leider die Banderole nicht mehr), für den kleineren Untersetzer habe ich ca. 8 gr benötigt, für den größeren 13 gr 
  • Stricknadeln - ich habe 2.5 mm Nadeln verwendet
  • einen Garnrest und eine Häkelnadel für den provisorischen Maschenanschlag 
  • eine Nähnadel für den Maschenstich und um Enden zu vernähen 


Techniken


Konstruktion
Du beginnst mit einem provisorischen Maschenanschlag. Während du den ersten Teil strickst, werden die Reihen kürzer - und zwar um eine Masche alle zwei Rippen. Im Teil 2 werden die Reihen wieder länger - auch um jeweils eine Masche alle zwei Reihen.
Dies wird insgesamt dreimal gestrickt - und dann mit einem Maschenstich beendet.


Größe
Die Anleitung ist so geschrieben, dass du sie auf eine beliebige Größe anpassen kannst.
Dabei entspricht die Länge des provisorischen Maschenanschlages in etwa einem Viertel der Höhe des Dreiecks (von Unterkante bis zur gegenüberliegenden Spitze).
Ich habe für den kleineren Untersetzer 10 Maschen angeschlagen (Höhe etwa 13 cm, Kantenlänge ca. 16 cm). Für den größeren waren es 13 Maschen (Höhe etwas mehr als 16 cm und Kantenlänge etwa 19 cm).


Anleitung

Provisorischen Maschenanschlag der gewünschten Maschenzahl (z.B. 10 M) und allererste Reihe in Arbeitsgarn stricken.

Teil 1
Rippe 1: re. M. bis vor die letzte Masche, w+t, re. M. bis zum Ende
Rippe 2: re. M. bis vor die Wickelmasche, wenden (ohne zu wickeln), erste M. wie zum links stricken abheben, re. M. bis zum Ende
Rippe 3: re. M. bis zu einer Masche vor der Wickelmasche, w+t, re. M. bis zum Ende
Rippen 2 und 3 sooft wiederholen bis die letzte Reihe nur aus einer gestrickten Masche und einer Wickelmasche besteht.

Teil 2
Rippe 1: 1 re. M. w+t, 1 re. M.
Ridge 2: re. M. bis zu erster Wickelmasche, diese Wickelmasche abstricken, eine Masche aus der Seite aufnehmen (aus abgehobenen Randmasche), wenden (ohne zu wickeln), ssk, re. M. bis zum Ende
Ridge 3: re. M. bis zum ssk der letzten Rippe, diese ssk-Masche abstricken, w+t, k re. M. bis zum Ende
Rippen 2 und 3 sooft wiederholen, bis die letzte Masche der Reihe gewickelt wird.

Zwischenrippe: re. M. bis zum Ende, wenden, erste M. wie zum links stricken abheben, re. M. bis zum Ende

Teil 3 = Teil 1
Teil 4 = Teil 2

Zwischenrippe: re. M. bis zum Ende, wenden, erste M. wie zum links stricken abheben, re. M. bis zum Ende

Teil 5 = Teil 1
Teil 6 = Teil 2

Ende
Die Maschen vom provisorischen Maschenanschlag auf die zweite Nadel nehmen. Garn abschneiden, aber so viel dran lassen, dass es für den Maschenstich über eine Reihe ausreicht.
Die beiden Seiten mit Maschenstich (in Kraus-Rechts) verbinden.
Falls sich in der Mitte des Dreiecks ein kleines Loch befindet, dieses mit dem Garnende zunähen. Die beiden Endfäden vernähen.
Fertig!

Freitag, 3. August 2018

Rechteck - Rectangular Garter Stitch Doily

Currently, it's really hot in my part of the world ... so hot, in fact, that I really don't feel like knitting, especially not something like scarfs, cowls, fingerless gloves or other things that I usually like.
One of the few yarns that can be knitted comfortably in high summer is cotton ... and a project that is sufficently "summery" is a doily or coaster. For this one, I tried to do a bit of shaping to get  rectangle. This was actually a test knit for a bath rug I wanted to make out of t-shirt yarn, but I didn't like the shaping for that purpose. However, the piece can be used as a doily, a placemat, a washcloth or a potholder.


"Rechteck" is the german word for rectangle.


Creative Commons License
This work by Knitting and so on is licensed under a Creative Commons Attribution-NonCommercial-ShareAlike 4.0 International License.


Materials
  • yarn (for the grey piece I used about 60 grams of DK weight cotton yarn)
  • appropriate knitting needles
  • scrap yarn and a crochet hook for the provisional cast on
  • tapestry needle for grafting and to weave in ends


Techniques
  • Provisional CO: My favorite method for a provision CO is the crochet provisional CO - it is shown in this Youtube video by New Stitch a Day.
  • Short rows with wrap and turn (w+t) - as shown in this YouTube video by Very Pink Knits.
  • Picking up and knit stitches from the side: Insert the needle into the front leg of the edge stitch from back to front and draw your working yarn through. In case of this pattern you only need to pick up one stitch at a time.
  • Grafting in Garter Stitch: A technique to get an invisible (knitted) seam - this technique is shown in this YouTube Video by knittinghelp.com.

Construction
When knitting this piece you start with a provisional CO. During the first part, the rows are getting shorter (one stitch every two ridges). In part 2, the ridges are getting longer again (two stitches for every ridge). Parts 3 and 4 are parts 2 and 1 backwards. You have then knitted a square and turned your knitting by 180°.
Parts 5 to 8, are a repeat of parts 1 to 4.
After knitting around four corners and the two sides (CO and last row) are grafted in garter stitch.

The pattern is written in a way, that you can adapt it to the size you want. To calculate the final size, multiply the width of the sts you cast on by 2 for the height and by 4 for the width.


Instructions

Provisionally CO the calculated number of sts with scrap yarn and knit the first row with your working yarn. I did 22 sts for the grey piece and 18 sts for the purple one.

Part 1
Ridge 1: sl1, k up to last st, w+t, k to end
Ridge 2: sl1, k up to last wrap, turn (without wrapping), sl1, k to end
Ridge 3: sl1, k to 1 sts before last wrap, w+t, k to end
Repeat ridge 2 and 3 until your last row was only 1 st long.

Part 2
Ridge 1: sl1, w+t, k to end
Ridge 2: sl1, k1, pick up 1 st (from a slipped stitch), w+t, k to end
Ridge 3: sl1, k up to last wrapped stitch, k1, pick up 1 st, w+t, k to end
Repeat ridge 3 until all stitch on your needle are used.
You should by then have knitted as many ridges in part 2 as the number of stitches that you cast on in the beginning of part 1 - and your stitch count should be twice the number of your CO.

Part 3
Ridge 1: sl1, k to end, turn, sl1, k to end
Ridge 2: sl1, k up to last st, w+t, k to end
Ridge 3: sl1, k to 2 bef last wrap, w+t, k to end
Repeat ridge 3 until the last row is only 1 or 2 sts long

Part 4
Ridge 1: sl1, w+t, k1
Ridge 2: sl1, k2tog, turn, sl1, k to end
Ridge 3: sl1, k up to and including k2tog of last ridge, w+t, k to end
Ridge 4: sl1, k up to last wrap, k2tog, turn, k to end
Repeat ridges 3 and 4 until all sts on your needle are used.

Inbetween Ridge: sl1, k to end, turn, sl1 k to end

Part 5
= Part 1

Part 6
= Part 2

 Part 7
= Part 3

Part 8
= Part 4

Finishing:
Put the stitches from the provisional CO on the second needle - cut your yarn, but leave a tail long enough for grafting.
Graft in garter stitch.
If there is a small hole in the middle of the piece, use the end to sew it closed.
Weave in ends

It's more comfortable to rest my arms on a piece of knitted cotton than right on my desk - especially in hot weather

Freitag, 20. Juli 2018

Negative Spaces Scarf

I like experimenting with my knitting. At the same time I think limitations lead to (more) creative solutions and designs. One of my preferred limitations is that I do not like to cut my yarn before I've completely finished a knitted piece. So when I saw a picture of knitted “holes” somewhere on the internet, I resolved to find a way to do this without cutting yarn.
This scarf is knitted in garter stitch only, but with square shaped holes. Once you've mastered how to do the square holes, it's good TV or travel knitting.


This pattern contains a photo tutorial on how to knit the square holes without cutting the yarn, instructions on how to knit a small swatch to get the hang of the technique and of course the instructions to knit this scarf.

The PDF is 6 pages long and available for purchase


Materials
  • about 300 grams of lace weight yarn  – I used Wollmeise Lace – colorway “Pfefferminz Prinz”
  • 3.25 mm knitting needles - I used circulars, but straight needles will do as well
  • a removable stitch marker to mark the RS (scrap yarn or a safety pin works as well)
  • a tapestry needle to weave in ends

Gauge and Size
In garter stitch 10 ridges (i.e. 20 rows) gave 5 cm in height, 11 stitches gave 5 cm in width. This was measured on a unblocked piece.
The finished scarf measures about 42 cm in width and about 200 cm in length (blocked).


Necessary Skills
Besides plain garter stitch you need the following skills to complete this project:
  • Backwards Loop CO
  • k2togtbl - knitting two stitches together through the back loop