Samstag, 13. August 2022

Sewing practice or you can't have too many pincushions ...

This summer, I started to sew a few t-shirts for myself (see e.g. this Instagram post). I am far from being a confident sewer - not very neat or exact. Even though you might get away with a few inaccuracies in Jersey, I decided I would use some of the leftover fabric to practice sewing exactly.  

The finished piece looks from above a bit like a paper fortune-teller (the childrens' game) or to be a bit more technical like an origami Blintz base.


If you want to do something similar yourself, here's how to do it:

1. Cut out four pieces of this pattern from leftover fabric. The outer (dotted) line is the cutting line - it already has a seam allowance of 1 cm.


2. Mark the sewing line (along the grey line in the pattern). 


3. Decide how to place the pieces. In the picture the parts are numbered for reference in the next steps.


4. Pin pieces 1 and 2 right sides together and sew along the highlighted (black dotted) line on the right hand side.


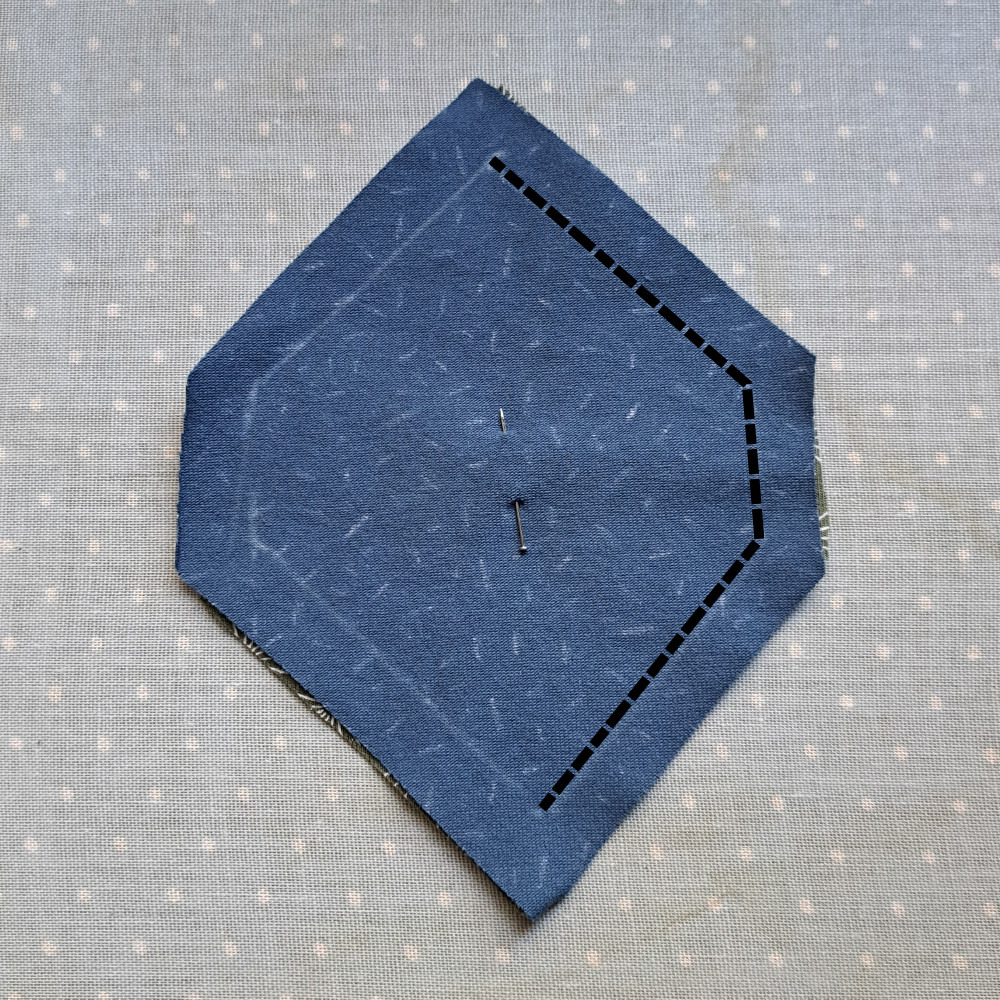
5. Now pin part 3 to part 2 (also right sides together) and again sew along the highlighted (black dotted) line. Make sure to not sew part 1.


6. Now pin part 4 to part 3 and again sew only the right hand seam. Now all four pieces are sewn together and there is an open seam between parts 4 and 1.

7. Now pin parts 4 and 1 together and sew the sides according to the picture below, i.e. leaving an opening through which you can turn the piece.

8. Now your piece looks as shown below - with only a small opening (where the arrow is).

9. Turn the piece right sides out and fill with stuffing through the opening (I always use the cuttings from my overlock machine for stuffing). Make sure that the stuffing gets into the corners, too.

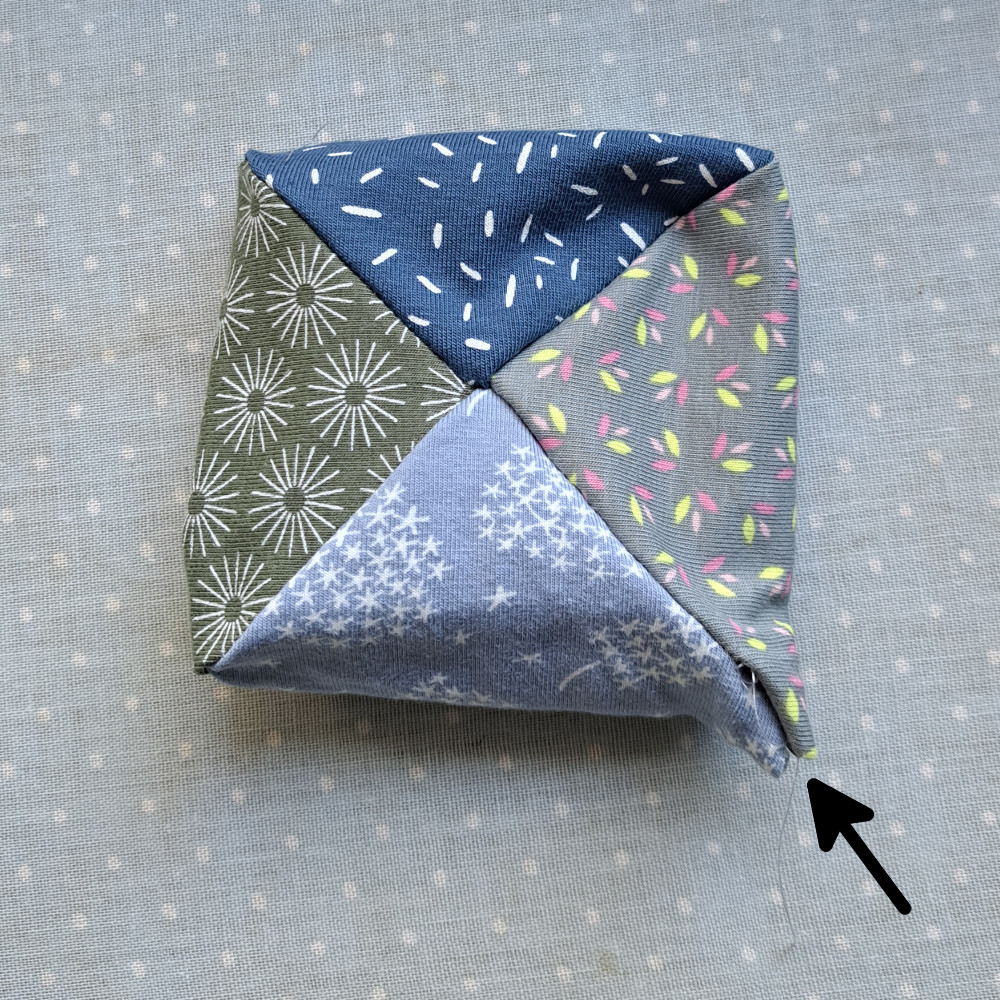
10. Close the opening by hand sewing. And the pincushion is finished.

Unfortunately, my piece is not as neat as I would have liked - the bit in the middle (where all parts meet) . The reverse side is even worse :) I guess I need some more practice - i.e. I need to think of another scrappy project that requires a certain precision :)

Mittwoch, 6. Juli 2022

Shiki-Miki

I like tops with interesting constructions (see for example the Garter Stitch Bias Top). So when Angela from bestrickendes.de showed and offered me her Shiki-Miki pattern - in the summer of last year, I was really excited. It seemed a really good idea to use a lovely Lace weight yarn, I had seen at shop in town. It turns out, I was right and I am really happy with the result - however it took me some time to get there.

The pattern is available via Ravelry here: https://www.ravelry.com/patterns/library/shiki-miki-shirt


Once I had ordered and received the yarn (Creative Melange Lace by Rico Design, colorway 011 - here's the yarn's Ravelry page), the actual knitting wasn't the problem. I started in July and I had finished everything except the lower edges by August 2021. I don't know, why I didn't continue it, but this June I started again and finished knitting the final bits. 

Because I don't like sewing up seams, I try to avoid creating seams at the knitting stage. Here, e.g. I knitted the shoulder bits at once for the front and back - see picture on the right. I had originally planned to do the same at the sides, but decided against it, because I think a knitted piece doesn't warp as much if it has side seams. 

So after finishing I only had to seam the sides and to weave in all ends. Unsurprisingly, this task took me quite a few weeks, but I have finally done it. 

I really (really, really) like the summery colors and the light lacy texture - and I am looking forward to wearing it on a hot day.

Sonntag, 5. Juni 2022

June 2022 - Discount

During the month off June 2022 all my knitting patterns on Ravelry and Payhip are 20% off with coupon code "JUNE".

For example the ones shown below: