Mittwoch, 11. Januar 2017

Knit-Only Slouch Hat

To combat the current cold weather, knit yourself a stylish hat with an interesting detail at the crown. It is worked only in knit stitch, so it's the perfect for knitters who do not like to purl. The pattern is written in a way that it can be adapted to your head size.


As with many of my patterns, I don't give exact stitch counts. For the decrease rows, for example  I will ask you to count your stitches and decrease to 64 stitches over the next 3 rounds. If you don't like these kinds of instruction, you probably won't like the pattern.

Creative Commons License
This work by Knitting and so on is licensed under a Creative Commons Attribution-NonCommercial-ShareAlike 4.0 International License.


Dansk / Danish: A danish version of this pattern is also available. It was translated by MarianneHo (Ravelry name) and can be found here.


Materials
  • a total of about 80-90 grams of Sport weight yarn - about 70-80 grams of the main color (MC) and about 10 grams of the contrast color (CC)
  • 3mm needles (for the brim or ribbing)
  • 3.5mm or 3.75mm needles (for the main part of the hat) - I used circulars for the main part of the hat and dpns for the crown, but you can used dpns throughout
  • a crochet hook for provisional CO
  • scrap yarn for provisional CO
  • a stitch marker
  • a tapestry needle to weave in ends
If you use a different yarn weight, use needles that are slightly larger than what the yarn calls for for the brim and bigger needles for the main part.


Techniques

Instructions

Brim
With smaller needles:
Provisionally CO 16 sts
Row 1 (MC): k all stitches
Row 2 (MC): k all stitches
Row 3 (CC): k all stitches
Row 4 (CC): k all stitches
Row 5 (MC): k all stitches
Row 6 (MC): k all stitches
Repeat these 6 rows until the piece is long enough to fit around your hat when stretched.

Put the stitches from the provisional CO on a knitting needle and do a three needle BO. Your piece should look similar to picture 1.

Cut both yarns.

Main Part
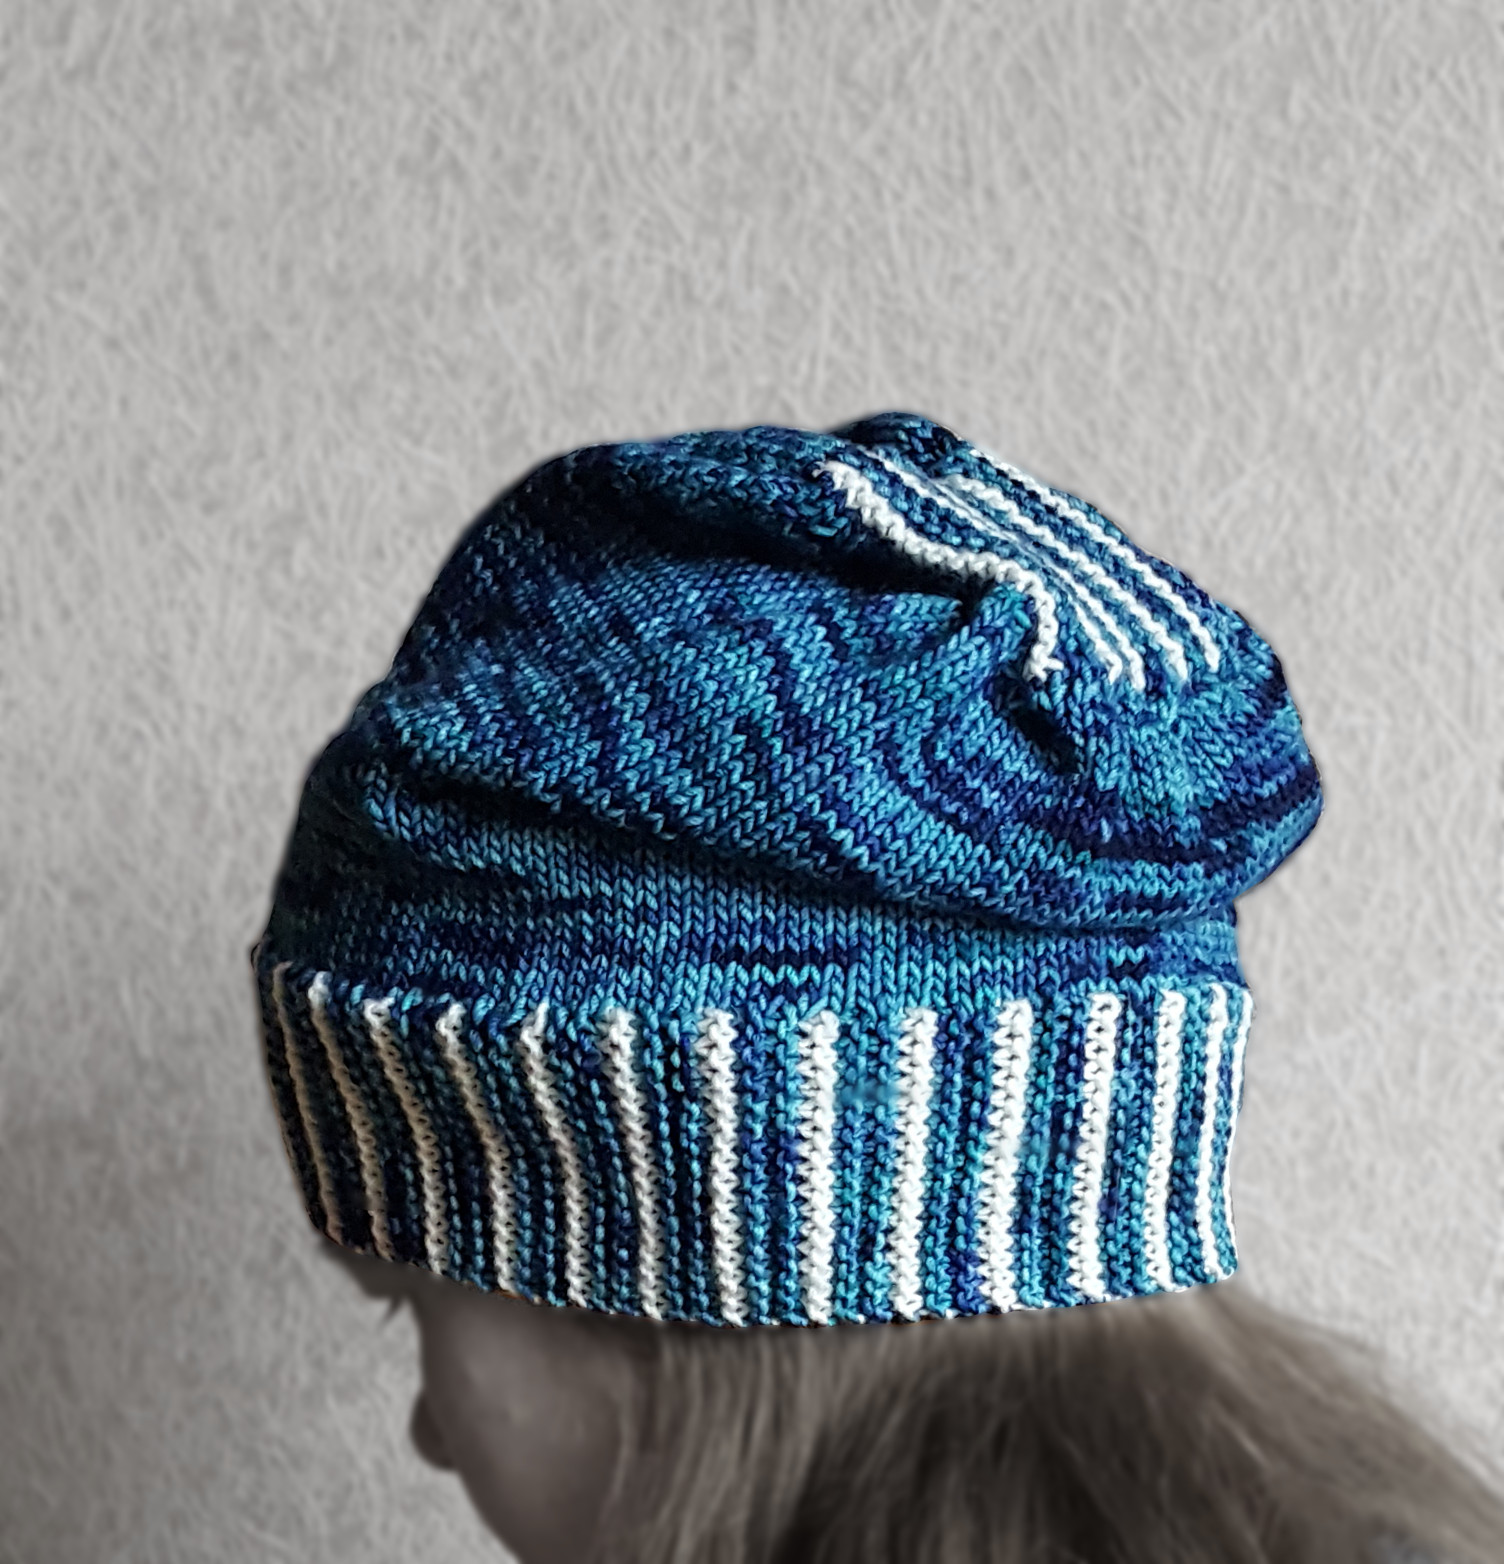
With MC and bigger needles pick up and knit 4 stitches per 3 garter stitch ridges. Join in round and place end-of-round-marker. Knit about 15 cm of stockinette rounds (or until the hat is "slouchy" enough for you).
Count your stitches and over the next 3 rounds, decrease the number of stitches to 64 stitches.
(Just for example, here are my stitch counts: I had 132 stitches and decreased every 4th stitch in the first round (about 99 stitches left), every 4th stitch in the second round (75 stitches left) and then distributed the necessary 11 decreases equally in the third round.)


Crown
Distribute the 64 left stitches on 4 needles. Your piece should look similar to picture 2. (If you only have circulars, you may want to put stitch markers after every 16 stitches).
Now you will work with the first 16 stitches and the adjoining stitches on both sides.

Row 1 (CC): k15, k2tog (i.e. the last stitch on the first needle and the first stitch on the adjoining needle), turn
Row 2 (CC): k15, k2tog (i.e. the last stitch of your row and the first stitch on the adjoining needle, turn
Row 3 (MC): k15, k2tog (again, the last stitch on your "working needle" and the next stitch on the adjoining needle), turn
Row 4 (MC): k15, k2tog, turn
Row 5 (MC): k15, k2tog, turn
Row 6 (MC): k15, k2tog, turn
Repeat rows 1-6 four more times (after a few rows, your piece should look similar to picture 3), then knit rows 1 and 2 one more time.

Now you should have a total of 2x16 stitches left - one needle of the 16 sts that you just worked in CC, and another needle of 16 stitches that haven't been worked with since the main part.

Turn the hat inside out (see picture 4) and with MC do a three-needle bind off.

Weave in ends.


Mittwoch, 4. Januar 2017

Garter Stitch Haramaki

The older I get, the easier I feel chilly - not only at my feet, but also around my belly. The solution to this is a garment that is called Haramaki (腹巻, literally "belly wrap" or "bellyband") in Japanese. Though the ones I found on the internet are just a tube, I wanted a piece of clothing that could be wrapped and adjusted around my belly and hips, that's why I knitted a flat one and included a strap on either side.

The piece is knitted all in garter stitch and therefore quite easy to knit. It is suitable for beginners as well.


Creative Commons License
This work by Knitting and so on is licensed under a Creative Commons Attribution-NonCommercial-ShareAlike 4.0 International License.


A danish translation of this pattern was written by Marianne Holmen of strikkeglad.dk - it is available here.


Materials
  • about 150 to 250 grams of DK weight yarn
  • 4.5mm needles
  • a tapestry needle to weave in ends
  • some scrap yarn to mark the RS

Techniques
  • Short rows (with any technique you like) - since this is all garter stitch I used "wrap and turn" technique (w+t, see this YouTube video by Very Pink Knits). But any other technique will work fine as well.
  • Backwards loop cast on: a cast on that can be inserted in the middle of the row, see this YouTube video also by Very Pink Knits

Construction 
As shown below the piece is constructed of two straps and a body piece. You begin by knitting one strap, then you increase to get the desired width for your body piece - here you insert a whole. Then you knit the piece including some short rows (to make it fit around waist and hips). When the body piece is long enough to fit around your waist, you decrease and knit the second strap. The hole is needed to pull one strap through.


Measurements, How to Calculate the Short Rows and Gauge
In order to knit this piece to fit your body, you need to take the following measurements:
  • your waist circumference (w) and 
  • your hip circumference (h)
Now calculate the ratio of these two measurements. For me (waist = 80 cm, hips = 100 cm), it was 8 to 10 or 4 to 5. This means that for every 4 garter stitch ridges at the upper end (waist) I needed to knit 5 garter stitch ridges at the lower end (hip). In turn, this meant that after every 4 garter stitch ridges I needed to insert a short row on lower end (hip).

If you don't want to calculate, I have included below a summary of a clothing size table for ladies I found on wikipedia, together with the ratio of normal ridges to short row ridges that I would suggest for the given size: e.g. if you are an S-size, knit 3 normal ridges and then one short row ridge or for and XL knit 5 normal ridges and then one short row ridge. (Yes, the ratio is not very exact, but the piece will be very stretchy, so it should be fine.)


XS S M L XL XXL
Waist (cm) 58 – 64 65 – 72 73 – 81 82 – 90 91 to 102 103 – 114
Hips (cm) 80 – 89 90 – 97 98 – 104 105 – 112 113 to 122 123 – 134
Ratio 3 to 4 3 to 4 4 to 5 4 to 5 5 to 6 5 to 6

With the yarn I used I had the following gauge in garter stitch: 16 sts gave 10 cm in width and 15 ridges (30 rows) gave 10 cm in height.
The finished piece was about 35 cm wide in the mid part of the body piece.
If you have different gauge, you can adjust the width by doing more or less increasing rows (and also the decreasing rows).


Instructions

1st strap
CO2
R1 (RS): k all
R2 (WS): kfb, k to last st, kfb
Repeat rows 1 and 2 until there are 10 stitches on your needles

Then knit garter stitch rows (k all), until the strap measures your waist circumference plus 15 cm.

Body piece

Increasing part

R1 (RS): k all
R2 (WS): kfb, k to last st, kfb
Use some scrap yarn to mark the RS. Repeat these rows until there are 48 stitches on your needles.

For the hole, knit the following two rows once:
R1 (RS): k20, BO8, k20
R2 (WS): k20, CO8 (with backwards loop CO), k to last st, kfb

Then continue with some increases on the lower end (hip):
R1 (RS): k all
R2 (WS): k to last st, kfb
Repeat until there are 56 sts on your needles

Measure the length of the piece from the beginning of the increasing part.

Mid part
According to the ratio calculated above knit normal ridges and short row ridges.
Normal ridge (RS and WS): k all, turn, k all
Short row ridge (RS and WS): k25, w+t, k to end

Repeat until the lower edge measures your waist circumference minus the length of increasing part. The piece will stretch quite a bit when you're wearing it, so stretch it while measuring it.

Decreasing part
R1 (RS): k2tog, k to end
R2 (WS): k all
Repeat until there are only 48 sts on your needles

R1 (RS): k2tog, k to last 2 sts, ssk
R2 (WS): k all
Repeat until there are only 10 sts on your needles

2nd strap
Now that there are only 10 stitches on your needles, knit garter stitch rows (k all), until the strap is as long as the first strap - finish the tip as follows:
R1 (RS): k2tog, k to last 2 sts, ssk
R2 (WS): k all
Repeat until there are only 2 sts left.
BO these 2 sts.

Weave in ends and block gently.


This blogpost was featured at the Linky Ladies Community Link Party #88 and at the Knitting Love Link Party #18 (February 2017). Thank you!

Linky Ladies Featured on Knitting Love Link Party with Jessie At Home and Underground Crafter

Dienstag, 3. Januar 2017

Zimtsterne Fingerlose Handschuhe - Anleitung auf Deutsch

Bernadette von „Törtchens Blog“ hat sich die Mühe gemacht, die Anleitung für die Zimtstern Mitts in Deutsche zu übersetzen. Vielen lieben Dank dafür. In diesem Blogbeitrag hat sie ihre Erfahrungen beschrieben.

Die Anleitung als PDF gibt es hier.

The original pattern in english is available here.
Die Originalanleitung auf Englisch gibt es hier.


Sonntag, 1. Januar 2017

Another Sock Idea - Socks with a Butterfly Pattern

Happy new year to all of you!

Over the holidays I stayed at home a lot - and knitted socks. So here's another idea for knitted socks, however this exact pattern only works with a stitch count that is a multiple of 12. These socks are knitted top down with a heel flap.


Creative Commons License
This work by Knitting and so on is licensed under a Creative Commons Attribution-NonCommercial-ShareAlike 4.0 International License.

As in my last blogpost with a sock idea, this is NOT a complete knitting pattern, but just a sketch or rather a stitch pattern (over 12 stitches and 12 rows) that can be used for socks. So this only works for socks with a number of stitches that is a multiple of 12.
For socks there are many general instructions and tutorials around, I have linked to some in the Techniques section of this post.


Materials
  • about 60 grams of fingering weight yarn - or yarn where a multiple of 12 stitches is big enough to fit around your ankles
  • 3mm knitting needles (I used dpns, but a circular needle works as well with the magic loop method) - or needles where the multiple of 12 stitches fits around your ankles
  • slightly bigger needles for a looser CO
  • a darning needle to weave in ends

Techniques

"Instructions"

With the bigger needles CO 60 stitches and join in round.
With smaller needles start knitting.

Knit 12 rounds of p2k2 ribbing.

Then start with the butterfly pattern (see also chart below):
Round 1: k all
Round 2: * k1, C2B, C2F, k7 repeat from *
Round 3: k all
Round 4: * k1, C2F, C2B, k7 repeat from *
Rounds 5, 6, 7: k all
Round 8: * k7, C2B, C2F, k1 repeat from *
Round 9: k all
Round 10: * k7, C2F, C2B, k1 repeat from *
Round 11, 12: k all

Repeat three times then start heel flap over 30 stitches. Turn the heel. Then knit the gusset while continuing the butterfly pattern in front.

When foot is long enough, do toe decreases and graft leftover stitches with kitchener stitch.

Make two.


This post was featured at the Linky Ladies Community Link Party No. 86. Thank you!

Featured Five Club