Sonntag, 20. September 2015

Knit Design Fails - or Patterns that Haven't Been Finished (yet?)

A lot of knitting ideas occur to me when I'm on the train commuting to work. I usually write them down or draw a little sketch to avoid forgetting them straight away ... and then I'll try them out when I feel like it.

Some of these ideas work - they become finished knitted objects and I write down the pattern for it and publish it here. But some of them don't work, or just don't get finished.

In this post I wanted to share some of the "design fails" I've had over the years - some of them were forgotten completely, others were reworked into a better version ... please note that there are lots more, because on average I have one "fail" for every one published pattern :) This means that I frog a lot which is the main reason I don't like to cut my yarn before I'm really, REALLY sure that I want something to stay the way it is. This is also the main reason I prefer sturdy materials (e.g. sock yarn from wool and poloyamide) that can be ribbed back many times.


  1. Picture 1 shows the start of an idea for fingerless gloves started from the thumb (like e.g. Circle Mitts or Pieces of Eight Mitts). However, I didn't like the way the waves at the shaft merged into the circle around the thumb - so I frogged it. I have a vague idea how to fix this issue so I may pursue this idea again in future.
  2. On picture 2 is a prototype for a kind of opposite version of the Starburst Mitts - with the rows pivoting around a point at the wrist. Even though it kind of worked, I didn't like the look of it - so I frogged it.
  3. Number 3 shows a yoga sock design that just look plump - it fitted my foot but I really didn't like it.
  4. Photo number 4 shows a try to use some beautiful Noro Kureyon yarn. I wanted to show off the color way by contrasting it with a different color way - unfortunately, I didn't like the shape. This yarn eventually became the Almendra Cowl.
  5. Picture 5 shows a rather confused construction idea for fingerless gloves knitted in several directions. It did fit my hands but it look too crowded and complicated. I used the idea of a slanted thumb panel later in the Windings Mitts.
  6. Finally, on picture 6 you can see the first prototype of  wrist warmers that are knitted at a 45 degree angle - the connection between the thumb and the main part looked a bit clumsy so I ribbed it back and knitted it without the angle - resulting in the Strata fingerless gloves. (A pattern with a similar construction but without a thumb will be published in a few days :)

Have you ever tried out an idea that just didn't work? It would be great to hear about it.


Montag, 14. September 2015

Strata Fingerless Gloves

Knitting and so on: Strata Fingerless Gloves - #free #knittingpattern
I like the standard sock yarn that is available here in Germany and Switzerland. It usually has lovely color changes for great effects in a finished object. This looks nice when you're knitting a "normal" pair of loom-style fingerless gloves (i.e. stockinette in the round, top-to-bottom). But it can be more interesting if you use a different construction (as are for example Circle Mitts, Zoom Out Fingerless Gloves, Pieces of Eight Mitts and U-Turn Mitts on this blog). Here's a new pattern for fingerless gloves in a out-of-the-ordinary construction. They also are knitted in one part, i.e. there are only two ends to weave in per glove. Enjoy!

I'm usually bad at naming my patterns. So this time again I asked the good folk of knittingparadise.com to help me out - you can read all their suggestions here. I opted for "Strata" not only because of the stripes that are created by using a yarn with color changes but also because of the "structural stripes" given by the alternations of stockinette and garter stitch, This effect of parallel lines (one upon the other) changing in color and structure reminded me of strata in geology. So I instantly loved the name. On top of that "Strata" is also the name of a novel by my favorite author, Terry Pratchett.

Creative Commons License
This work by Knitting and so on is licensed under a Creative Commons Attribution-NonCommercial-ShareAlike 4.0 International License.


Print Friendly and PDF

Materials
  • 3mm needles - I used dpns for the beginning (thumb) and circulars for the rest - however, except for the thumb the mitts are knitted flat, so for the main part you can use straight needles, too - as I did for the pictures :) - or you can use circulars if you do the beginning part (thumb) in Magic Loop method. Whatever methods or needles you use, you will need a third needle: a) for a provisional CO of new stitches right in the middle of the project and b) for a three-needle bind-off
  • about 25 grams of fingering weight yarn
  • scrap yarn for provisional CO and to be used as a "stitch holder"
  • a crochet hook for provisional CO
  • a tapestry needle to weave in ends

Techniques

Basic Construction
The schematic below shows the construction of these mitts. The mitts are started at the thumb (1) which is knitted in the round. Then an increasing oval shape is knitted (2) - half of the stitches of the oval are put on a stitch holder to be used later. At one end of the oval a provisional CO is added, to give length to the shaft of the mitts.
The main body part (3) is knitted flat. The last row is attached to the provisional CO and the stitches from the stitch holder by means of a three needle BO.
Knitting and so on: Strata Fingerless Gloves - construction

Gauge / Measurements

The finished mitts measure 21 cm in length, 15 cm in circumference at the top end and 18 cm in circumference at the bottom end - however, the pattern is written in a way that the circumference can be adapted.
When knitting stockinette stitch 13 sts gave 5cm in width and 7 rows gave 2 cm in height.


Instructions

Thumb
CO18
Rounds 1-10: *p1 k1 p1, repeat from *
Round 11: *p1 k1 p1 mk1, repeat from *
Rounds 12-15: *p1 k1, repeat from *

In row 15 either place two markers (one at the beginning of the round - the other at the middle of the row (i.e. after 12 sts)) or use the magic loop technique and distribute the stitches evenly on the front and back needle (12 sts each).

Rounds 16  and 17: * kfb, k to last stitch of this needle (or last stitch before marker), kfb, repeat from *
Rounds 18 to 21: *kfb, kfb,  k to last 2 sts of this needle (or last 2 sts before marker), kfb, kfb, repeat from *

After round 21 you should have a total of 64 sts on your needles - these stitches now form an oval shape. For the body part only one side of this oval will be used.

Knitting and so on: Strata Fingerless Gloves - Illustrations

Body
Row 1: kfb, knit to last stitch on this needle (or last stitch before marker), kfb - do a provisional CO of 18 new stitches on a third needle - then continue knitting these new 1 sts in row 1 (see picture 1).
Put the rest of the stitches on scrap yarn or on a stitch holder
Rows 2 to 4: sl1, k to end

(Rows 5 to 10 are basically stockinette stitch - except for the four stitches on the edges)
Row 5: sl1, k to end
Row 6: sl1, k3, p to last 4 sts, k4
Row 7 = Row 5
Rows 8+9 = sl1, k3, p12, w+t, k to end
Row 10 = Row 6 (picking up the wrapped stitch)
Row 11 = Row 5
Row 12 = Row 6

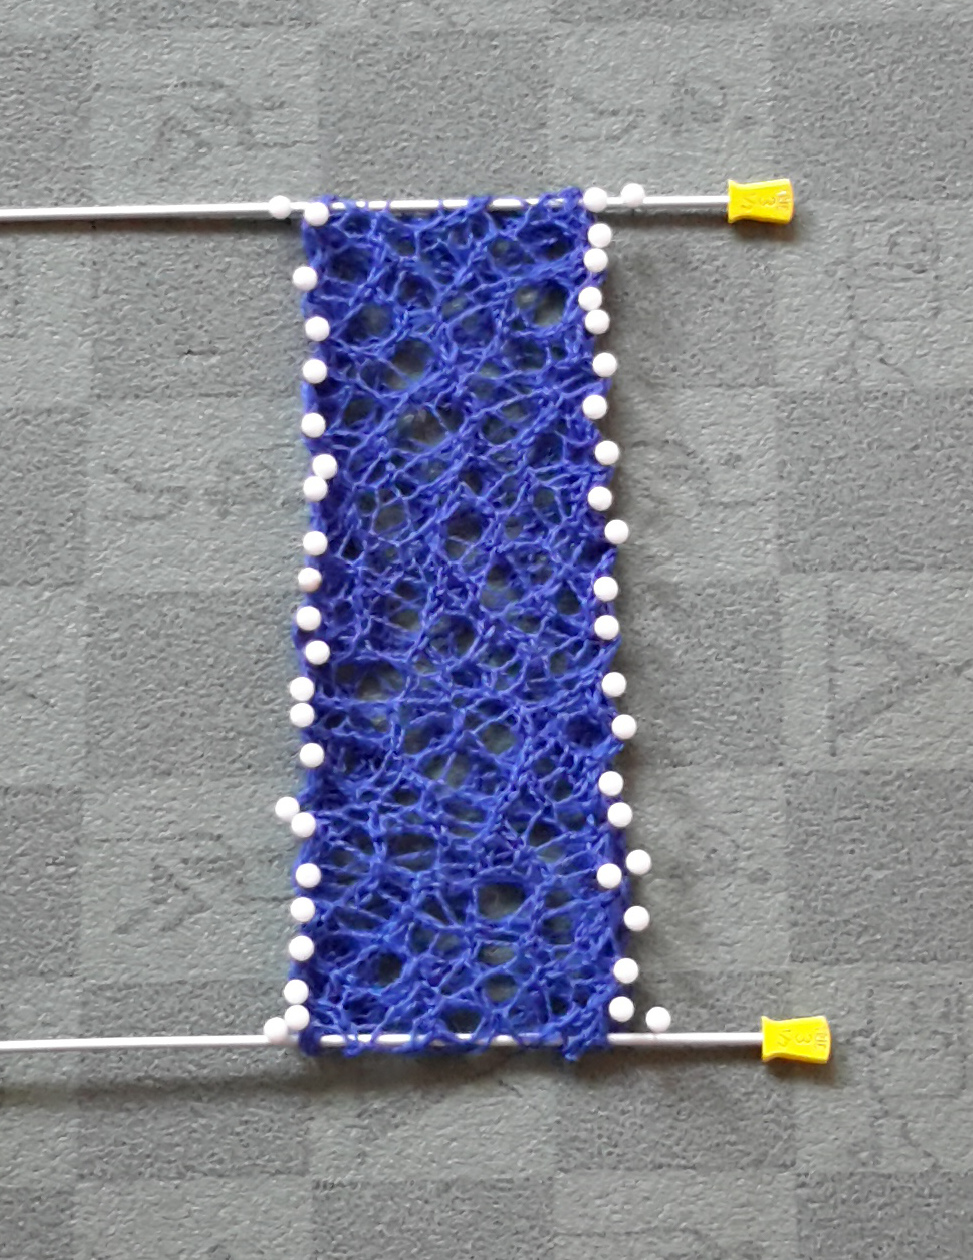
(Now your piece should look similar to the one in picture 2)

Rows 13-20: sl1, k to end  (garter stitch)
Rows 21-26 = Rows 5 to 10 (stockinette stitch - except for four stitches on the edges)

Repeat rows 13 to 26 twice more - or until the mitt is wide enough to fit around your wrists.
Then knit four more rows of garter stitch (i.e. sl1, k to end).

Now prepare for joining the sides together with a three-needle bind-off.

Put the stitches from your scrap yarn/stitch holder on a needle as well as the stitches of the provsional CO. Your piece should now look similar to picture 3.

After you have picked up the stitches from the scrap yarn and your provisional CO, you'll notice two gaps (see picture 4). To avoid holes in the finished piece you'll have to pick up a stitch from these gaps and put them on the needle. To do this you need to transfer the stitches to a new needle - and when you reach the gap, pick up the the horizontal piece of yarn between the two stitches with your left needle (picture 5), and twist it (as in a mk1-sts). Now you have one stitch more which will help to avoid a hole. Do the same for with the last stitches of that row.

Now with right sides held together do a three needle BO. Weave in ends and turn the mitts back right sides out.

Make two.
Knitting and so on: Strata Fingerless Gloves - #free #knittingpattern


This post has been featured on EyeLoveKnots.blogspot.com Yarn Fanatic Party No. 52! Thank you!

EyeLoveKnots

Montag, 7. September 2015

Color Way Grievances

I love Schoppel Zauberball yarn - especially the colors and the way they combine. 

But this time I didn't have much luck in the way the colors developed. I wanted to show off the colors by using two skeins of the same colorway (Fuchsia) and alternating every few rows. 

On the right hand side is my first try: the stripe pattern became practically invisible, when both skeins turn red. So I frogged and tried again - starting from the other end of one skein - the result is in the left hand picture. This time both skeins turn orange at the same time - with the same effect.

I'm slightly annoyed ... but I'm sure that I will find something nice to do with the skeins sometime soon. In the meantime, this goes to the frog pond (i.e. will be ripped back).


I will also use this pattern idea another time and with different yarn(s).

Samstag, 5. September 2015

Fauxdori - Knitters' Version

I don't know where I first heard of a Midori-style traveller's notebook  (or fauxdori :)... somewhere on YouTube, I suppose. If you haven't heard of it, such a fauxdori "notebook" is basically a "wrapper" made of leather or another sturdy material, in which you can place your notebooks.
From the start I really liked the idea and I wanted one for myself.

But I also wanted to make one
myself - and I wanted it to have a "knit-look". I searched the Internet a bit, but I didn't find ideas for that.
So, I thought I might try a it with thick felt and random lace.

This blogpost is a brief (!) how-to -  describing how I made my "Fauxdori for Knitters" - it's not a detailed step-by-step tutorial. There are already so many excellent description and videos out there on the internet, that I'd rather link to them.

Creative Commons License
This work by Knitting and so on is licensed under a Creative Commons Attribution-NonCommercial-ShareAlike 4.0 International License.


Materials
  • a thick sheet of felt
  • elastic (I used 2mm elastic)
  • eyelets and a hammer (I used 5mm eyelets by Prym)
  • a charm with one or two holes in it (I made mine with leftover polymer clay (Fimo)
  • quite thin yarn that blocks well (I used a "skein" of reinforcement yarn - the yarn that is sometimes hidden inside sock yarn skeins)
  • knitting needles - a bit thicker than what the yarn calls for (I used 2.5mm needles)
  • notebooks to put into the traveller's notebook - you'll need them as a template - I used A4 booklets since that's a standard size you get everywhere in Germany

Techniques you Need
For me this was rather a thrifty project - so it was great to try out some new techniques
  • Knitting random lace: In my blogpost about the lacy ebook sleeve you can find a tutorial on how to knit random lace.
  • Grafting lace: Joni Coniglio has written several brilliant post on grafting in general and also on grafting lace - this one and this one.
    I guess this project is perfect to try the stitches (or formulas) because it doesn't really matter if you get one of them wrong - as long as you keep your number of stitches (it is RANDOM lace, after all).

How to Make the Basic Traveler's Notebook
  • Cut your felt to size, i.e. as big as the notebooks that are to fit into it, but with about 1.5cm more at each side.
  • Mark the middle with a line and on that line mark five dots 0.8mm away from the top, 15mm away from the top,  0.7mm away from the bottom, 15mm away from the bottom, and one right in the middle. 
  • Put in 5 eyelets centered around the dots. A video showing how to put in eyelets can be found here on YouTube
  • Thread your elastic through the holes as shown in this YouTube-video by sealemon at about minute 3'30''. To add some more decore I threaded a charm in first. Knot your elastic. Then cut off excess elastic. Your notebook should now look like this:


How to Create the Lace Decor

Provisionally CO 16 stitches. The provisional cast-on is important if you want a seamless look, i.e. a neverending band.

Knit in a random lace pattern until the strip you've knitted is about twice as long as your notebook (piece of felt) is high when being stretched.

Open the provisional CO and catch the stitches on your second needle. Graft the ends together using grafting formulas for lace grafting. I used this as an opportunity to graft lace for the first time ... and since it was random lace, there was only a small chance to mess this up :)
I used the descriptions in this blogpost by Joni Coniglio to learn the basics of grafting lace - here's another post explaining this topic.

After you have grafted the beginning and end of the band together you have a continuous band of random lace. Block it to size (use your traveler's notebook as a guide) with two knitting needles on top and bottom (see picture above). It will take a little longer to dry, because it now consists of two layers of knitted fabric.

Draw the band over the front part of your notebook - placing it where you like it best. I chose to place it right in the center. With a sharp needle, stitch the lace to your fabric to keep it from moving.

Put in some notebooks and you're done!

This post was featured on OuiCrochet's Fiber Tuesday Link Party No. 64. Thank you!

Sonntag, 30. August 2015

Yarnbomb in Zurich

A couple of weeks ago I saw the air vents of a parking garage in Zurich were decorated with fabric of a really bright color ... at the time I even posted a picture of it on my Instagram account, but I thought it was just fabric (well, not knitting :)


Well, this weekend I walked by a bit closer so I could examine it better and read the sign with the explanations. It turns out that
a) it's actually knitted, i.e. a yarnbomb
b) it's part of a bigger festival, with large-scale projects in the public space - called AUFSEHEN (sensation or splash in English); this installation is called "Knitted Parking"


I also found out that I had seen some of the other projects, wondered about them and didn't know what to make of them. But I really like the ideas ... so I guess, I will try to see the installations I haven't seen yet, but I will have to hurry, because it only runs till September 6th.