Posts mit dem Label Crochet werden angezeigt. Alle Posts anzeigen

Freitag, 3. Juli 2015

Nikko Summer Crochet Hat

In high summer I tend to get sunburned. Therefore I usually have to shield my eyes and face somehow. Last year I decided to crochet a cotton hat, I bought the yarn ... and put it in one of my stash boxes ...

Another summer started and I - finally - started to crochet a hat. As usual I was too lazy to search for a pattern that fits my size, to swatch and so on. I ended up trying and frogging twice before I got it right. But now, it fits perfectly.

I chose the name Nikko because these kinds of hats remind me of Japan in summer and "nikko" - besides being a town name - means sunlight or sunshine.


Creative Commons License
This work by Knitting and so on is licensed under a Creative Commons Attribution-NonCommercial-ShareAlike 4.0 International License.


Materials
  • yarn (I used about 200 metres of DK weight yarn - 2 skeins of Lang Xenia (a mix of cotton, linen and rayon)
  • a crochet hook to match the yarn (I used 3.5mm hook)
  • a tape measure
  • a tapestry needle to weave in ends

Techniques and Abbreviations
  • Magic ring: A method to avoid the little hole when starting to crochet in the round - the technique is shown in this YouTube video by planetjune.com
  • ch: chain stitch
  • ss: slip stitch
  • sc: single crochet
  • sc-inc: single crochet increase; two single crochets into one stitch below
  • dc: double crochet
  • dc-inc: double crochet increase: two double crochets into one stitch below

How to Crochet a Flat Circle ... and a Hat
A way to crochet a flat circle is to start with a magic loop and 8 sc in the round. In each of the following rounds the stitch count will be increased by 8.
That means that in the 2nd round every 2nd stitch needs to be doubled (e.g. by crocheting 2 sc into the sc below). In the 3rd round every 3rd stitch needs to be doubled, in the 4th round every 4 stitch ... and so on. So when you distribute the increases evenly, in round 2 there is always one stitch between the increases, in the 3rd round there are 2 normal stitches between the increases, in round 4 there are 3 stitches between the increases ... and so one.

For a hat there needs to be a sort of incline, i.e. less than 8 stitches need to be doubled per round, so after the first few rounds there will be more stitches between the increases.

Preparations
Take the following measurements:
  • A = the desired height of your hat (you can do that by measuring around the top of your head from about 1 cm into your ear to the same point at the other ear - and then taking half of that distance
  • B = the circumference of your head
See also the picture on the right for a schematic.

Instructions
There are two versions of the instructions one really short one that explains the

Really short version
  • Crochet a magic ring with 8 sc and close with ss
  • Crocheting a circle (as explained above) alternate in crocheting one round of sc and one round of dc - until your piece measures one fifth (1/5) of the desired height.
  • Continue alternating sc and dc rounds, but with less increases - calculate the stitches between the increases by multiplying the normal stitch distance by 1.5 until your piece measures three fifth of the desired height.
  • Continue alternating sc and dc rounds, but now with a distance between the increases as twice as wide as the distance for a normal circle until your piece has the desired circumference.
  • Then continue to alternate sc and dc rounds without any increases until your head has the desired height.
  • To crochet the brim, increase every third stitch - still continuing to change each round between  a dc round and an sc round.
  • Continue without any increases until the brim is as wide as you like it to be.

Longer Version with Examples and Comments

This example is one-size only - there are explanations to adjust it to your size, and some comments (written in purple) to explain the "thinking" behind this pattern.

Crochet a magic ring with  8 sc and close with a ss.

For the first fifth of the height the hat is worked as a circle,
R1: ch1, sc-inc to end of round, close with ss
R2: ch3, * dc, dc-inc repeat from * to end of round, close with ss
R3: ch1, * sc-in, 2sc repeat from * to end of round, close with ss
R4: ch3, * dc, dc-inc, dc repeat from * to end of round, close with ss
[To avoid visible corners the first increase stitch is at a random spot.]

After these four rounds, I had finished one fifth of the height. Adjust the number of rows to the size of your head and your crochet piece.

In order to shape the hat, less increases are worked from now on. For the 2nd and 3rd fifth, the distance between the increases is 1.5 times as high as for a flat circle.

R5: ch1, * sc3, sc-inc, sc3 * sc, sc-inc, sc repeat from * to end of round, close with ss
[5 x 1.5 = 7.5 (rounded to 7), i.e. every 7th stitch is doubled, i.e. there are 6 stiches between the increases] 
[To avoid visible corners the first increase stitch is always at a random spot.]
From this point on there may be a few stitches left at the end of your round after you finish your last complete repeat. Just finish the round with sc's (or dc's in even-numbered rounds) and then close with ss
R6: ch3, * dc8, dc-inc repeat from * to end of round, close with ss
[6 * 1.5 = 9, i.e. every 9th stitch is double or 8 stitches between the increases]
R7: ch1, * sc1, sc-inc, sc8 repeat from * to end of round, close with ss
[7 x 1.5 = 10.5 (rounded to 10), i.e. every 10th stitch is doubled]
R8: ch3, * dc5, dc-inc, dc6 repeat from * to end of round, close with ss
[8 x 1.5 = 12, i.e. every 12th stitch is doubled or 11 stitches between the increases]

Continue in this fashion (increasing according to the formula and alternating sc- and dc-rounds) until you have reached 3/5 (three fifth) of the height of your hat. For me this was the case after the 12th round, i.e. I continued with round number 13. Please adjust this to your size.

From now on you have to measure the hat's desired circumference, once you've reached that, stop the increases and just go on with alternating sc- and dc-rounds until you've reached the desired height.
If you haven't reached the circumference, yet, continue increasing but with an even wider distance between the increases: twice as wide as for a flat circle.

R13: ch1, * sc10, sc-inc, sc15 repeat from * to end of round, close with ss
[13 x 2 = 26, every 26th stitch is doubled]
R14: ch3, * dc3, dc-inc, dc24 repeat from * to end of round, close with ss
[14 x 2 = 28, every 28th stitch is doubled]

Continue in this fashion (increasing according to the formula and alternating sc- and dc-rounds) until your hat has the desired circumference.

Then add alternating sc- and dc-rounds without any increases until your piece has the desired height.
For me this was the case after round 16. Please adjust to your size.

R17: ch1, sc until end or round, close with ss
R18: ch3, dc until end or round, close with ss

When your hat has the desired height, start crocheting the brim. For me this was the case after the 24th round.

To start the brim, crochet a round where every 2nd stitch is doubled.
If this is an odd-number round (i.e. an sc-round): ch1 * sc-inc, sc2 repeat from * to end of round, close with ss
If this is an even-number round (i.e. a dc-round): ch1 * dc-inc, dc2 repeat from * to end of round, close with ss

Continue alternating sc- and dc-rounds (without increases) until you're brim is as wide as you like it to be. I stopped after the 4th brim-round because I ran out of yarn. 

Weave in ends and you're done!


Freitag, 20. März 2015

Crochet U-Turn Mitts

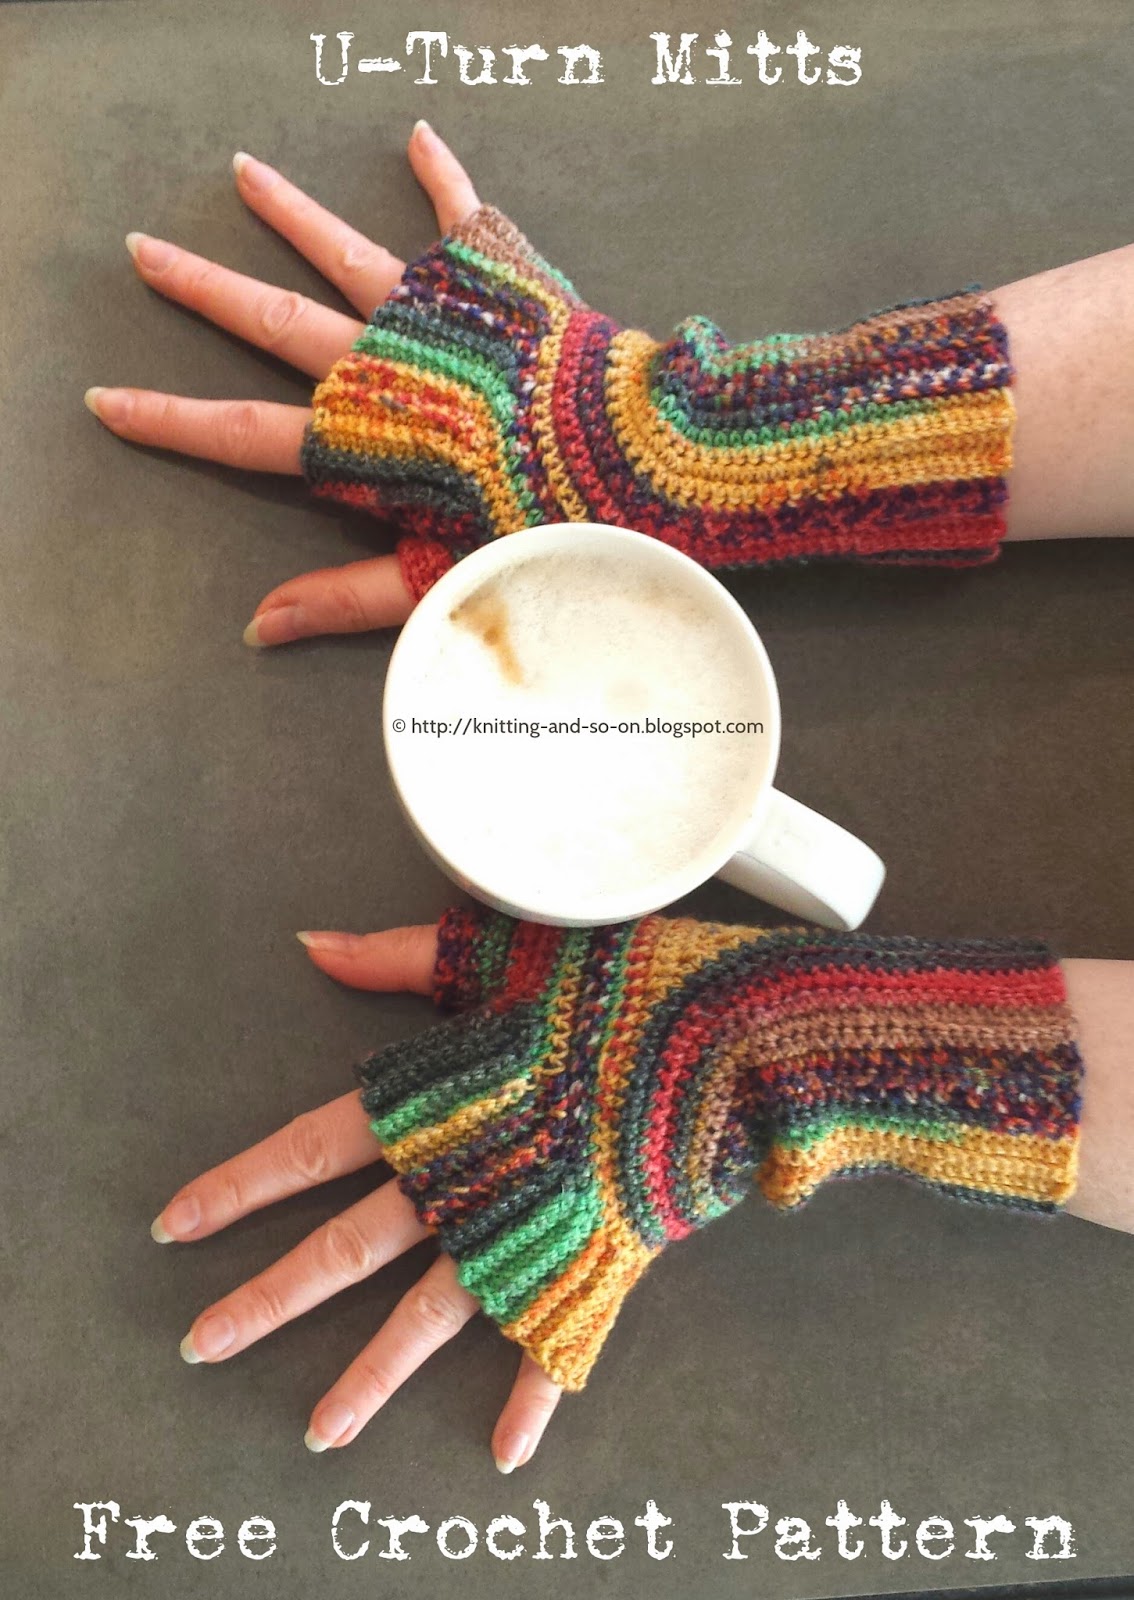
Do you like constructions a bit out of the ordinary? And are you - as me - not really fond of weaving in ends? Then this crochet pattern is made for you.
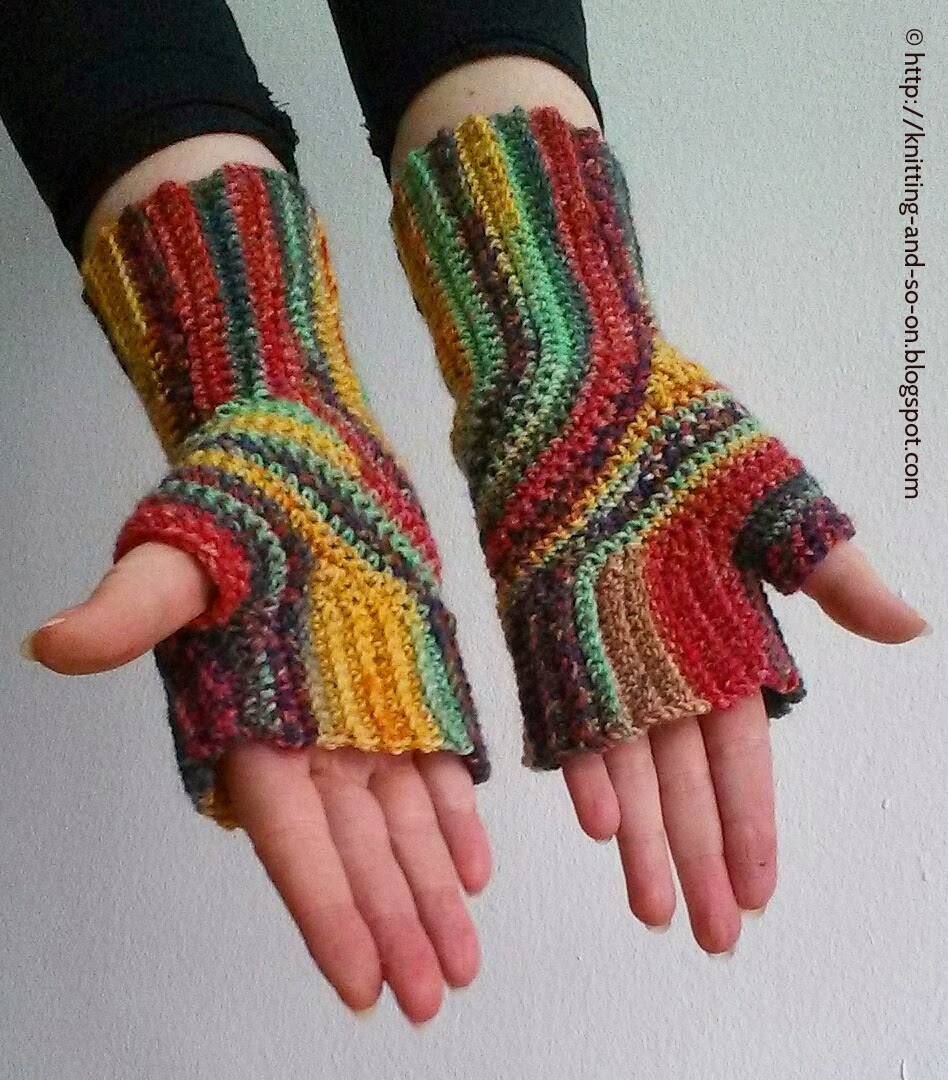
These fingerless gloves are worked in on piece, starting at the outer wrists and ending at the thumb - in an interesting construction that great to show off your variegated yarn.
A knitted version of these mitts can be found in this blogpost.

Free Crochet Pattern: U-Turn Mitts


Creative Commons License
This work by Knitting and so on is licensed under a Creative Commons Attribution-NonCommercial-ShareAlike 4.0 International License.


Other Languages
Thanks to sannemethorst (Ravelry user name) a dutch version of this pattern is available here.


Materials
  • about 40-45 grams of fingering weight yarn
  • 3mm crochet hook
  • 5 removable stitch markers (e.g. safety pins) 
  • tapestry needle to weave in ends

Abbreviations

How the half-circle is worked in this pattern?
Basically, in each RS-row, you have to increase by 4 stitches – evenly distributed whereas in WS-rows no increases occur. It is important to start the increases at different points in each row to avoid a visible edges, so I started increasing at a random stitch in the first quarter
So, if you start with 4 stitches that will form the half-circle, you start off as follows
row 1: [inc]*4
row 2 and all even-numbered rows: sc all sts
row 3: [sc inc]*4 (i.e. there is a distance of 1 st between the increases)
row 5: [inc sc*2]*4 (i.e. there is a distance of 2 sts between the increases)
row 7: [sc*2 inc sc]*4 (i.e. there is a distance of 3 sts between the increases)
row 9: [sc inc sc*4]*4 (i.e. there is a distance of 4 sts between the increases)


Gauge or what to measure beforehand
You should measure the circumference of your wrists.


Construction
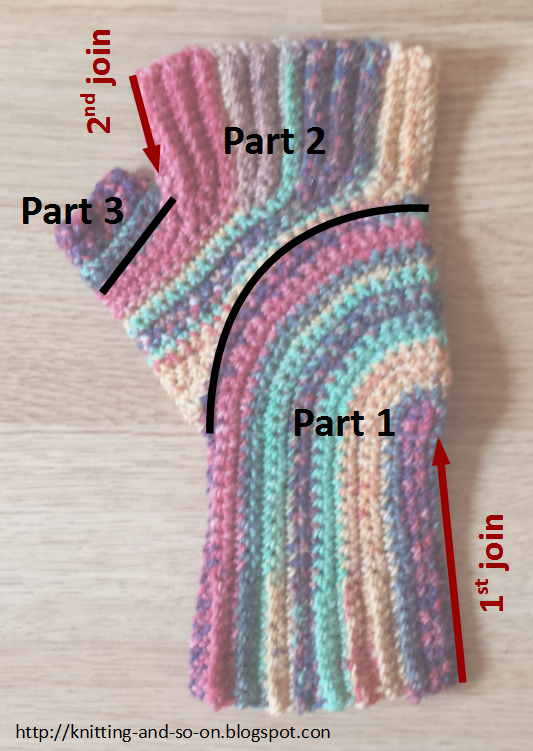
Free Crochet Pattern: U-Turn MittsThese mitts are knitted in three parts (see picture on the right):
  • Part 1 covers the wrists, it is worked with a 10 stitch wide ribbing (always working into the back loop) and a single crochet body which includes the half-circle. This part ends with a row that join the two sides together (1st join).
  • Part 2 covers the palms up to the knuckles. It is worked back and forth and consists of an upper ribbing edge (also 10 stitches that are worked into the back loop) and its main body. It also ends with a row where the two side of the upper ribbing are joined together (2nd join) - leaving a hole for the thumb. 
  • Part 3 is worked around the thumb - to create the same stitch pattern than parts 2 and 3, it is also worked back and forth with a slip stitch to join the "rounds" together.


Instructions
The pictures numbered 1 to 6 will give you and idea how the piece looks like during the stages of creation. On the pictures you see stitch markers. Strictly speaking, it’s not necessary really to use them, but it may be convenient as they provide a visual (and haptic?) aid. Therefore, I have included instruction for working with stitch markers in brackets. Since this is crochet, the marker must be carried up to the current row. I'd also advise to mark the RS (e.g. with a safety pin).

Part 1
Chain 23 (22 stitches and 1 turning-chain)
Row 1 (RS): sc 10, (place marker) sc 10, (place marker), [inc]*2, turn piece by 180 degrees and continue on the lower edge of your chain, [inc]*2, sc 10 (place marker), sc 10, (place marker), 1 turning-chain
Row 2 (WS): sctbl 10, sc 10, sc 4, place marker (="middle-marker") sc 4, sc 10, sctbl 10, 1 turning-chain
Row 3 (RS): sctbl 10, sc 10, from here to the last 20 stitches (or between the current and the next marker): increase by 4 stitches – evenly spaced out and started at a random point to form the half-circle, sc 10 sctbl 10, 1 turning chain
Row 4 (WS): sctbl 10, sc 10, sc until the last 20 stitches (or until the last but one marker), sc 10, sctbl 10, 1 turning-chain

Repeat rows 3 and 4 until the lover edge fits around your wrists - for me this was the case after row 17. After a few repeats, your piece should look similar to the one in picture 1. End with an odd-numbered row.

If you're not comfortable with the instructions above, here are the first odd-numbered rows spelled out:
Row 3 (RS):  sctbl 10, sc 10, [sc 1, inc]*4, sc 10 sctbl 10, 1 turning chain (-> 1 stitch distance between the increases)
Row 5 (RS):  sctbl 10, sc 10, [inc, sc 2]*4, sc 10 sctbl 10, 1 turning chain (-> 2 stitches distance between the increases)
Row 7 (RS):  sctbl 10, sc 10, [sc 2, inc, sc 1]*4, sc10,  sctbl10, 1 turning chain (-> 3 stitches distance between the increases)
Row 9 (RS):  sctbl 10, sc 10, [sc 1, inc, sc 3]*4, sc10, sctbl 10, 1 turning chain (-> 4 stitches distance between the increases)
Row 11 (RS):  sctbl 10, sc 10, [sc 3, inc, sc 2]*4, sc10, sctbl 10, 1 turning chain (-> 5 stitches distance between the increases)
Row 13 (RS):  sctbl 10, sc 10, [sc 1, inc, sc 5]*4, sc10,  sctbl 10, 1 turning chain (-> 6 stitches distance between the increases)
Row 15 (RS):  sctbl 10, sc 10, [sc 4, inc, sc 3]*4, sc10, sctbl 10, 1 turning chain (-> 7 stitches distance between the increases)
Row 17 (RS): sctbl 10, sc 10, [sc 7, inc, sc 1]*4, sc10, sctbl 10, 1 turning chain (-> 8 stitches distance between the increases)

Fold in half with right sides together and join the first 20 stitches, i.e. inserting your hook into the front and the back stitch at the same time (see picture 2). Remove all markers except for "middle marker".


Part 2
Turn mitt back right sides out (be sure to secure your last loop while you're doing this) and start working a small triangle on top of the joined stitches as follows (see picture 3):
Row 1 (RS-WS-RS): sc 3, turn, sc 5, turn, sc 2 (you're back at the point where you started this row)
Row 2 (RS-WS-RS): sc 5, turn, sc 9, turn, sc 4 (you're back at the point where you started this row)
Row 3 (RS-WS-RS): sc 7, turn, sc 13, turn, sc 6 (you're back at the point where you started this row)

Row 4: crochet (sc's) up to middle-marker and chain 11 (i.e. 10 + 1 turning-chain) (see picture 4)
Row 5: sc 9, dec, sc 2, turn; sc 1, sctbl 10, 1 turning-chain (and turn - this is a short row),
     sctbl 9, dec, sc 22, dec, sc to end (i.e. middle-marker), sc 1 from gap between last st and last row's chain, sc 10 into the lower edge of chain, 1 turning chain (see picture 5)
Row 6: sc 9, dec, dec, sc 1, turn; sc 1, sctbl 10, 1 turning-chain;
    sctbl 9, dec, sc 5, dec, sc to the last 17 sts, dec, sc 5, sctbl 10, 1 turning-chain
Row 7: sctbl 9, dec, sc 1, turn; sc 1, sctbl 10, 1 turning-chain;
    sctbl 9, dec, sc 1, turn; sc 1, sctbl 10, 1 turning-chain;
    sctbl 9, dec, sc to last 10 sts, sctbl 10, 1 turning-chain
Row 8: sctbl 9, dec, sc 1, turn; sc 1, sctbl 10, 1 turning-chain;
    sctbl 9, dec, sc 1, turn; sc 1, sctbl 10, 1 turning-chain;
    sctbl 9, dec, sc to last 10 sts, sctbl 10, 1 turning-chain

Repeat rows 7and 8 a few times and end with an odd-numbered row -  until there are only about 36 stitches left (2x 10 ribbing, and about 16 for the thumb hole.  For me this after two more repeats (i.e. row 13, if counted on).
If it feel as if the mitts gets too wide, you can always do a row with two decreases (similar to row 6).

You can - if necessary - now widen the upper ribbing by working 1 or 2 widening-rows as follows:
Widening-Row: sctbl 10, turning-chain"; sctbl 10, turning-chain

If you want to avoid cutting yarn, it is necessary that your last stitch is a the top of the ribbing before you start joining the sides. That's why the widening-row is actually two rows - back-and-forth

Now hold the right sides of upper ribbing together and join 10 stitches (see picture 6) - this will look and feel odd, but only for the 10 join stitches.
Turn the upper ribbing back (inside-out) making sure to secure the open loop while you're doing this - now you can start the thumb.


Part 3 (Thumb)
I decided to work the thumbs back and forth, to get a consistent "stitch pattern" with the rest of the mitt. If you don't mind the change in the stitch pattern, you can also work this part in the round.

Hold your mitt so that the upper ribbing is down, i.e. that you can work stitches into it.

Row 1: work sc's into the edge of the upper ribbing (the number depending on the number of widening-rows you worked at the end of part 2) - at least 1 (if you didn't do any widening-rows) or the number of widening-rows+1, place marker; work sc's into all sc's that are left over from part 2, work 1 sc into gap, and join with sl st to first stitch of row, turning-chain and turn
Row 2: sc 1, dec, sc to one before marker, dec, sc to end, join with sl st to first stitch of row, turning-chain and turn
Repeat row 2 until the the hole fits snugly around your thumb - I repeated until there were 16 sts.

Row 3: sc into all sts, join with sl st to last st, turning-chain (except for very last row)
Repeat until you have worked a total of 6 thumb rows.

Cut yarn and weave in ends.

Make two.


Free Crochet Pattern: U-Turn Mitts


Yarn
The yarn I used here is called Zwerger Opal Hundertwasser - colorway "Blinde Venus" (yarn link on Ravelry).

This pattern was featured at Pinbellish Link Party at Purfylle.com.

Sonntag, 15. März 2015

U-Turn Mitts in Crochet?

I haven't finished a crochet piece for some time ... or even started one, to be honest. But lately, just after I'd published the U-Turn Mitts knitting pattern, someone on Ravelry asked whether it would be possible to do this in crochet ... and that got me thinking ... and then trying it out.

When I started out, I didn't really like it - it all looked sort of crumply and the texture was "all wrong" (meaning, it wasn't the texture that you're accustomed to when you're knitting ...).

But I persevered, and it started to look better :) I even started to appreciate the "crochet look and feel" that suits pattern and yarn. So I finished one mitt and started the next one ... I guess I will write up the pattern - even though it will rather be a "knitting pattern in crochet" than a real crochet pattern.


Freitag, 7. März 2014

Serpentina Mitts

These mitts were knitted during the time of carnival. I wanted to knit something with a slightly tipsy feeling - that's why I added
random surface crochet. Serpentina is the spanish word for a paper streamer :).

They are knitted sideways in simple stockinette stitch, with some shaping added using short rows.

Adding surface crochet is a good way to mix colours, especially with variegated yarn that has a dramatic colour change – as with the mitts in the picture where the colour changes from a very light pink to a dark turquoise.


Creative Commons License
This work by Knitting and so on is licensed under a Creative Commons Attribution-NonCommercial-ShareAlike 4.0 International License.


Important: the surface crochet is applied completely at random, i.e. the pattern below will NOT give a detailed descriptions where to put the surface crochet stitches. There are, however, tips of how to achieve a similar look.

Materials
  • ca. 30 grams of variegated fingering weight yarn
  • a long 3.5mm circular needles
  • a 2.5mm or 3mm crochet hook
  • scrap yarn (for provisional cast on)
  • tapestry needle (to weave in ends)

Techiques

Instructions

Provisionally cast on 45 stitches (if you use the crochet on method, this means crochet on your stitches with scrap yarn and knit the first row with the yarn you'll use for the mitts)
R1 (RS): sl1 k to end
R2 (WS): sl1 p to end

Repeat until there are 11 rows of stockinette stitch
R12: apply random loops and curves of surface crochet on RS - while doing so, cross the complete width of the mitt, end near the last stitch of this row (i.e. where you would have ended, had you knitted the row). Now the tip of your knitting needle is on the opposite side as your yarn, therefore, slip all stitches to correct this. Put the last crochet loop on your knitting needle.

R13 (RS): sl2, pass first slipped stitch over second slipped stitch, k9, place marker, k to end
R14 (WS, thumb row):
- sl1 p to last st before marker, k1, TURN but DO NOT WRAP the yarn around the next stitch (you want to create the opening for your thumb!)
- k12, w+t, p11, k1 turn (DO NOT WRAP)
- k11 w+t, p10, k1 turn (DO NOT WRAP)
- k9 w+t, p8, k1 turn (DO NOT WRAP)
- k7 w+t, p6, k1 turn (DO NOT WRAP)
- k6 w+t, p5, k1 turn (DO NOT WRAP)
- k4 w+t, p3, k1 turn (DO NOT WRAP)
- k5 w+t, p4, k1 turn (DO NOT WRAP)
- k9 w+t, p8, k1 turn (DO NOT WRAP)
- p to end
R15 (RS): sl1, k to end
R16 (WS): sl1, p to end
continue 4 more rows of stockinette stitch
R20 (WS, shaping row to widen the upper part): sl1, p39, w+t, k20, w+t, p to end
knit 2 more rows of stockinette stitch
R24: appy surface crochet on RS (as in R12)

The photo on the right shows the mitt after row 25, i.e. the thumb has been knitted and surface crochet has been applied twice.

R25 (RS): sl1, k to end
R26 (WS): sl1, p to end
continue in stockinette 7 more rows
R30 (WS, shaping row to widen the upper part): sl1, p39, w+t, k20, w+t, p to end
R31 (RS): sl1, k to end
R32: appy surface crochet on RS (as in R12)

Repeat rows R25 to R32 two more times (or until the mitts are wide enough for your hands continue 5 more rows in in stockinette stitch.

Undo your provisional cast on and put the stitches on a second needle. Break yarn and thread yarn into a tapestry needle. Hold both needles together and start grafting in stockinette stitch.

You can knit the second mitt exactly as the first one, however, if you want them to be more symmetrical (i.e. with the graft line mirror-inverted at the same place), you have to use a slightly different set of instructions for the second mitt:
  • start "thumb row" one row later (row 14 is just a normal purl-row) and knit it as follows:
    - sl1 k to last st before marker, p1, TURN but DO NOT WRAP - p12, w+t, k11, p1 turn (DO NOT WRAP)
    - p11 w+t, k10, p1 turn (DO NOT WRAP)
    - p9 w+t, k8, p1 turn (DO NOT WRAP)
    - p7 w+t, k6, p1 turn (DO NOT WRAP)
    - p6 w+t, k5, p1 turn (DO NOT WRAP)
    - p4 w+t, k3, p1 turn (DO NOT WRAP)
    - p5 w+t, k4, p1 turn (DO NOT WRAP)
    - p9 w+t, k8, p1 turn (DO NOT WRAP)
    - k to end 
  • start "shaping rows" one row later (i.e. the row before is just a normal purl row) and knit them as follows:R21 (RS, shaping row to widen the upper part): sl1, k39, w+t, p20, w+t, k to end


How to apply the surface crochet to get a similar look to the mitts in the photo
1) When applying surface crochet try to use all of the available space – not just the rows you last knitted. This also helps to distribute the colours.
2) Furthermore try to avoid crocheting straight lines, go for loops and curves instead.
3) The first time you apply surface crochet don’t make the loops too close to one another, when you do it the next time, you can (should) go over them again and you’ll need space for it.
    4) After grafting the application of surface crochet gets more difficult (it gets cumbersome to hold the yarn within the newly formed tube and reach it with your crochet hook from the outside), therefore it’s easier to apply it before grafting. However, to get a consistent look, some surface crochet should be applied crossing the grafted row. The photo on the right shows how some surface crochet crosses the "graft line" (where turquois meets pink).
    5) Since the mitts are knitted in stockinette stitch, they tend to roll in at the side; it rolls in less if the surface crochet loops come close to the edges


    Samstag, 1. März 2014

    Entangled

    Fingerless gloves knitted sideways with lots of random surface crochet ... 

    Samstag, 30. November 2013

    Zimtstern Mitts

    Since Advent season starts this weekend, here's a "christmassy" pattern. It's called "Zimtstern" because its look reminds me of the traditional Christmas cookie of the same name (the cookies have cinnamon in them ("Zimt") and are formed as a star ("Stern") - here's a recipe (not mine!)).


    The Zimtstern mitts are started at the thumb then increased - they combine techniques used in the hexagon mitts and the circle mitts. The stitches in star shape are added as surface crochet (or surface slip stitches) in between the knitted rows. Because of the unusual construction and since surface crochet is fiddly work, the pattern is not really suited for beginners.


    Creative Commons License
    This work by Knitting and so on is licensed under a Creative Commons Attribution-NonCommercial-ShareAlike 4.0 International License.


    German / Deutsch: Eine deutsche Version dieser Anleitung wurde von Bernadette von Törtchens Blog erstellt. Vielen lieben Dank. Details dazu in diesem Blogpost.

    Danish / Dansk: A danish translation was written by MarianneHo (Ravelry name) and is available here. Hjertelig tak


    Construction

    These mitts are knitted in 5 parts: they are started at the thumb and then "grow" in a hexagon (knitted in round and refered to as part 1 and 2 in the pattern),  a bind-off of one side of the hexagon creates part of the upper edge the mitts; they then grow bigger in an open hexagon until the edge of the hand is reached (that's part 3 - knitted flat). During part 2 and 3 rows of surface crochet slip stitches are added to create the star pattern. A three needle bind-off creates a seam along the edge of the hand. Now the lower edge of the mitt is lopsided. To even it out a series of short rows is knitted that also include some decreases (part 4 - knitted in the round). With an even lower edge the shaft is lengthened a bit and ribbing is added (part 5).

    As with the patterns mentioned above, these are knitted in one piece, i.e. no yarn is cut which minimizes the weaving in of ends.

    Materials
    • about 30 grams of fingering weight yarn - preferably variegated - the yarn I used is called Corolli by Schulana (link to the yarn's Ravelry page)
    • 3mm dpns (even if you prefer the magic loop technique you will need a 3rd needle for a three-needle bind-off)
    • 2.5mm crochet hook
    • 6 stitch markers

    Gauge / Size
    • 7 sts and 9 rows = 2cm x 2cm
    • the finished mitt is about 20 cm high (highest point) with 15 cm circumference at the lower edge (ribbing) and about 14 cm at the top

    Techniques and Non-Standard Abbreviations
    • Surface Crochet or surface slip stitches: Using a crochet hook, you make slip stitches through your knitted fabric. The photo on the right shows how it looks when adding surface slip stitches to a knitted fabric. Here's a video and here's a tutorial that both show surface crochet.

    • Three-Needle Bind-Off: http://www.youtube.com/watch?v=wpJUrCX52DU
    • Short Rows in the Round (and t+ky) I learned short rows in the round with this helpful video: http://www.youtube.com/watch?v=SCgycxLce94; however, I ended up doing the pick-ups differently.

      "Wrapping" of the Stitches
      Basically, when you're on the RS, you do wrap the working yarn around the next stitch (from front to back) and then turn your work, i.e. the "normal" wrap and turn (w+t).
      When you are on the wrong side you slip the last stitch, turn your work with the yarn in front, wrap the yarn around the RIGHT needle and knit the slipped stitch. That creates a sort of double-stitch - one half of it has to be knitted together with the stitch in front when you're picking up the stitches. In the pattern, throughout the pattern I will call this stitch, t+ky (short for "turn and knit w/yarn-over").

      Picking-up
      When encountering a w+t, I turned the wrapped stitch on the needle, picked up the wrap from the front and knitted the stitch and the wrap together through the back of the loop.
      When reaching the stitch BEFORE the “double-stitch”, I turned this stitch and knitted it together with the yo through the back of the loop.
    • “Make One Purl”-Stitches (a video that shows these stitches):
      • mk1p right-leaning: make one purl stitch by inserting the needle from the back in the bar between the two stitches and purl
      • mk1p left-leaning: make one purl stitch by inserting the needle from the back in the bar between the two stitches and purl through the back of the loop

    Instructions

    Part I - Thumb

    CO18
    Join in round
    Rounds 1-10: *k1tbl p2 (repeat from * till end of round)

    Round 11: *k1tbl p1, mk1p, p1 (repeat from * till end of round)
    Rounds 12-15: *k1tbl p1 (repeat from * till end of round)
    Round 16: *place marker, k1tbl p1 k1tbl p1 (repeat from * till end of round)

    (You have 24 sts on your needles)

    Part II - Increases in the Round

    Round 0: k
    Round 1: *slip marker, k1, mk1l, k to marker; mk1r  (repeat from * till end of round) (after this round you have increased by 12 sts)
    Round 2: k
    Round 3: k
    Round 4: add surface crochet, put the loop from the last stitch on the knitting needle
    Round 5: pass loop from crochet hook over the first stitch; knit first stitch; k to end, k to end

    Repeat rounds 1-5 a total of 4 times

    Then repeat them once more but add a "mini-ribbing" (k1 p1) and bind-off in the last sixth of the hexagon, i.e.:


    Round 21: *slip marker, k1, mk1l, k to marker; mk1r  (repeat from * till end of round)
    Round 22: k
    Round 23: k until the last marker k1, *k1 p1 (repeat from *) until last stitch, k1
    Round 24: apply surface crochet, put the loop from the last stitch on the knitting needle
    Round 25: pass loop from crochet hook over the first stitch; knit first stitch; k until the last marker binding off in pattern (i.e. k1, *k1 p1 (repeat from *) until last stitch, k1 - this creates the upper bind-off.

    (Now you have 70 sts (84 - 14 BO sts) on your needles.)

    The diagram shows where to insert the surface crochet stitches during part 2.


     When adding surface crochet,
    • use your working yarn to add slip stitches to the knitted surface, i.e. insert the crochet hook into the first live stitch on the needle and pull the loop, then insert the crochet hook into the stitch below the second stitch and make a slip stitch (see photo), insert the crochet hook into the second stitch below the 3rd stitch on the needle and make a slip stitch; 
    • continue slip stitches "one to the left, one down" until you have reached the middle between two markers, 
    • then go up again, i.e. make a slip stitch into the stitch one to the left and one above; continue until you have reached a live stitch on the needle - this should be a stitch just after a marker
    • when you have pulled a slip stitch through the stitch below the last stitch of the round, put the loop back on the left knitting needle and pass it over the first stitch of the round.
    • make sure to keep your slip stitches loose, i.e. don't pull them too tight, in order to keep the fabric stretchy
    • insert your knitting needle between the legs of the stitch - except when you are at the upper edge (i.e. life knit stitches on your needle), here you draw the slip stitch through the life stitch.
    The diagram shows where to put the slip stitches - it shows one sixth of a round or the space between two stitch markers.


    Part III - Increases knitted flat

    Complete the BO by slipping the last stitch over the first stitch and continue the pattern flat.

    Row 1 (RS): * k to marker mk1r slip marker, k1, mk1l  (repeat from * until the last marker), k to end (-> after this row you have increased by 8 stitches)
    Row 2 (WS): p
    Row 3 (RS): k
    Row 4: apply surface crochet (on RS), put the loop from the last stitch on the knitting needle
    Row 5 (RS): k2tog (loop from crochet hook and first stitch on knitting needle); k to end

    Row 6 (WS): * p to 1 st before marker, mk1p left-leaning, p1, slip marker, make1p right-leaning (repeat from * until last marker), p to end
    Row 7 (RS): k
    Row 8 (WS): p
    Row 9 : apply surface crochet (on RS), put the loop from the last stitch on the knitting needle
    Row 10 (WS): p2tog  (loop from crochet hook and first stitch on knitting needle); p to end

    Repeat rows 1-7 once again.
    (You should now have 102 sts on your needles; 4 times increases of 8 sts per row (4*8 = 32), added to the 70 already on the needles: 70+32 = 102)

    When you're applying the surface crochet in part 3, you don't start through the 1st live stitch on the needles but below (see picture). In the first two instances (rows 4 and 9), this is not a problem because you only need to insert your crochet hook one or two stitches below, i.e. you don't need to draw the yarn too far. Afterwards (row 14) you can bring your yarn down to the starting point of the surface crochet by doing one surface slip stitch on the WS of the mitts.
    On the diagram below you can see that even though you have finished row 3 for the 2nd time, the first crochet slip stitch would be 3 stitches below the first live stitch.


    Hold the RS togehter and do a three-needle bind-off 26 stitches. Place a marker ("end-marker") on the back needle and put the last stitch on the back needle: then turn the mitts inside out, so that the RS shows.


    Part 4 - Short rows to even out the shaft

    As you can see in the photo, the lower edge of the mitts is now lopsided. This can be evened out by knitting a wedge of short rows.

    This wedge is highest around end-marker and gets flatter towards the sides, i.e. short rows are knitted around the end-marker that get shorter by 2 stitches each row. At the same time decreases are made around the end-marker in order to finish with 45 stitches before part 5.

    After the three-needle BO you have 51 sts on your needles (102-26-26+1, the +1 is the one stitch is left after the BO that is placed on the back needle).

    Row 1: (RS) mk1, k25 w+t
       (WS) sl1, p21 p2tog p1, slip marker, mk1p, p23 t+ky
       (RS) k to 3 before end marker, ssk
    (-> increases and decreases cancel each other out in this row (still 51 sts), the mk1-stitches are used to avoid holes between the stitch left over from the three-needle-BO and the next stitch on either side)
    Row 2: (RS) k22 w+t
       (WS) sl1 p19 p2tog p1, slip marker, p2togtbl, p20 t+ky
       (RS) k2 to end marker (-> decrease by 2 sts, 49 sts)
    Row 3: (RS) k19 w+t
       (WS) sl1 p16 p2tog p1, slip marker, p2togtbl, p17 t+ky
       (RS) k2 to end marker (-> decrease by 2 sts, 47 sts)
    Row 4: (RS) k16 w+t
       (WS) sl1 p13 p2tog p1, slip marker, p2togtbl, p14 t+ky
       (RS) k2 to end marker (-> decrease by 2 sts => there should be 45 stitches on your needles, however, they may be difficult to count because of the double stitches created with the short rows.
    Row 5: (RS): k13 w+t
       (WS): sl1 p to end marker, p12 t+ky
       (RS): k to end marker
    Row 6:  (RS): k11 w+t
       (WS): sl1 p to end marker, p10 t+ky
       (RS): k to end marker
    Row 7: (RS): k9 w+t
       (WS): sl1 p to end marker, p8 t+ky
       (RS): k to end marker
    Row 8: (RS): k7 w+t
       (WS): sl1 p to end marker, p6 t+ky
       (RS): k to end marker
    Row 9: (RS): k5 w+t
       (WS): sl1 p to end marker, p4 t+ky
       (RS): k to end marker


    Knit one round picking up all stitches.

    Part 5 - Lengthen the shaft and ribbing
    Knit 5 more rounds.
    Then do 12 rounds of k1tbl, p2-ribbing.
    Bind off (loosely) in pattern (or use your favourite stretchy bind-off).


    Montag, 10. Juni 2013

    Hyperbolic Crochet

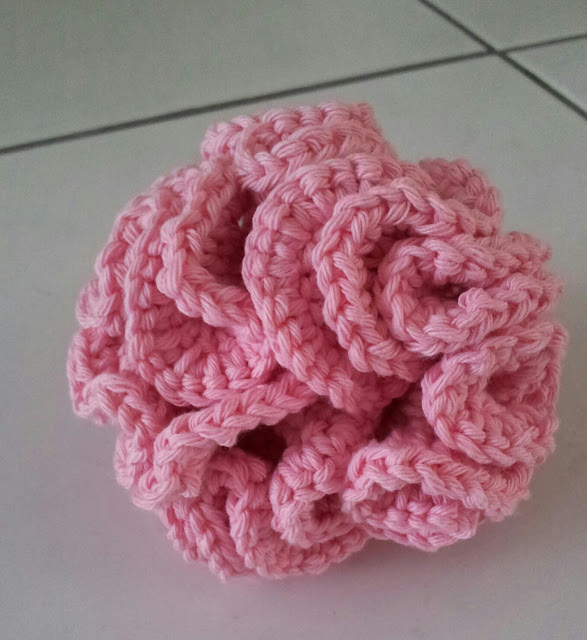
    I love the idea that some fancy mathematical ideas can best be explained with a crocheted piece of fabric - hyperbolic planes. Here's a video that explains the idea, an interview and here the paper.


    Plus, it makes a great bathroom sponge/scrubby :-) 

    How to make it

    If you want to crochet such a sponge, it's really easy to do: you only need some leftover cotton yarn and the appropriate crochet hook.

    Do a magic ring with 6 single crochet stitches.
    After that continue to crochet 2 sc into each single crochet (i.e. doubling the number of stitches every round) ... until it's big enough or you run out of yarn.

    Enjoy!

    Dienstag, 19. Februar 2013

    So cute

    Seen in a bookstore in Shibuya.

    Dienstag, 15. Mai 2012

    Japanese Pattern Books

    ... seen in Paris - quite appropriate ;-)

    Sonntag, 29. April 2012

    Tarn Scrunchy

    If there's anything I should have lying around, it's scrunchies. Unfortunately, I seem to "distribute" them all over the place, so that I usually don't find any of them. That's why I buy more and more of them - only to discover later that there were some in the pocket of a winter coat or in a bag that I hadn't used for ages.
    By chance I found on ravelry a pattern for one ... before, it had never occured to me that this could be a knitting or crochet project.

    So, this weekend I went to the supermarket and bought cheap hair rubber bands.

    First I tried with thin cotton yarn - and it looked just fine. Then I thought that this might be something to use my tarn for. (How to make tarn: here.)

    It took me several times, to get it right. Since tarn is quite thick, it was necessary to use it in a way that the scrunchy wouldn't get to heavy. For example, loops of chain stitches were just to thick and unelastic.


    Creative Commons License
    This work by Knitting and so on is licensed under a Creative Commons Attribution-NonCommercial-ShareAlike 3.0 Unported License.


    Here's how I did it ...

    Material:
    • less then 1 t-shirt's worth of tarn
    • one elastic hair band
    • 5mm crochet hook
    Instructions:
    1. to start do a slip stitch and fix yarn to hair band with another slip stitch
    2. wrap yarn twice around your index finger, insert hook into these loops, yarn over and pull through, but leave the loops on your finger (you have now 2 loops on your hook)
    3. again wrap yarn twice around your index finger insert hook into these loops, yarn over and pull through, but leave the loops on your finger (you have now 3 loops on your hook)
    4. yarn over and pull yarn through all three loops on your hook
    5. slip stitch around the elastic hair band and remove the loops from your index finger
    6. repeat steps 2 to 5 round
    7. join with slip stitch and weave in ends

    Sonntag, 8. April 2012

    Falling Blossoms Scarf

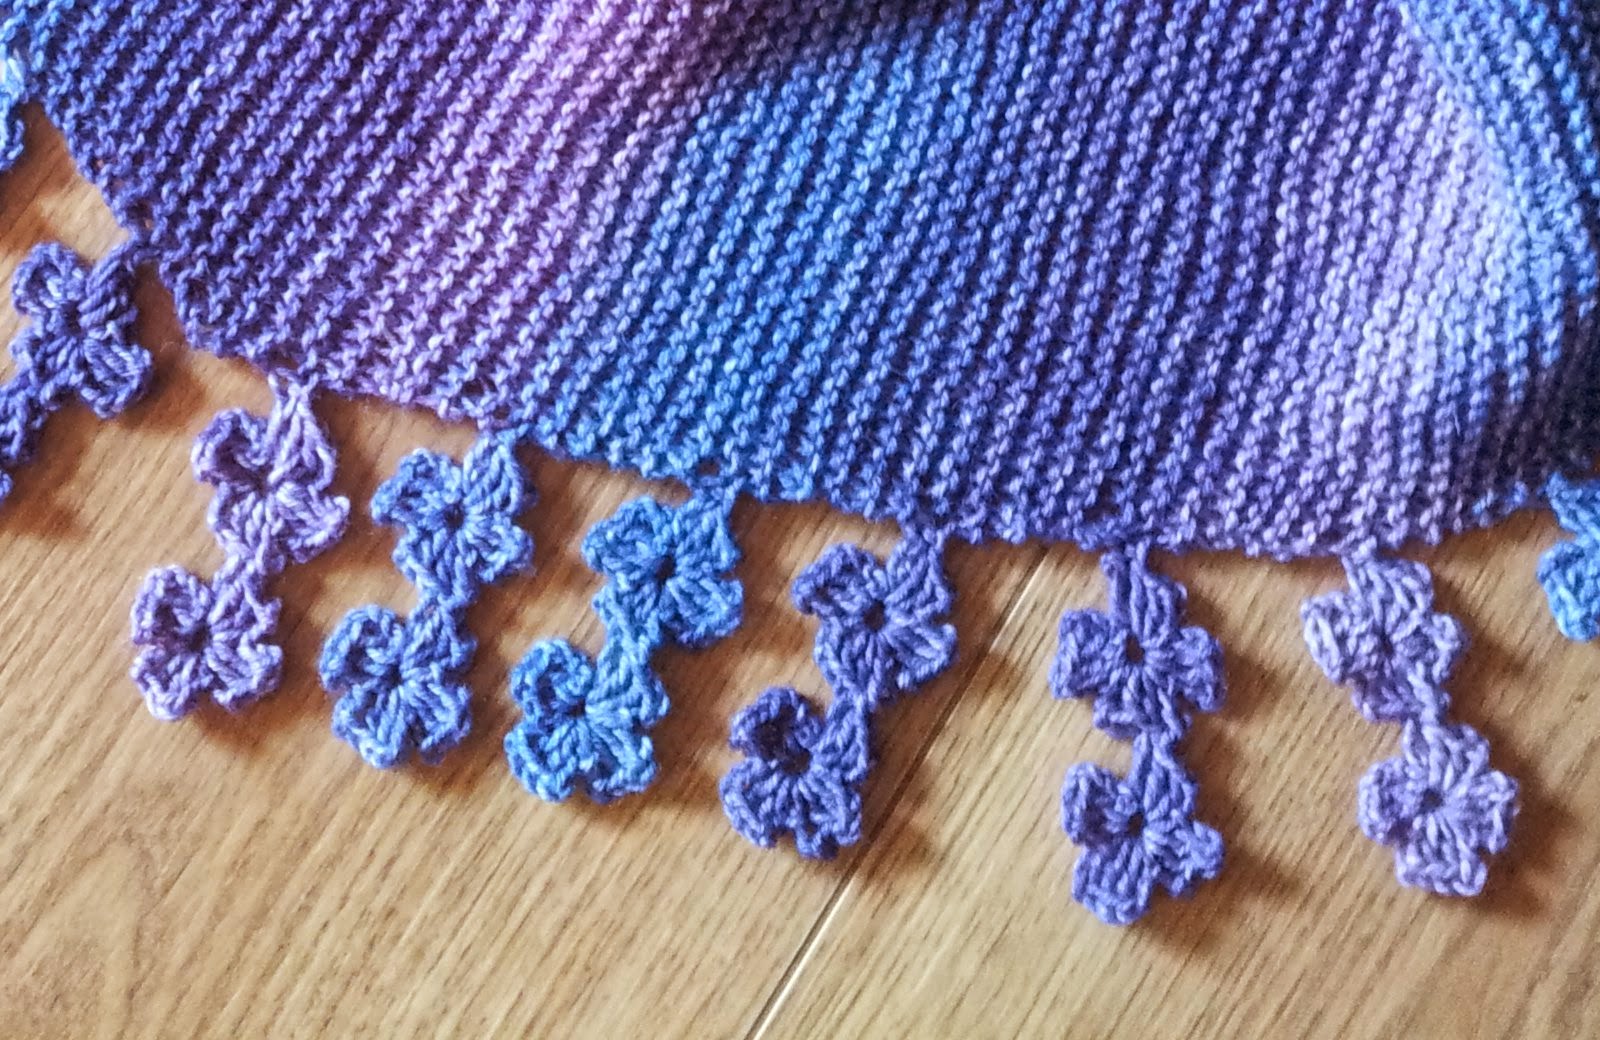
    Free Pattern: Falling Blossoms Scarf (Knitting/Crochet Combo); http://knitting-and-so-on.blogspot.com This scarf is the ideal spring project for "bi-craftuals" :)
    You can combine your knitting and crocheting skills into one special garment.

    The scarf is knitted from side to side with crochet flowers added at the beginning of every 12th row by taking the last stitch off the needle and using it as a chain stitch to crochet from. After two flowers have been crocheted the stitch is slipped back on the knitting needle and knitting is continued in a normal way.

    A photo tutorial on how to crochet the flowers can be found in this blog post.


    Creative Commons License
    Falling Blossoms Scarf by Knitting and so on is licensed under a Creative Commons Attribution-NonCommercial-ShareAlike 3.0 Unported License.

    Print Friendly and PDF


    Materials:
    • 3.5 mm knitting needles (i.e. knitting needles that were slightly bigger than the yarn called for)
    • 2.5 mm crochet hook
    • ca. 100 grams fingering weight yarn (I used Zwerger Opal Surprise, but any other fingering weight with a nice color change will do)
    Free Knitting/Crochet Pattern: Falling Blossoms Scarf


    How to crochet the flowers:
    At the beginning of a row use the crochet hook to take the first stitch from your knitting needle and start to crochet the flowers - the numbers in square brackets are references to the chart.
    • ch 7, sl st in 4th chain to form a small loop (the first flower will be crocheted around this loop) [1]
    • to form the first petal ch 3, dc 2 in loop, ch 3 and sl st in loop, 
    • ch 3, dc 2 in loop (this starts the second petal of the first flower)
    • ch 7, sl st in 4th chain to form a small loop (the second flower will be crocheted around this loop) [2]
    • ch 3, dc 2 in loop, ch 3, sl st in loop (first petal)
    • ch 3, dc 2 in loop, ch 3, sl st in loop (second petal) 
    • ch 3, dc 2 in loop, ch 3, sl st in loop (third petal) 
    • ch 3, dc 2 in loop, sl st in the top of the last dc of the second petal of the first flower [3]
    • ch 3, sl st in loop of first flower (the second petal of the first flower is now finished)
    • ch 3, dc 2 in loop, ch 3, sl st in loop (third petal)  
    • ch 3, dc 2 in loop, sl st in the first chain [4]
    • put stitch back on knitting needle and continue pattern
    I have written a short tutorial (with photos) on how to crochet the flowers - here's the link.


    Instructions:
    CO2
    knit 2 rows

    Section 1 - Set-up rows
    Row 1: kfb, k to end
    Row 2 - 6: k
    repeat these rows a total of 8 times (you have 10 sts on your needles)

    Section 2 - Increase rows
    Row 1: kfb, k to end
    Row 2: k
    Row 3: make flower and then k to end
    Row 4-6: k
    Row 7: kfb, k to end
    Row 8-12: k
    Repeat these rows a total of 19 times and once more knit rows 1-10 (you have 50 sts on your needles)


    Section 3 - Decrease rows
    Row 1: k
    Row 2: k until the last two stitches k2tog
    Row 3-4: k
    Row 5: make flower and then k to end
    Row 6-7: k
    Row 8: k until the last two stitches k2tog
    Row 9-12: k
    Repeat these rows a total of 20 time

    Section 4 - Finishing rows
    Row 1: k
    Row 2: k until the last two stitches k2tog
    Row 3-6: k
    Repeat these rows 7 times (there are only 3 sts left on your needles), then
    knit one row,
    knit and k2tog,
    knit one row
    and bind off the last two stitches.

    Weave in ends and block - making sure to block the flowers separately.

    Free Knitting/Crochet Pattern: Falling Blossoms Scarf


    This post was featured on The Philosopher's Wife: Yarn Fanatic Party #31, Pinbellish Link Party No. 40 at Purfylle.com. and at Moogly's Hookin' up on Hump Day Link Party No. 120. Thank you!

    The Philosopher's Wife