Posts mit dem Label Fingerless Gloves werden angezeigt. Alle Posts anzeigen

Mittwoch, 4. April 2018

Snowflake Mitts

When I recently posted an old picture of my Bat Mitts on social media, a friend commented and asked for something similar - in turquoise. And since I don't like to repeat myself, I wanted to design something new - plus I only found turquoise yarn in Sports weight, so I had to use this.
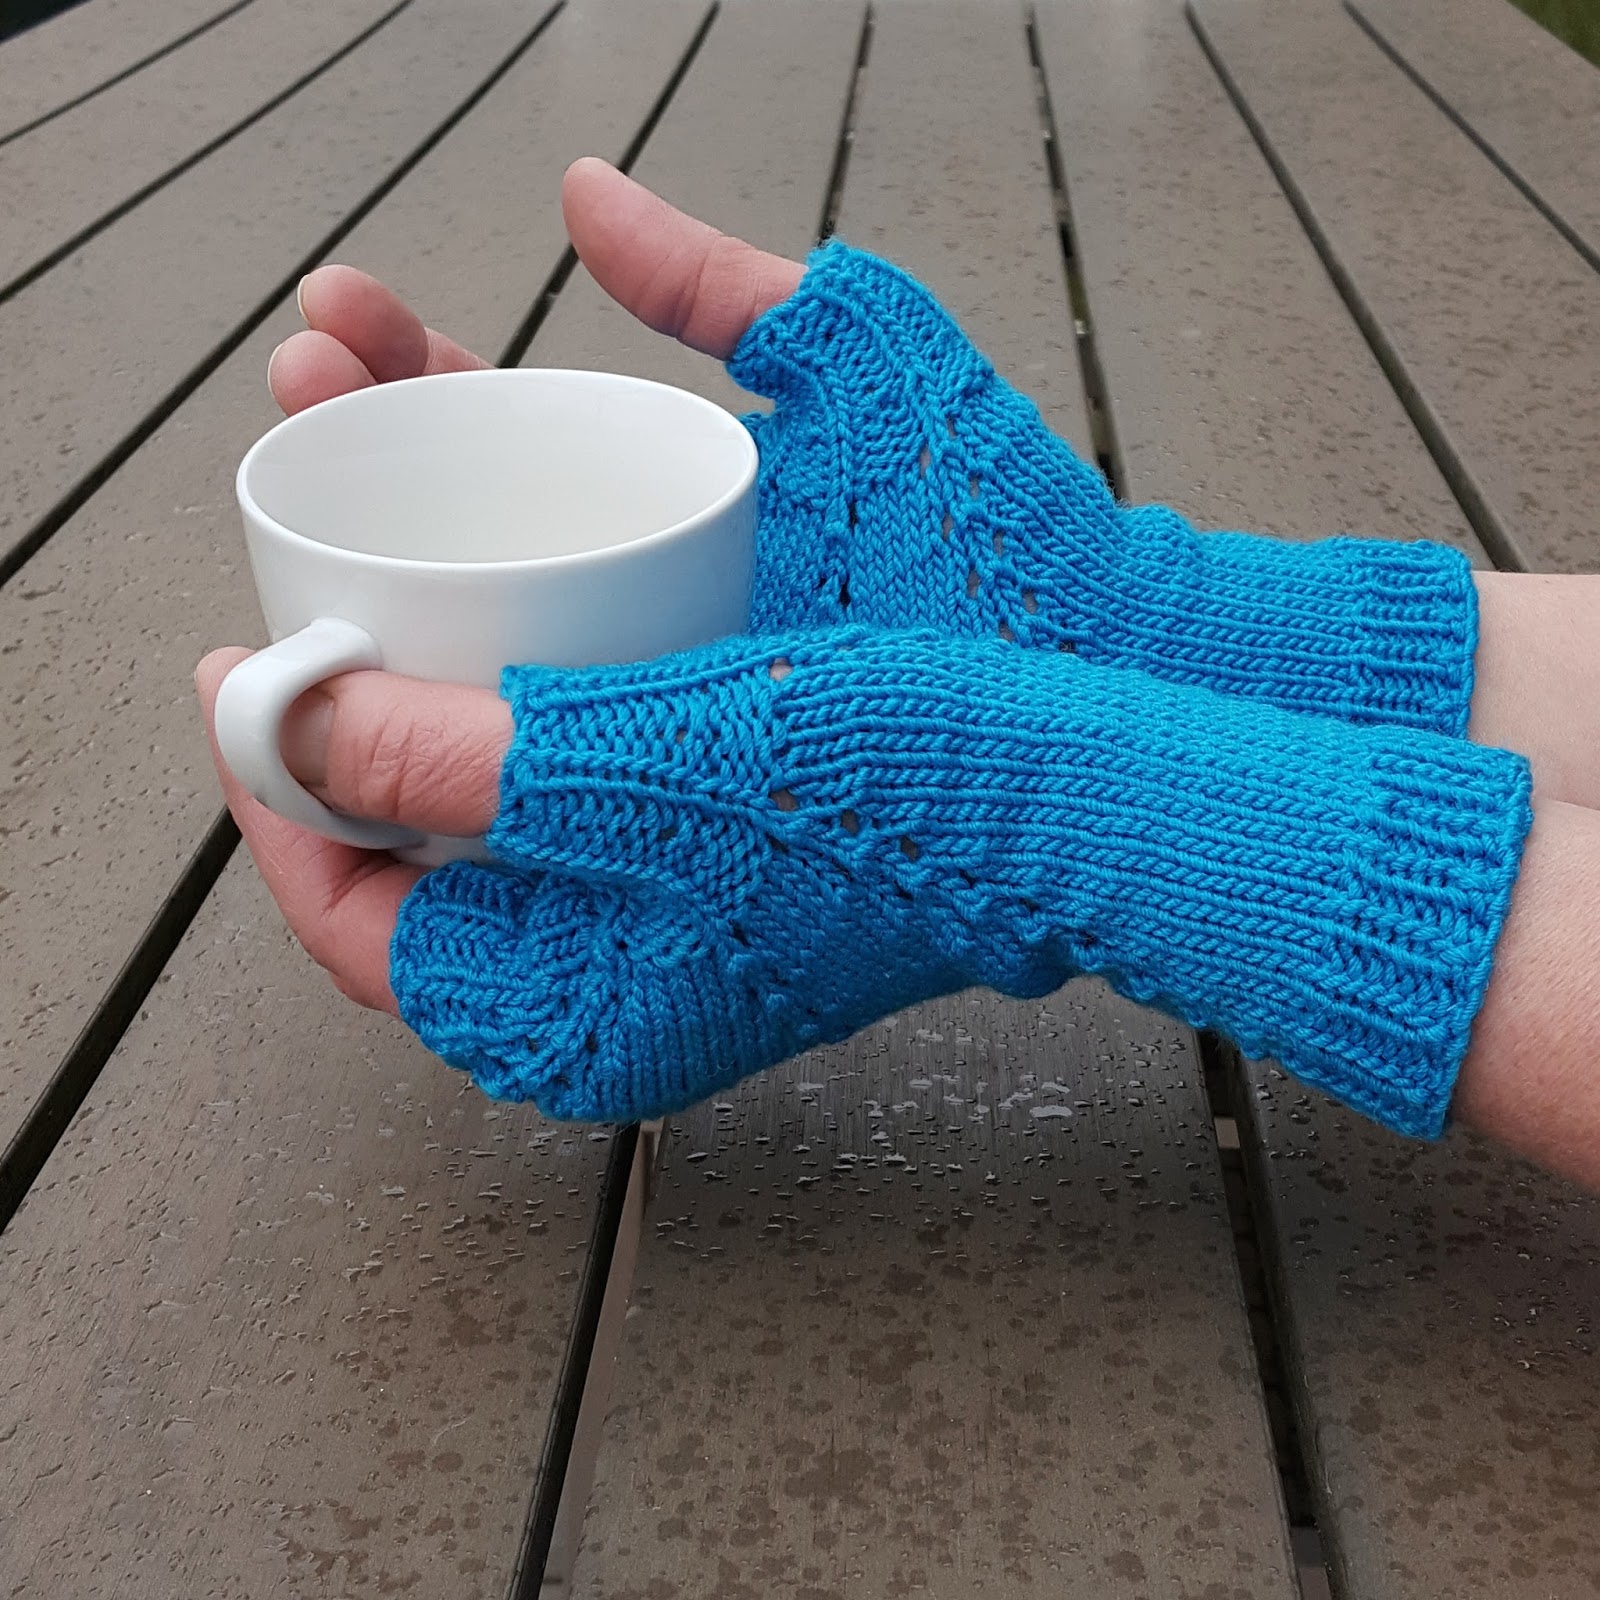
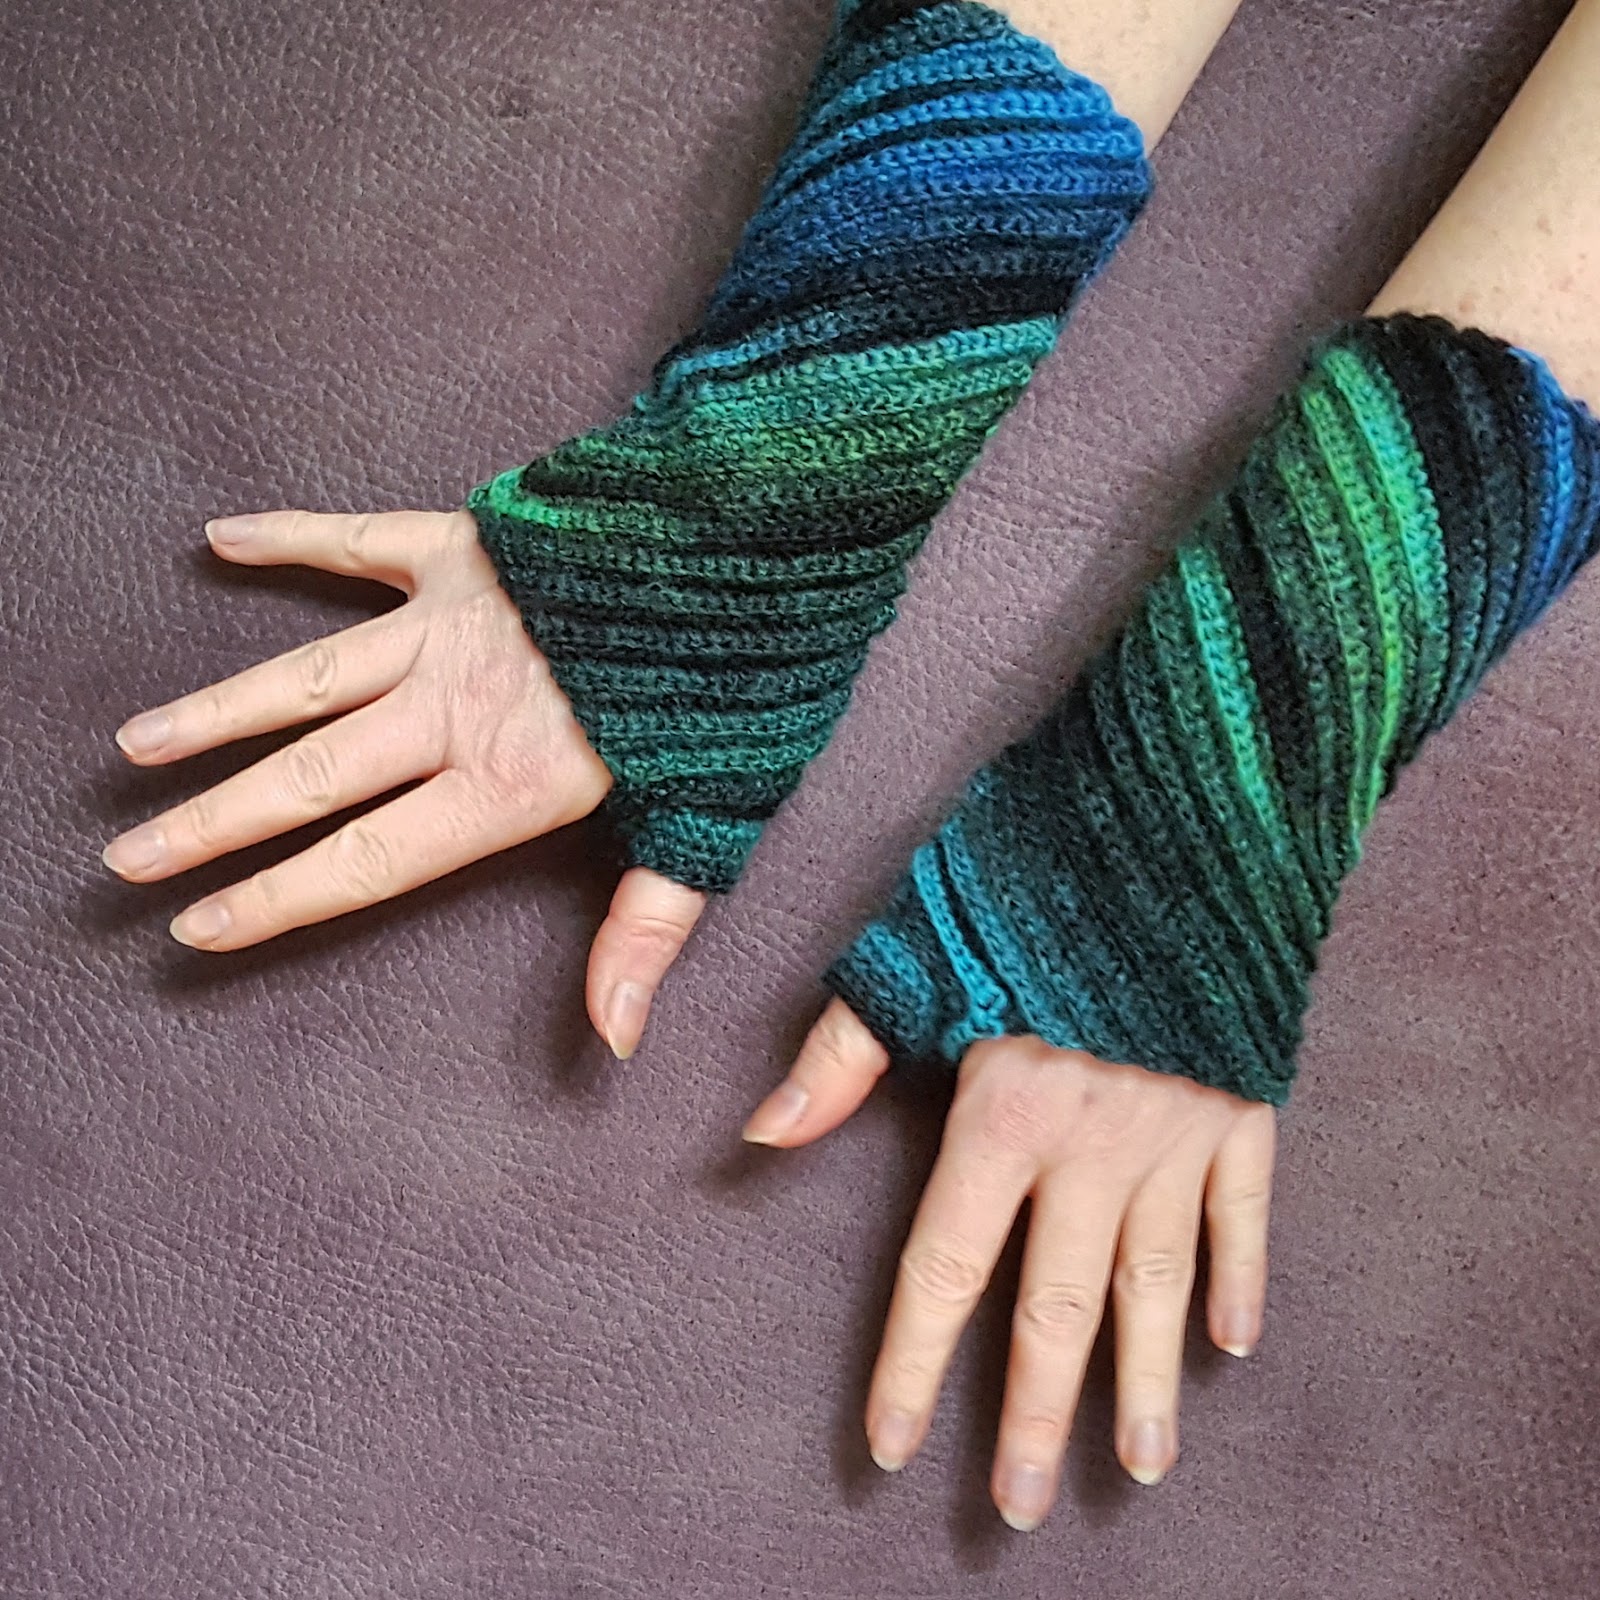
I like fingerless gloves that are knitted in one piece - so that you only have to weave in 2 ends per glove. That's why I think it's a good idea to start fingerless gloves at the thumb ... there are already a few patterns like this available on my blog (e.g. Circle Mitts or Zimtsterne Mitts). However, these mitts are the first ones that I knitted in Sports weight yarn.
The pattern is written for one size only, but there are explanations on how to adjust the pattern to your size.


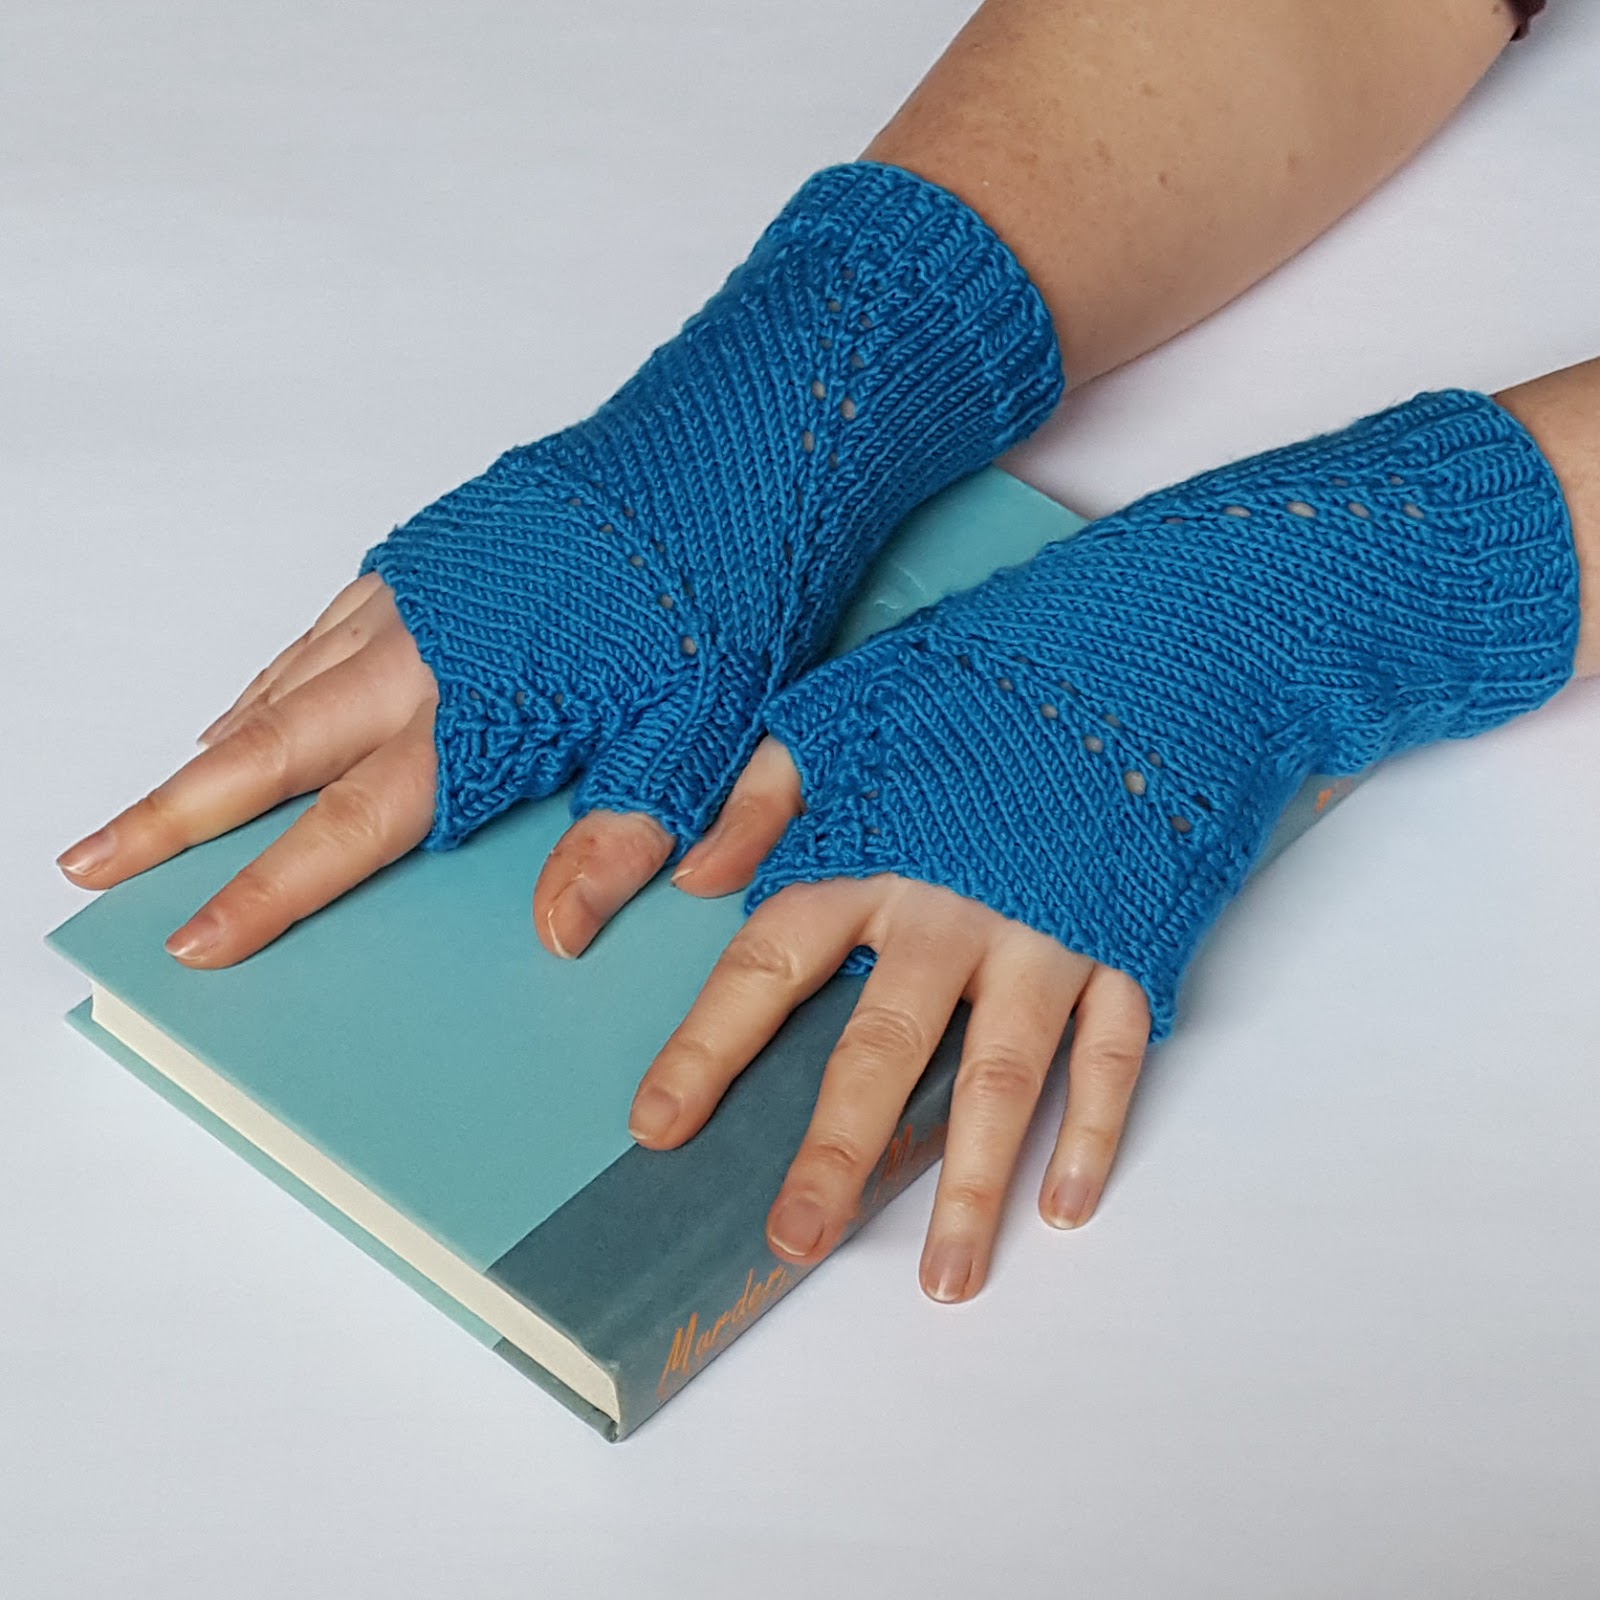
As to the name, in the early stages of knitting them, the pattern looked a bit like a snowflake to me. If you look at illustration 1 below, you might see it, too.


Creative Commons License
This work by Knitting and so on is licensed under a Creative Commons Attribution-NonCommercial-ShareAlike 4.0 International License.


Materials
  • about 45 grams of Sports weight yarn
  • 3.25mm circular needles
  • a third needle of about the same size for the three-needle BO
  • 6 stitch markers
  • a tapestry needle to weave in ends


Techniques and Abbreviations
  • Three-Needle Bind-Off: https://youtu.be/Ph93jWSzTa0
  • Short Rows in the Round (and t+ky) I learned short rows in the round with this helpful video: http://www.youtube.com/watch?v=SCgycxLce94; however, I ended up doing the pick-ups differently.
    - "Wrapping" of the StitchesBasically, when you're on the RS, you do wrap the working yarn around the next stitch (from front to back) and then turn your work, i.e. the "normal" wrap and turn (w+t).
    When you are on the WS you slip the last stitch, turn your work with the yarn in front, wrap the yarn around the RIGHT needle and knit the slipped stitch. That creates a sort of double-stitch - one half of it has to be knitted together with the stitch in front when you're picking up the stitches. In the pattern, throughout the pattern I will call this stitch, t+ky (short for "turn and knit w/yarn-over").
    - Picking-up When encountering a w+t, I turned the wrapped stitch on the needle, picked up the wrap from the front and knitted the stitch and the wrap together through the back of the loop.
    When reaching the stitch BEFORE the “double-stitch”, I turned this stitch and knitted it together with the yo through the back of the loop. 
  • Picking up stitches from a gap or ditch: After the three needle bind-off there is one left over stitch which tends to have a distance to the stitches next to it. To avoid holes, I usually pick up one stitch from the gap and decrease over the new stitch in the following row (see also this YouTube video where it is shown on the example of a thumb gusset). In my experience (or the way I knit :) it's even better to pick up two stitches and knit decreases over them in the following two rows.
  • mk1p: make one purl stitch; https://youtu.be/7WLQ9qXa88k (YouTube video by Knit Purl Hunter - you can use one the first two method shown there)
  • Stretchy Bind-Off: see this YouTube-video by Knitting Pipeline.

Gauge and Measurements
The finished mitts - as knitted by me - measure about 18 cm in height (at the highest point) and 14 cm at the lowest point. The circumference at the wrist is about 16 cm.
In stockinette stitch 13 sts gve 5 cm in width, and 20 rows gave 5 cm height.

General Construction
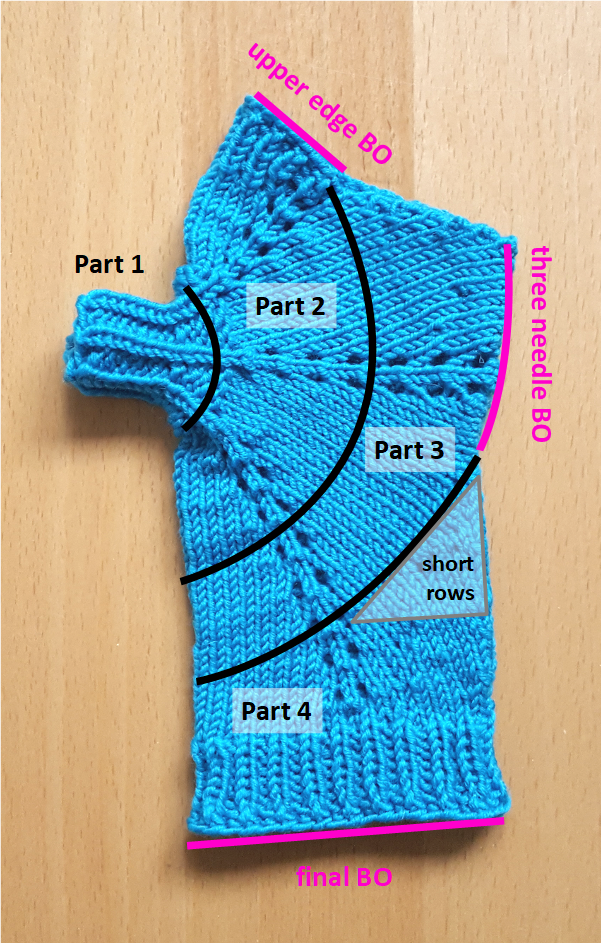
These mitts are knitted in four parts. Part 1 - the thumb - is knitted in the round. Part 2 - the first part of the palm - is also knitted in the round, at its end there is a small ribbing knitted on top to make sure that the BO at the upper edge doesn't curl in. Part 3 is knitted flat. In order to keep the upper edge straight(-ish) there are a few decreases at the beginning and end of some rows. This part ends with a three-needle BO. Part 4 - the cuff - starts with a few short rows to even out the height differences. It is knitted in the round and ends with a few rounds of ribbing.


Instructions

Part 1
CO18 sts and join in round
Rounds 1 to 9: * p1, k1, p1 repeat from * to end
Round 10: * p1, k1, p1, mk1p repeat from * to end
Rounds 11 to 13: * p1, k1, p2 repeat from * to end
Round 14: * p1, place marker, k1, p2 repeat from * to end - by the end of the round you have placed 6 markers

Part 2
Round 1: * k to marker, yo, slip marker, k1, yo repeat from * to end
Round 2 to 4: k all
Repeat 1 to 4 twice more - your piece should look similar to illustration 1
Round 13 = Round 1
Round 14 = Round 2
From now on the small k1p1-ribbing will be added to the pattern - between the 5th and 6th marker.
Round 15: * k to marker, slip marker, repeat from * three more times - now there are two markers left to the end of the round - k to marker, slip marker,  # k1, p1 repeat from # to 1 bef marker, k1, slip marker, k to end
Round 16 = Round 15
Round 17: * k to marker, yo, slip marker, k1, yo repeat from * three more times - now there are two markers left to the end of the round - k to marker, yo, slip marker,  k1, yo, # k1, p1 repeat from # to 1 bef marker, k1, yo, slip marker, k1, yo, k to end
Round 18: * k to marker, slip marker, repeat from * three more times - now there are two markers left to the end of the round - k to 1 bef, marker, p1, slip marker,  # k1, p1 repeat from # to marker, k1, slip marker, p1, k to end
Round 19 = Round 18
Round 20: * k to marker, slip marker, repeat from * three more times - now there are two markers left to the end of the round - k to 1 bef, marker, BO17 sts in p1k1 pattern (removing the last marker) - you are now one stitch beyond the last marker - k to end, DON'T TURN!

Part 3
Row 1 (RS): * k to marker, yo, slip marker, k1, yo, repeat from * three more times, k to end
Row 2 (WS): p2togtbl, p9, w+t,
     (RS) k to end, turn,
     (WS) p2togtbl, p to last 2 sts, p2tog, turn
     (RS) k10, w+t, p to last 2 sts, p2tog
Row 3 (RS): k all
Row 4 (WS): p2togtbl, p5, w+t,
     (RS) k to end, turn,
     (WS) p2togtbl, p to last 2 sts, p2tog, turn
     (RS) k7, w+t, p to last 2 sts, p2tog
Row 5 (RS): * k to marker, yo, slip marker, k1, yo, repeat from * three more times, k to end
Row 6 (WS): p2togtbl, p7, w+t,
     (RS) k to end, turn,
     (WS) p2togtbl, p to last 2 sts, p2tog, turn
     (RS) k6, w+t, p to last 2 sts, p2tog
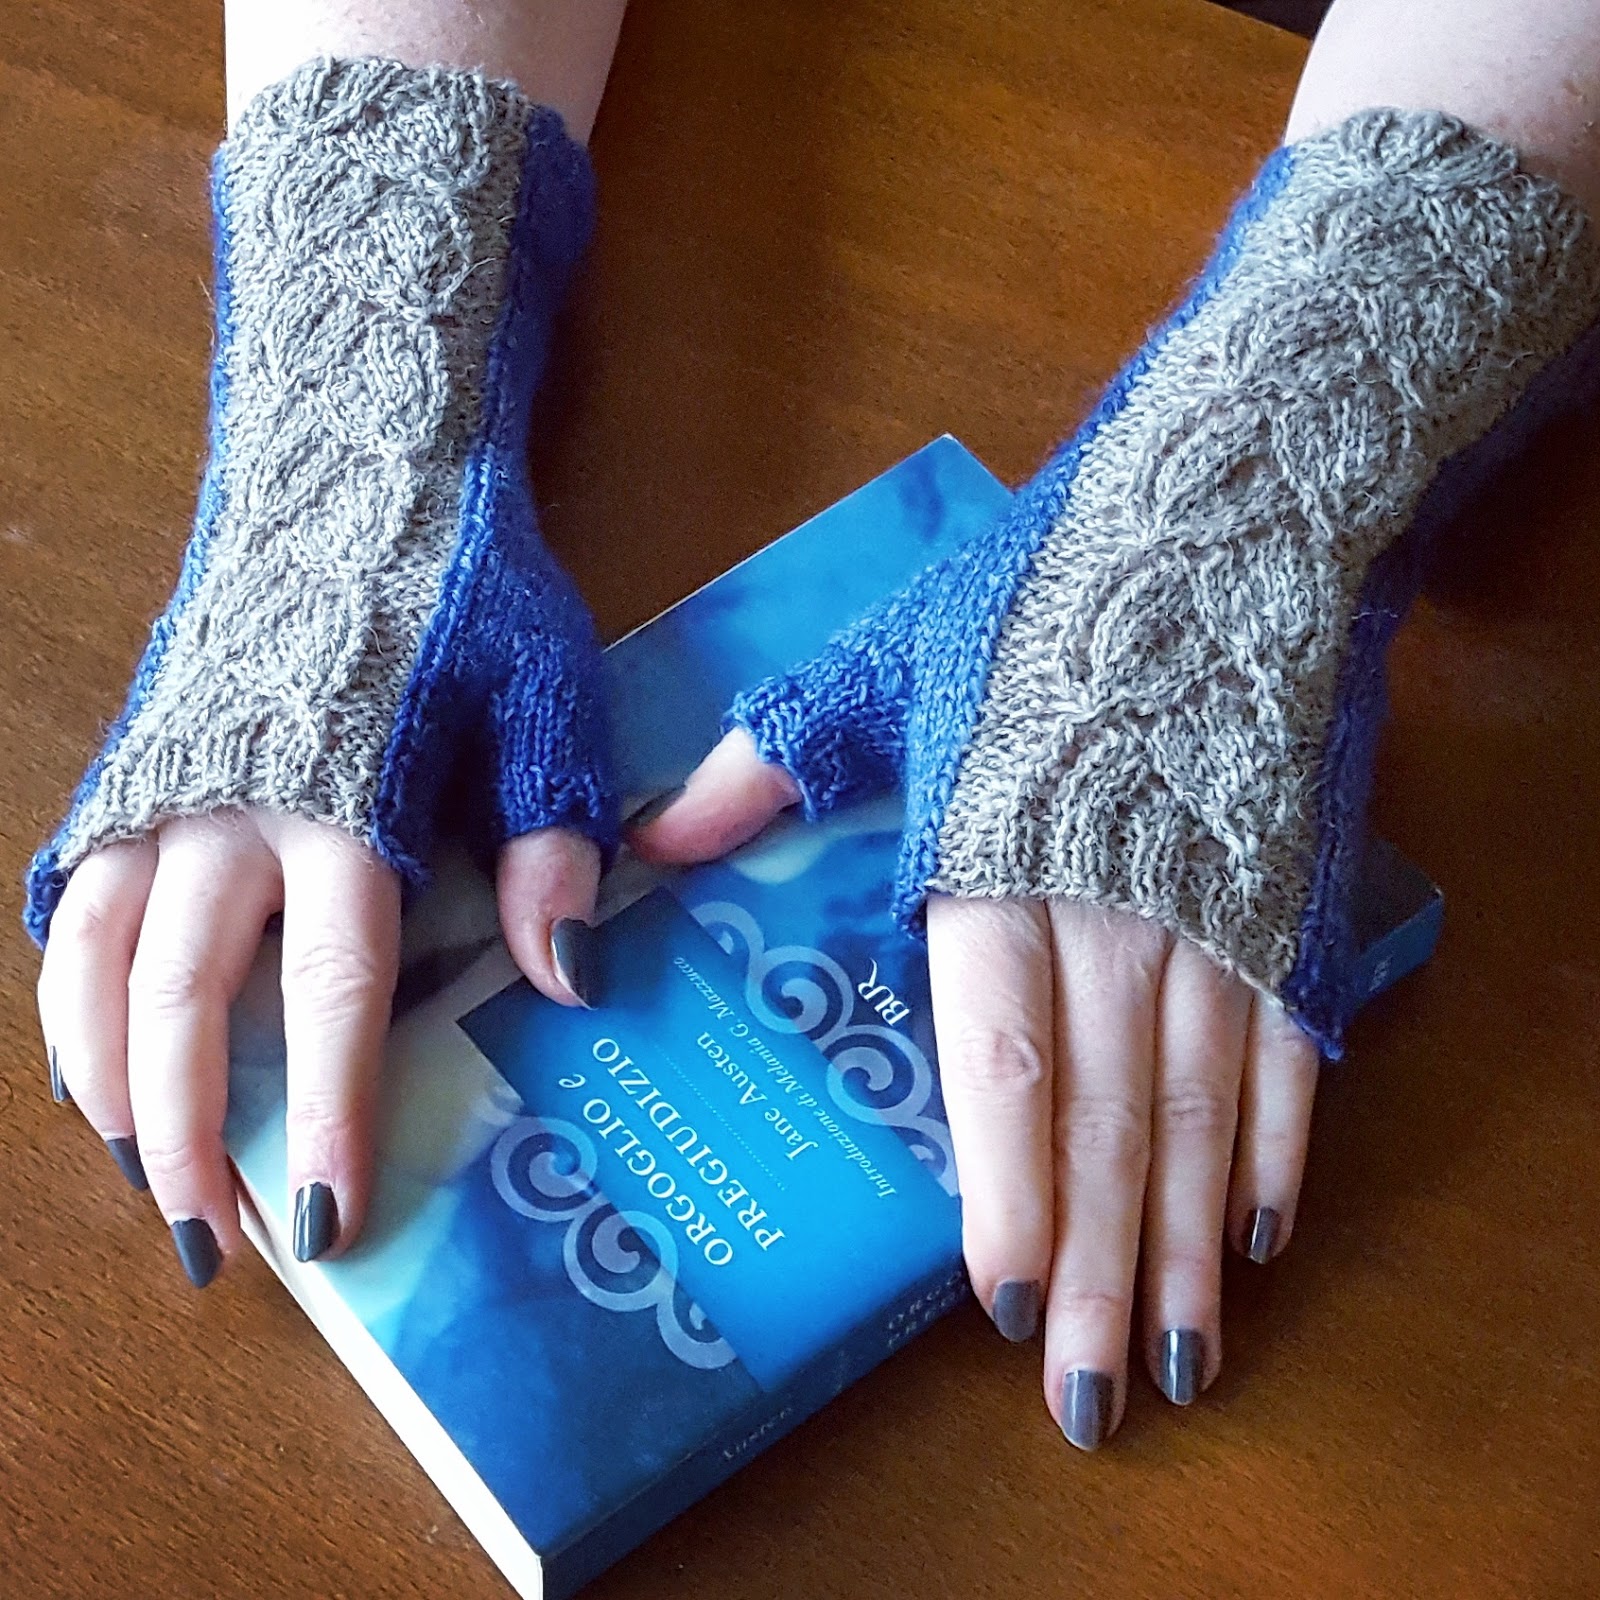
Row 7 (RS): k all - now your piece will look similar to illustration 2.
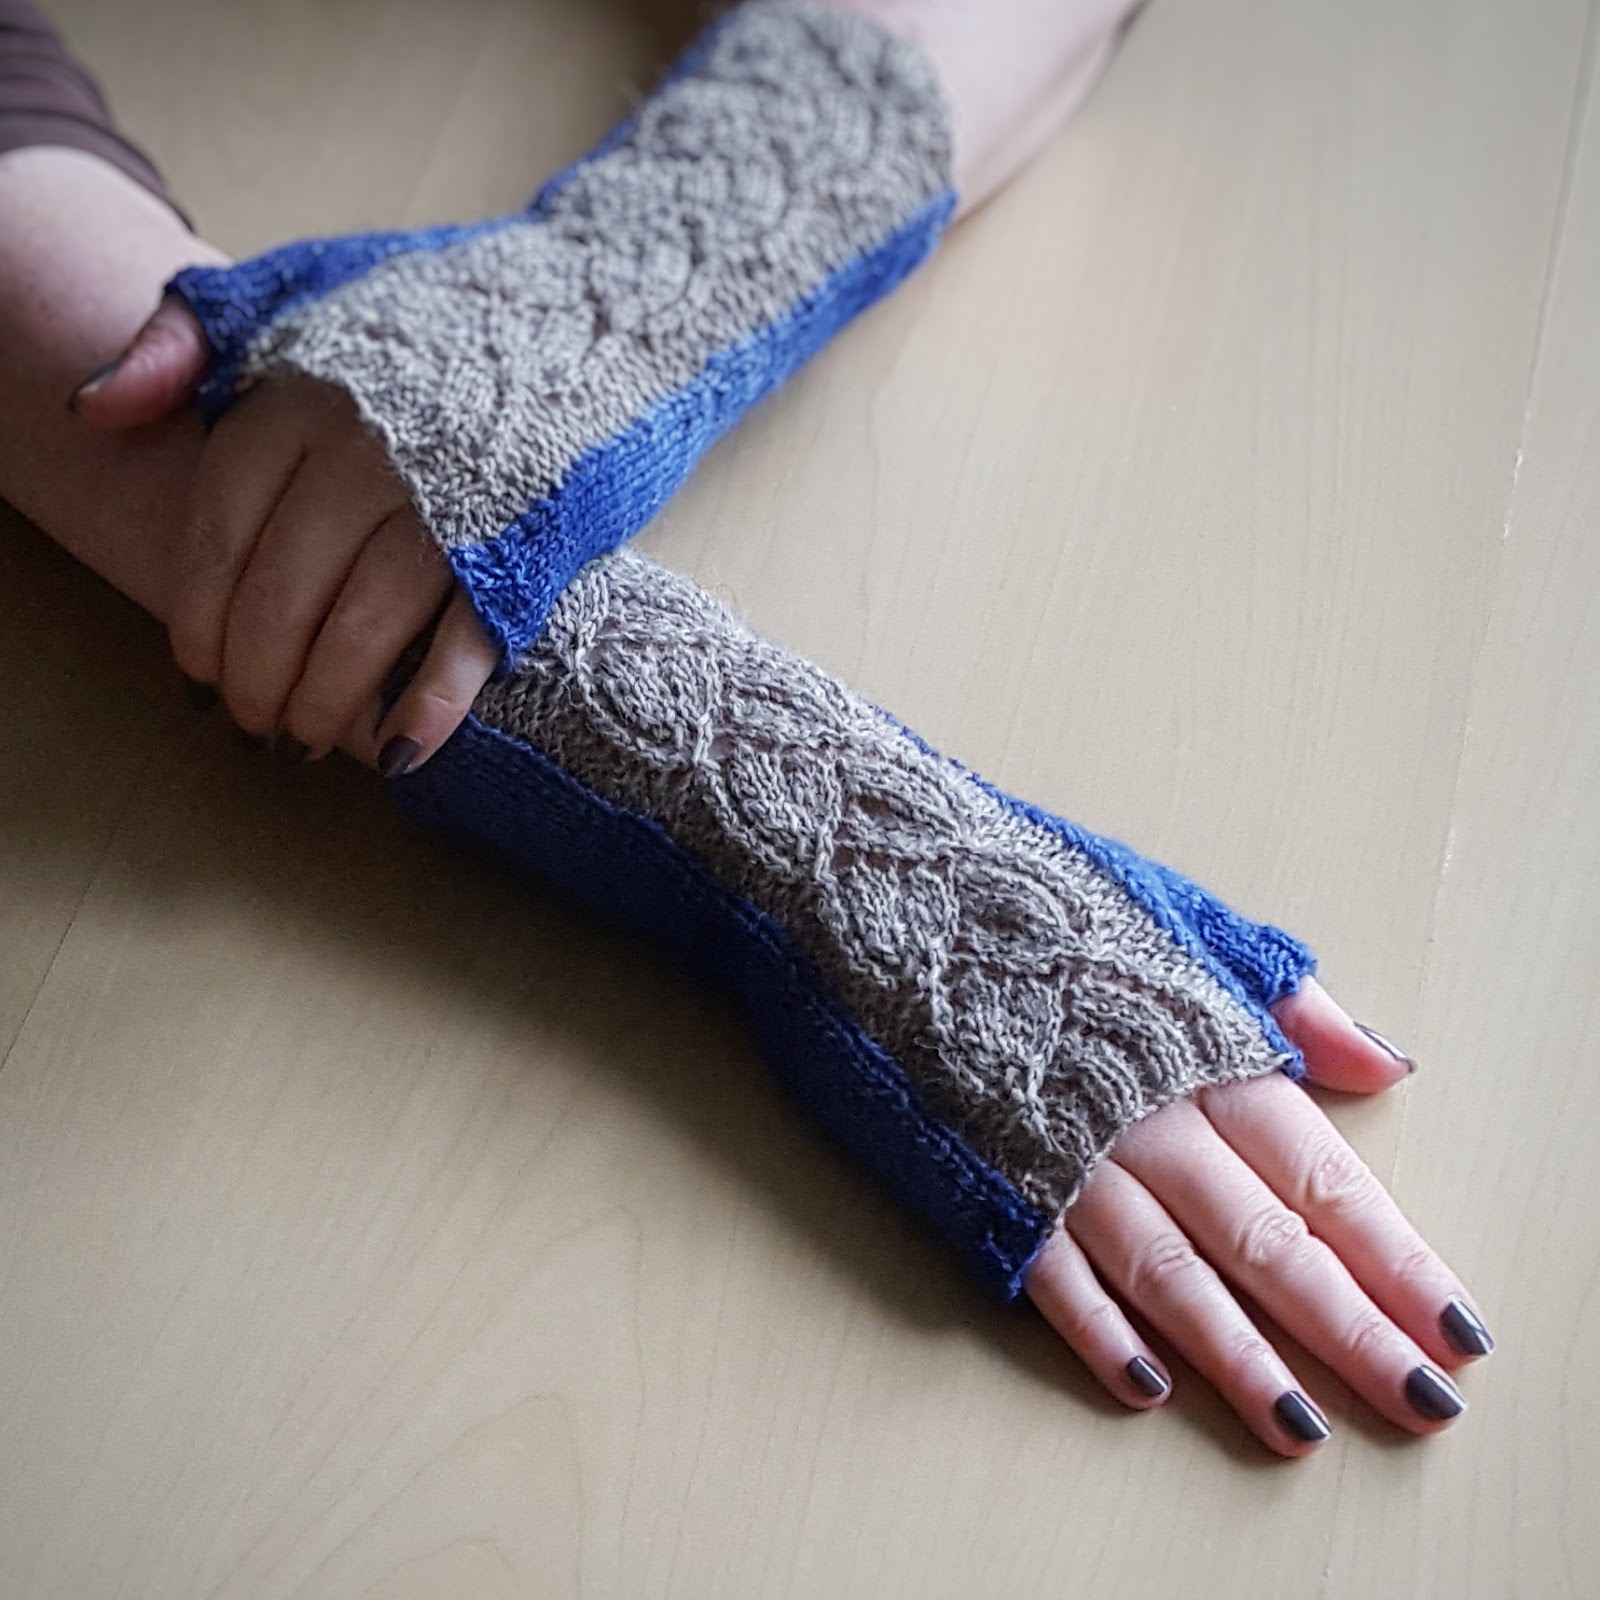
Fold the piece right sides together and do a three-needle BO of 14 sts - see illustration 3. Turn the piece back right sides out. Now it will look similar to illustration 4.
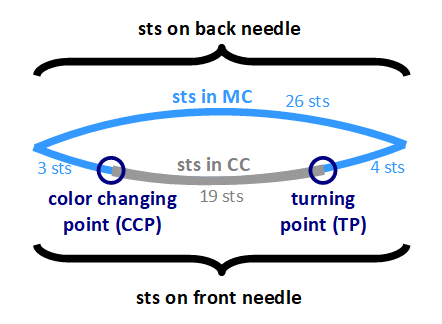
Illustrations
Part 4
In order to get an even lower edge, you will have to insert a few short rows. This will create a sort of triangle to even out height differences.
Make sure the stitch that's leftover from the three-needle BO is on your left hand needle. Place a marker to mark the end of round.
Set up round: sl1 (i.e. the "BO leftover" stitch), pick up one or two stitches from the gap (to avoid holes), k to end, pick up one or two stitches from gap.
Short row sequence: k1, k2tog, w+t, p3, p2tog, p2 w+t, k2, you're back at the end of round-marker
    k1, k2tog, k3, w+t, p4, p2tog, p3, w+t, k3, you're back at the end of round-marker
    k6, w+t, p5, p5, w+t, k4, you're back at the end of round-marker
Round 1: k1, k2tog, * k to marker, yo, slip marker, k1, yo repeat once from *, k to last 2 sts, ssk,
Round 2: k all, k7, w+t, p13, w+t, k6
Round 3: k all,  k1, k2tog, k6, w+t, p7, p2tog, p6, w+t, k to end of round marker
Round 4: k all
Round 5 = Round 1
Round 6: k7, w+t, p13, w+t, k6 (you're at the end-of-round marker), k one round
Round 7: k1, k2tog, k to last 2 sts, ssk - count your stitches.
If you have an odd number of stitches knit Round 8-odd. For and even number, knit Round 8-even
Round 8-odd: k8, w+t, p7, p2tog, p6, w+t, k to end-of-round marker, k one round
Round 8-even: k8, w+t, p13, w+t, k7 (you're at the end-of-round marker), k one round

End with 7 rows of k1p1-ribbing. Bind off in pattern.

Make two.
Weave in ends and block gently.


How to Adapt for Different Hand Sizes
The obvious way to adapt this pattern to different hand sizes is change the number of repeats in parts 2, 3 and 4, but this requires other adaptations as well.
  • If you change the number of repeats in part 2 the mitts will get wider and the upper edge will be higher. This will lead to a change of the stitches of the upper edge BO at the end of this part. Basically, I'd bind of from the stitch of the yo before the first marker to the stitch of the yo after the second marker. You also might want to start the p1k1-ribbing at the upper edge accordingly - it doesn't need to be higher than 5 or 6 rows (including the BO row).
  • If you increase the repeats (row 1 to row 4) of part 3 the mitts will get wider without raising the upper edge. This can be done only a few times since - with the decreases at the upper edge, the yo-k1-yo sequences will get closer to the upper edge. This means that you have to adjust the length(s) of the short rows (rows 2 and 4) will have to be adapted; they must be short enough to not come to the yo-k1-yo-sequence. This will also lead to an adjustment of the number of stitches you need to BO with the three-needle BO. You also need to make sure, that the last row of your part 3, is a row 3 or row 7, i.e. one more row is necessary before you need to do the lace pattern.
  • If you want to lengthen the shaft of the mitts, you can do not need to insert more short rows because you've already evened out the height. But you need to do a lace row every 4th row and to decrease around the end-of-round marker in the next two rounds to even out the increases.

Freitag, 16. März 2018

Helgoland Mitts in Danish - Helgoland Vanter

Marianne Holmen from strikkeglad.dk has written a Danish translation of the Helgoland Mitts pattern. Thank you very much or rather "mange tak"!
Here is a link to the Danish version of this pattern on strikkeglad.dk.
The original (English) version can be found here.


A list of all translated versions of my patterns can be found in this blogpost.

Creative Commons License
This work by Knitting and so on is licensed under a Creative Commons Attribution-NonCommercial-ShareAlike 4.0 International License.

Samstag, 10. Februar 2018

Sparkler Mitts - version française - french version

Sophie Gelfi from Easy Crochet has kindly translated the Sparkler Mitts crochet pattern into French. It is available here. Thank you!

Grâce à Sophie Gelfi de Easy Crochet le modèle crochet pour les mitaines "Sparkler" est disponible ici. Merci beaucoup pour la traduction.

The original english version of this crochet pattern is available here.


Dienstag, 19. Dezember 2017

La Chocolatière Mitts

Shortly after finishing my knitted Helgoland Mitts, I thought that it might be a good idea to pursue the same concept in crochet ... and it actually worked better than I had hoped. As with the Helgoland Mitts, it took me quite a while to write up the pattern, given that I finished them in March. But - finally - here it is.

These mitts are crocheted flat and each in one piece. They are started at the thumb, which is worked flat and joined into a tube. Afterwards, the main part starts with an additional chain, and then is worked back and forth around the thumb. Working through the back loop only gives them an interesting texture.

As to the name, the finished pieces reminded me of creamy, wavy layers of a rich chocolate cake.


Creative Commons License
This work by Knitting and so on is licensed under a Creative Commons Attribution-NonCommercial-ShareAlike 4.0 International License.


Materials
  • a total of about 40 to 45 grams of fingering weight yarn in two colors (called C1 and C2) - I used beige and dark (chocolate) brown
  • 3mm crochet hook
  • 2 removable stitch markers (e.g. safety pins)
  • tapestry needle to weave in ends 

Size
The finished mitts - as knitted by me - are about 19 cm long. The width is adjustable - in part 3 of the pattern.


Stitches and Abbreviations

General Construction
  • Part 1 is the thumb - worked flat and ends with joining the sides to get a little tube. 
  • Part 2 starts with a chain of 36 sts and is worked flat (back and forth) around the thumb - the rows consist of the wave sequences (at the beginning and end of a row) and the increases in round sequences (in the middle of the row, around the thumb). The increases around the thumb are calculated to form a part of a flat circle. (The general idea how to crochet a flat circle is explained in this blogpost, i.e. the Kreisel Mitts crochet pattern).
  • Part 3 is also worked flat, it widens the mitt to fit your hands and ends by crocheting the edges together.

Instructions

NOTE 1: all increase and decrease stitches in this part are crocheted through the back loop of the underlying stitch only.

NOTE 2: Please note that the sequences in brackets don't always match the number of stitches left (e.g. it might say [dec, sctbl 5], but there are only 4 stitches left) - that's OK. Just continue with the sequence until the condition is met and then stop (in case of the example above, just make one decrease and sctbl the 3 stitches to the end)

NOTE 3: Whenever you encounter a marker, work that stitch and replace the marker up to the current row - unless indicated otherwise.

First mitt

Part 1 (Thumb)
With C1
Row 0: ch 10 and 1 turning-chain
Row 1: sc 10; 1 turning-chain
Row 2: sctbl 10; 1 turning-chain
Row 3: sctbl 8, dec; 1 turning-chain
Row 4: sctbl 9; 1 turning-chain
Row 5: sctbl 7, dec; 1 turning-chain
Row 6: sctbl 8; 1 turning-chain
Row 7: sctbl 6, dec; 1 turning-chain

(Your piece should now be as high as half of your thumb circumference. If it's too small for that you can add an even number of "sctbl all, 1 turning-chain"-rounds.)

Row 8: sctbl 7; 1 turning-chain
Row 9: sctbl 6, inc; 1 turning-chain
Row 10: sctbl 8; 1 turning-chain
Row 11: sctbl 7, inc; 1 turning-chain
Row 12: stbl 9; 1 turning-chain
Row 13: sctbl 8, inc; 1 turning-chain
Row 14: sctbl 10; 1 turning-chain

Now your piece should look like in illustration 1.

Fold the edges together (chain edge and your last row) and connect.
Illustrations

Part 2

Row 0 (C1): chain 36 + 1 turning chain - now your piece looks similar to illustration 2
Row 1 (WS, C1): [A]*3, place marker, sc around the rim of the thumb (from the inside, I picked up 24 sts, if you added a few rows between row 7 and 8 of part 1, you will have a different stitch count), place marker [B]*3
Row 2 (RS, C2): [B]*3, dec, [sctbl2, inc] to 2 before marker, dec, [A]*3
Row 3 (WS, C2): [A]*3, sctbl1, dec [sctbl1, inc, sctbl2] to 3 bef marker, sctbl1, dec, [B]*3
Row 4 (RS, C1): [B]*3, dec, sctbl2, [sctbl2, inc, sctbl2] to 4 bef marker sctbl2, dec , [A]*3
Row 5 (WS, C1): [A]*3, dec, sctbl3, [sctbl3, inc, sctbl2] to 5 bef marker, sctbl3, dec , [B]*3
(Now your piece should look similar to illustration 3.)

Row 6 (RS, C2): [B]*3, dec, sctbl3, inc, [sctbl1, inc, sctbl5] to 6 bef marker, dec, sctbl3, inc, [A]*3
Row 7 (WS, C2): [A]*3, inc, sctbl3, dec, sctbl1, [sctbl1, inc, sctbl6] to 7 bef marker sctbl1, inc, sctbl3, dec, [B]*3
Row 8 (RS, C1): [B]*3, dec, sctbl3, inc, [sctbl4, inc, sctbl4] to 6 bef marker, dec, sctbl3, inc, [A]*3
Row 9 (WS, C1): [A]*3, inc, sctbl3, dec, [inc, sctbl9] to 6 bef marker inc, sctbl3, dec, [B]*3
Row 10 (RS, C2): [B]*4, [sctbl2, inc, sctbl8] to marker sctbl2, [A]*4
Row 11 (WS, C2): [A]*4, [sctbl4, inc, sctbl7] to  marker, [B]*4
Row 12 (RS, C1): [B]*4, [sctbl8, inc, sctbl4]] to marker, [A]*4
Row 13 (WS, C1): [A]*4, [inc, sctbl13] to marker, [B]*4
Row 14 (RS, C2): [B]*4, dec, sctbl3, inc, [sctbl2, inc, sctbl1] to 6 bef marker, dec, sctbl3, inc, [A]*4
Row 15 (WS, C2): [A]*4, inc, sctbl3, dec, [sctbl2, inc, sctbl12] to 6 bef marker inc, sctbl3, dec, [B]*

Part 3
Row 1 (RS, C1): [B]*4, dec, sctbl3, inc, 1 turning chain
Row 2 (WS, C1):  inc, sctbl3, dec, [B]*4, 1 turning chain
Row 3 (RS, C2): [B]*4, dec, sctbl3, inc, 1 turning chain
Row 4 (WS, C2):  inc, sctbl3, dec, [B]*4, 1 turning chain
Row 5 (RS, C1): [B]*4, dec, sctbl3, inc, 1 turning chain
Row 6 (WS, C1):  inc, sctbl3, dec, [B]*4, 1 turning chain
Try or measure whether the piece fits your hands. If it is not wide enough, repeat rows 3 to 6.
Your piece should look similar to illustration 4.

Hold right sides together (aligning at the lower edge) and connect both sides.

Cut yarns and weave in ends.


Second Mitt
If you want one mitt to be the mirror image of the other, you need to exchange the wave sequences, i.e. every time the pattern for mitt 1 says "A", you need to crochet sequence B and vice versa. The increases around the thumb are the same for both mitts.
I also switched the colors, i.e. whenever I used C1 for mitt 1, I used C2 for mitt 2 - and vice versa.


This post was featured on Oombawka Design's Wednesday Link Party #226 . Thank you!

Sonntag, 10. Dezember 2017

Donnerstag, 9. November 2017

Sankaku Wrist Warmers in Crochet

Currently, there are roughly 100 knitting patterns available on my blog. Some of them have been quite successful, but others haven't ... and there are even some that I had nearly forgotten. One of these is the Triangulation Wrist Warmers knitting pattern that I published about four years ago.
So I was really surprised when I received an e-mail from a German knitter who had tried to translate it and had stumbled upon some blatant mistakes that I made when I wrote the pattern. However, she was so nice as to put them into very diplomatic questions. 
That made me review the whole pattern and correct a lot of the mistakes. ... And this activity made me think of the pattern again and gave the idea of doing something similar in crochet. Et volià - here it is. 
These wrist warmers are one in one piece - starting from the outside of the wrist and finished at the thumb. Like their knitted cousins, they are nice to showcase your variegated yarn.
I made these with fingering weight yarn. However, most of the pattern is written in a way that you can adapt it to other yarn weights as well. 


As to the name, Sankaku (三角) is the Japanese word for triangle.

Creative Commons License
This work by Knitting and so on is licensed under a Creative Commons Attribution-NonCommercial-ShareAlike 4.0 International License.


Materials
  • about 45 grams of fingering weight yarn (I used Lang Jawoll Magic, because I like the effect of the color variations)
  • a 3mm crochet hook
  • three removable stitch markers - one different from the others (safety pins work as well)
  • a tapestry needle to weave in ends

Gauge or What to Measure
If you're knitting for your own hands, you just have to try it on a few times before finishing. If you're knitting for somebody else, you'll need the following measurements:
  • hand circumference at wrist height or a bit lower - depending on how long you want your wrist warmers
  • total height of the wrist warmers - from the point where you measured the lower circumference to just below your hand knuckles
  • hand circumference just below knuckle height
  • thumb circumference
As with many of my patterns, it is written in a way that you can adjust it to your hand size and won't include exact stitch counts but rather you'd be asked to continue until something is wide enough to fit around your hands or similar. If you're uncomfortable with instructions like that, the pattern might not be for you.

However, I will give you an example of the wrist warmers I crocheted in purple.
The wrist warmers I made measured 17 cm in height and had about 19 cm circumference at the lower edge.


Abbreviations and Stitches

Construction
Construction
One mitt is worked in one piece - and in five parts as shown in the picture on the right.
Part 1 is started with two stitches only and worked back and forth with increases in the middle and on the sides to make up a triangle.
Part 2 is worked in the round - BUT, you will be changing directions after every row, i.e. one row is worked from the outside and the next from the inside of the piece. There are increases at the outer edge and decreases at the inner edge of the mitt.
Part 3 is worked back and forth around the inner edge of the hand and creating an open edging at the top.
Part 4 is started with a chain above the thumb and then worked in the round - but again changing directions after each round. The stitch count is decreased to fit snugly around your thumb.
Part 5 (the thumb) is the only part that is truely worked in the round without altering the crocheting direction.


Instructions

NOTE 1: all increase and decrease stitches in this part are crocheted through the back loop of the underlying stitch only.

Part I - Worked Flat
Row 1: ch2, 1 tc
Row 2: inc, inc, 1 tc
Row 3: inc, inc, place marker (will be called top marker), inc, inc, 1 tc
Row 4: inc, sctbl to top marker, inc, inc, sctbl to 1 bef end, inc, 1 tc
Repeat row 4 until the lower edge of the triangle is wide enough to fit around your wrist. Don't work the last turning chain. Your piece will now look similar to illustration 1.

For me the piece was wide enough after row 16, that means that I had a total of 64 stitches - or 32 per slope of the triangle.

NOTE 2: As to the handling of the stitch markers for increases around a point: in crochet, it's difficult to place a stitch marker between two stitches, so I'd do as follows: when I reached the point where the two increases were to be worked, I removed the marker, did the two increases and afterwards place the marker into the first stitch of the second increase. That way, after turning my work, the stitch marker would mark the first stitch into which I had to increase in the next row.

NOTE 3: During part I, your stitch count will increase by 4 sts in each row - or by 2 sts per slope of the triangle. I.e. the number of sctbls between in increases also increases by 2 sts per row (on each slope). So, if you prefer not to use stitch markers, you can count your sctbl stitches from beginning increase to middle increase. In row 4, there are 2 sts, in row 5 4 sts, in row 6 6 sts, in row 7 8 sts and so on.


Part II
Fold the piece around the middle (see illustration 2) and attach the two lower tips of the triangle to each other with a slip stitch. Place a marker here (will be called lower marker). Work a turning chain and turn work.
Row 1 (inside): dec, sctbl to top marker, inc, inc, sctbl to 2 bef lower marker, dec, connect to first dec of the row with slip stitch, tc and turn
Row 2 (outside): dec, sctbl to top marker, inc, inc, sctbl to 2 bef lower marker, dec, connect to first dec of the row with slip stitch, tc and turn
Repeat rows 1 and 2 until the edge of the top marker (i.e. the longer side edge) is as high as you want the mitt to be. DON'T TURN after the last row.

For me this was the case after 9 repeats or 18 rows.

NOTE 4: The change of direction after each row is done to keep the texture of the sctbl-rows.

NOTE 5: Stitch marker handling for the decreases ...

NOTE 6: During part II, each row has the same number of increases than decreases. That means that your stitch count stays the same.
Illustrations (click to enlarge)
Part III
From now on the working direction will change, from around the top marker, to around the lower marker. To keep the texture of the piece, the next row should be started at the top marker - however, the working yarn currently is at the lower marker.
If you're not averse to cutting yarn in the middle of a project, cut your yarn and attach it at the upper marker for row 1 of part III. If you're like me (and want to avoid weaving in more ends at any cost), you can cheat a bit and do slip stitches on the inside (or just through the back loop of the current row) to the top. Once you crochet back tbl from the inside, these slip stitches will be hidden. When you've reached the top marker turn with a turning chain.

Row 1 (inside): dec, sctbl. to 1 bef lower marker, dec, dec, sctbl to 1 bef top marker, dec, tc
Row 2 (outside): dec, sctbl. to 2 bef end, dec, tc

Remove the top marker after these rows.
After row 1 your piece should look similar to illustration 3.

Row 3 (inside): dec, sctbl. to 2 bef end, dec, tc
Row 4 (outside): dec, sctbl. to 2 bef end, dec, tc

NOTE 7: Rows 2 to 3 don't have decrases around the lower marker, i.e. the wrist warmers will get wider at this point. This widening makes a sort of thumb gusset. If you feel - while working part III - that you need more room to accomodate the widening of your hands, you can always do another row 3 or 4 instead of a row 5 or 6.

Row 5 (inside): dec, sctbl. to 1 bef lower marker, dec, dec, sctbl to 2 bef end, dec, tc
Row 6 (outside): dec, sctbl. to 1 bef lower marker, dec, dec, sctbl to 2 bef end, dec, tc

Repeat rows 5 and 6 until the upper edge covers about 75% of the hand circumference just below your knuckles.

For me this was the case after 12 rows.


Part IV 
Now the opening above the thumb needs to be closed. This is done by crocheting a chain from one of the upper edges to the other. (See illustrations 4 and 5).

Chain: place a marker (called marker 1) chain 10 and connect this chain to the other edge with a slip stitch, tc and turn, place a marker here as well (called end marker, since it marks the end of a round)
Try on the wrist warmer to see whether it fits or measure whether the total upper circumference is equal to the measurement you took. It should fit comfortably. If it's too tight or too wide, adjust the number of chain stitches accordingly.

Round 1 (inside): sc to 2 bef marker 1, dec, dec, sctbl to 1 bef lower marker, dec, dec, sctbl to 2 bef end marker, dec, connect to first stitch of that round with slip stitch, tc and turn
Round 2 (outside): dec, sctbl to 1 bef lower marker, dec, dec, sctbl to 1 bef marker 1, dec, dec, sctbl to 1 bef end marker, dec, connect to first stitch of that round with slip stitch, tc and turn

After these rounds your piece should look similar to illustration 6.
Round 3 (inside): dec, sctbl to 2 bef marker 1, dec, dec, sctbl to 1 bef lower marker, dec, dec, sctbl to 2 bef end marker, dec, connect to first stitch of that round with slip stitch, tc and turn
Round 4 (outside): dec, sctbl to 1 bef lower marker, dec, dec, sctbl to 1 bef marker 1, dec, dec, sctbl to 1 bef end marker, dec, connect to first stitch of that round with slip stitch, tc and turn

Try it on to check whether the opening fits snugly around your thumb. If it's still too wide, work another round. Repeat.

If you ended on an inside round, turn your work before moving on to part V. If your last round was an outside round, don't turn, but go on working in the same direction. Part V will only be worked from the outside.

Part V
Now the opening is just wide enough to fit snugly around your thumb. Remove all markers except end marker.
Round 1: sctbl to end marker
Round 2: sc to end marker
Repeat round 2 three more times (or until the thumb is as long as you'd like it).
End with a slip stitch into the next stitch.

Weave in ends.
Make two.


Donnerstag, 2. November 2017

Jeans and Old Lace

After knitting quite a few socks with intarsia in the round (e.g. here or here), I wanted to apply this technique to fingerless gloves. I also wanted to challenge myself a bit by knitting lace - something that usually requires lots of concentration on my part ... and with this lace pattern, it did!

The result is an elegant pair of fingerless gloves in two colors with a delicate lace pattern on the back of your hand that stands out because it is knitted in a contrasting color. The palm side is knitted in plain stockinette stitch using the main color.


If you're a beginner at knitting, you'd probably want to start with a normal "loom-style" pair of fingerless gloves with a lace pattern that's not quite as challenging (e.g. this one). Plus, if you knit intarsia in the round for the first time, it can be a bit fiddly.

Creative Commons License
This work by Knitting and so on is licensed under a Creative Commons Attribution-NonCommercial-ShareAlike 4.0 International License.


Materials
  • about 35 to 45 grams of fingering weight yarn in two colors - I used about 10 grams of grey yarn (CC) and 30 grams of blue yarn (MC), I'd advise to use a solid color as CC to make the lace pattern stand out
  • 2.5mm circular knitting needles - I used the magic loop method, but you can use dpns, too - I also used dpns to knit the thumb
  • a stitch holder to hold your thumb stitches - e.g. scrap yarn
  • a tapestry needle to weave in ends

Techniques
  • Intarsia in the round with yarn-overs before turning: as shown in this YouTube video by Julia farwell-clay. Basically you knit back and forth even though your stitches are arranged in the round - and you have to consider rounds in pairs - one RS row and one WS row. You start with your main color (MC) on the RS, then - as in normal intarsia you change (by twisting the yarns) - to contrast color (CC) and knit your CC part, After finishing this you turn your work, make a yarn-over and do the WS with CC, when you get to the MC part you change back as in normal (flat) intarsia to MC.
    Now with MC you work your way on the WS not only to the start of the round, but further to the point where you ended the CC part. Here you p2tog the last MC stitch with the yarn over in CC. Then you turn - again with a yarn over - and do the RS part to the beginning of the round. That's the two round finished.
    When - during the next pair of rounds - you reach the new yarn over on the RS, you have to do an ssk of the last stitch in CC with the yarn over in MC.
    In this pattern the following notation will be used: "MC [k7]; CC [k23]" means knit 7 sts in MC, change to CC and knit 23 sts in CC, i.e. the color is indicated before the knitting instructions - the instructions are in square brackets and a semicolon indicates a change of color.
  • Magic Loop Method: as shown in this YouTube video by KnitPicks.
  • Backwards Loop CO: as shown in this YouTube video by Very Pink Knits.

Gauge and Measurements
One finished mitt measures 19 cm in height and 17 cm in diameter. If you want to adjust the width of the mitts, you can change the number of stitches in MC. If you want them longer, adjust the number of pattern repeats accordingly.
In stockinette stitch 16 sts gave 5 cm in width, and 22 rows 5cm in height.


Construction
Even though this piece is knitted in the round, there is a change of direction after every row. That's because it is knitted in intarsia where one round is knitted from the outside of the sock and the next from the inside. This means that at one point in the round you change the color just as in normal (flat knitted) intarsia knit, i.e. where you twist your two strands of yarn (called color changing point or CCP in the pattern) and at another point you attach the colors while you're turning by knitting together the last stitch of the current round with a yarn-over you did in the round below (called turning point or TP in the pattern).
On the right you can find a schematic of the stitch distribution when knitting with the Magic Loop technique.

The color changing point never moves, i.e. every stitch is knitted in the same color as the stitch in the row below.


Lace Pattern and Special Stitches
Below you can find a chart of the lace pattern - I used the Bellflowers patten that I found on knittingfool.com.
For the purpose of knitting these fingerless gloves, the last stitch of each WS row (even numbered row) corresponds to the turning point will connect the lace piece to the part knitted in MC, i.e. you do a k2tog of the last stitch with the yarn over you did at the beginning of the round.
Lace Chart (click to enlarge)
  • yo: yarn over
  • k2tog: knit 2 together, right leaning decrease
  • ssk: slip slip knit, left leaning decrease
  • k3tog: knit 3 together, right leaning double decrease
  • sl1 k2tog psso:  left leaning double decrease, alternatively you can do an sssk (slip slip slip knit)
  • k4tog: knit 4 together
  • sl1 k3tog psso: slip
  • no stitch: When there are more decreases than increases in one row, the stitch number decreases. The no stitch symbol is used as a place holder to ensure that the chart is still aligned.
I'd strongly advise to count the stitches on your needles just after you've finished the lace piece (in order to make sure that you've just the right number you need for the next round). I had to tink back quite a few times ...


Instructions

In CC CO19 and in MC CO33 (see illustration 1)
Turn work - do not join in round yet.
Row 0: MC [ * p2, k2 repeat from * until 1 st bef CCP, p1 ]; CC [ p1, k2, * p2, k2 repeat from * to end] - when crossing the two yarns at CCP, cross in front
From the beginning of the row, divide the stitches into the following three parts: of 22, 26 and 4 sts (see illustration 2). Join in round
Illustrations (click to enlarge)

Ribbing
Round 1 (outside): CC [yo, * p2, k2 repeat from * until 3 sts from CCP, p2, k1]; MC [k1, * p2, k2 repeat from * until 3 sts from TP, p2, k1, ssk] - with the ssk, you'll join the last stitch in this row with the yo you did at the beginning - your piece should look similar to illustration 3.
Round 2 (inside): MC  [yo, * p2, k2 repeat from * until 1 st from CCP, p1]; CC [p1, k2 * p2, k2 repeat from * until 3 sts from TP, p2, k1, k2tog] - with the k2tog, you'll join the last stitch in this row with the yo you did at the beginning
Repeat rounds 1 and 2 once more.

Now start the lace pattern:
Round 1 (outside): CC [yo, p2, yo, k2tog, yo, k2tog, k2tog, k2tog, k2, yo, k3, yo, ssk yo, p2 (you should be at CCP now)]; MC [k to 1 bef TP, ssk]
Round 2: (inside): MC [yo, p to CCP]; CC [k2, p15, k1, k2tog]
Round 3: (outside):  CC [yo, p2, yo, k2tog, k3tog, k3tog, yo, k1, yo, k2, ssk, yo, ssk, yo, p2 (you should be at CCP now)]; MC [k to 1 bef TP, ssk]
Round 4: (inside): MC [yo, p to CCP]; CC [k2, p13, k1, k2tog]
Round 5: (outside):  CC [yo, p2, yo, k4tog, yo k3, yo, k2, ssk, yo, ssk, yo, p2 (you should be at CCP now)]; MC [k to 1 bef TP, ssk]
Round 6: (inside): MC [yo, p to CCP]; CC [k2, p13, k1, k2tog]
Round 7: (outside):  CC [yo, p2, yo, k2tog, yo, k1, yo, k2, ssk, yo, k2, ssk, yo, ssk, yo, p2 (you should be at CCP now)]; MC [k to 1 bef TP, ssk]
Round 8: (inside): MC [yo, p to CCP]; CC [k2, p15, k1, k2tog]
Round 9: (outside):  CC [yo, p2, yo, k2tog, yo, k3, yo, k2, ssk, ssk, ssk, yo ssk, yo, p2 (you should be at CCP now)]; MC [k to 1 bef TP, ssk]
Round 10: (inside): MC [yo, p to CCP]; CC [k2, p15, k1, k2tog]
Round 11: (outside):  CC [yo, p2, yo,  k2tog, yo, k2tog, k2, yo, k1, yo, sl1 k2tog psso, sl1, k2tog, psso, ssk,  yo, p2 (you should be at CCP now)]; MC [k to 1 bef TP, ssk]
Round 12: (inside): MC [yo, p to CCP]; CC [k2, p13, k1, k2tog]
Round 13: (outside):  CC [yo, p2, yo, k2tog, yo, k2tog, k2, yo, k3, yo, sl1 k3tog psso, yo, p2 (you should be at CCP now)]; MC [k to 1 bef TP, ssk]
Round 14: (inside): MC [yo, p to CCP]; CC [k2, p13, k1, k2tog]
Round 15: (outside):  CC [yo, p2, yo, k2tog, yo, k2tog, k2, yo, ssk, k2, yo, k1, yo, ssk, yo, p2 (you should be at CCP now)]; MC [k to 1 bef TP, ssk]
Round 16: (inside): MC [yo, p to CCP]; CC [k2, p15, k1, k2tog]

Repeat rounds 1 to 16 once more. Then repeat rounds 1 to 6.

Thumb Gusset
For the thumb gusset, the "normal" rounds are slightly altered - i.e. there will be markers put in place and there will be increases along these markers every 4th row. these changes will be printed in boldface.  The rest of the round stays the same - that's why the row numbers are kept (but with an added t for "thumb").
To knit the thumb gusset on different sides of the lace pattern, there will be two versions of round 7 - one for the right hand mitt, and one for the left hand mitt.

Round 7t - first mitt: (outside):  CC [yo, p2, yo, k2tog, yo, k1, yo, k2, ssk, yo, k2, ssk, yo, ssk, yo, p2 (you should be at CCP now)]; MC [k5 pm k2 pm, k to 1 bef TP, ssk]
Round 7t - second mitt: (outside):  CC [yo, p2, yo, k2tog, yo, k1, yo, k2, ssk, yo, k2, ssk, yo, ssk, yo, p2 (you should be at CCP now)]; MC [k to 7 bef TP pm k2 pm, k to 1 bef TP, ssk]

Round 8t: (inside): MC [yo, p to CCP]; CC [k2, p15, k1, k2tog]
Round 9t: (outside):  CC [yo, p2, yo, k2tog, yo, k3, yo, k2, ssk, ssk, ssk, yo ssk, yo, p2 (you should be at CCP now)]; MC [k to marker, slip marker, mk1r, k to next m, mk1l, slip marker, k to 1 bef TP, ssk]
Round 10t: (inside): MC [yo, p to CCP]; CC [k2, p15, k1, k2tog]
Round 11t: (outside):  CC [yo, p2, yo,  k2tog, yo, k2tog, k2, yo, k1, yo, sl1 k2tog psso, sl1 k2tog psso, ssk,  yo, p2 (you should be at CCP now)]; MC [k to 1 bef TP, ssk]
Round 12t: (inside): MC [yo, p to CCP]; CC [k2, p13, k1, k2tog]
Round 13t: (outside):  CC [yo, p2, yo, k2tog, yo, k2tog, k2, yo, k3, yo, sl1 k3tog psso, yo, p2 (you should be at CCP now)]; MC [k to marker, slip marker, mk1r, k to next m, mk1l, slip marker, k to 1 bef TP, ssk]
Round 14t: (inside): MC [yo, p to CCP]; CC [k2, p13, k1, k2tog]
Round 15t: (outside):  CC [yo, p2, yo, k2tog, yo, k2tog, k2, yo, ssk, k2, yo, k1, yo, ssk, yo, p2 (you should be at CCP now)]; MC [k to 1 bef TP, ssk]
Round 16t: (inside): MC [yo, p to CCP]; CC [k2, p15, k1, k2tog]

Round 1t (outside): CC [yo, p2, yo, k2tog, yo, k2tog, k2tog, k2tog, k2, yo, k3, yo, ssk yo, p2 (you should be at CCP now)]; MC [k to marker, slip marker, mk1r, k to next m, mk1l, slip marker,  k to 1 bef TP, ssk]
Round 2t: (inside): MC [yo, p to CCP]; CC [k2, p15, k1, k2tog]
Round 3t: (outside):  CC [yo, p2, yo, k2tog, k3tog, k3tog, yo, k1, yo, k2, ssk, yo, ssk, yo, p2 (you should be at CCP now)]; MC [k to 1 bef TP, ssk]
Round 4t: (inside): MC [yo, p to CCP]; CC [k2, p13, k1, k2tog]
Round 5t: (outside):  CC [yo, p2, yo, k4tog, yo k3, yo, k2, ssk, yo, ssk, yo, p2 (you should be at CCP now)]; MC [k to marker, slip marker, mk1r, k to next m, mk1l, slip marker,  k to 1 bef TP, ssk]
Round 6t: (inside): MC [yo, p to CCP]; CC [k2, p13, k1, k2tog]
Round 7t: (outside):  CC [yo, p2, yo, k2tog, yo, k1, yo, k2, ssk, yo, k2, ssk, yo, ssk, yo, p2 (you should be at CCP now)]; MC [k to 1 bef TP, ssk]

Repeat rounds 8t to 16t once, then rounds 1t to 7t once, then rounds 8t to 16t once more, and then rounds 1t to 2t. Now there have been 7 increase rows, i.e. you have increased by 14 sts and there are 16 sts between the stitch markers.

Round 3tt:  CC [yo, p2, yo, k2tog, k3tog, k3tog, yo, k1, yo, k2, ssk, yo, ssk, yo, p2 (you should be at CCP now)]; MC [k to marker, put the 16 sts between the two stitch markers on a stitch holder, with backwards loop cast on, CO 2, k to 1 bef TP, ssk]

Now continue in lace pattern rounds 4 to 16.

Upper ribbing 
Round 1 (outside): CC [yo, * p2, k2 repeat from * until 3 sts from CCP, p2, k1]; MC [k1, * p2, k2 repeat from * until 3 sts from TP, p2, k1, ssk] - with the ssk, you'll join the last stitch in this row with the yo you did at the beginning
Round 2 (inside): MC  [yo, * p2, k2 repeat from * until 1 sts from CCP, p1]; CC [p1, k2, * p2, k2 repeat from * until 3 sts from TP, p2, k1, k2tog] - with the k2tog, you'll join the last stitch in this row with the yo you did at the beginning
Repeat rounds 1 and 2 once more.
Bind of in pattern in 5th round.

Thumb
Put the 16 sts from the stitch holder back on your knitting needle(s). I distributed them evenly on two dpns. There is an upper edge just below the backwards loop CO with a gap on each side. In order to close this gap, you pick up some stitches from these gaps which will be decreased over the next few rounds.

Round 1: pick up and knit a total of 8 stitches from gaps and this edge, k15, ssk (i.e. you join the last stitch of this round with the first of the next). -> 23 sts
Round 2: k6, k2tog, k15 -> 22 sts
Round 3: k all
Round 4: k5, k2tog, k14, ssk (i.e. you join the last stitch of this round with the first of the next) -> 20 sts left
Round 5: k19 (i.e. k to end)
Round 6: k all
Repeat round 6 twice more.

Thumb Ribbing
Round 1: * k2, p2 repeat from * to end
Repeat round 1 twice more.
Bind off in pattern.


Make two.
Weave in ends - all 12 of them ... (at least 6 per mitt)


Samstag, 14. Oktober 2017

Helgoland Mitts

It took me quite a while to get these mitts right. I had the original idea back in March 2014. At that time it just didn't work, but I had an idea what to do in order to actually make it work. However, it took me a while to start them again. I started again late in 2016 - and finished them in January 2017. Then it took me another nine months to write up the pattern ... but here they are.

The Helgoland mitts have a unique construction. They are started at the thumb, and afterwards knitted flat and in garter stitch. One mitt is knitted in one piece which minimizes the number of ends to weave in :)

Helgoland Mitts - free knitting pattern by Knitting and so on

A Danish version of this pattern has been written by Marianne Holmen from strikkeglad.dk . Mange tak!


Creative Commons License
This work by Knitting and so on is licensed under a Creative Commons Attribution-NonCommercial-ShareAlike 4.0 International License.


Materials
  • a total of 40 grams of fingering weight yarn in two colors (C1 and C2)- roughly the same amount of each - for the mitts in the photos I used blue variegated yarn as C1 and beige yarn as C2
  • 3mm circular knitting needles - I used 80mm circulars (with magic loop for the thumb) 
  • one straight 3mm knitting needle to keep half of the remaining stitches after finishing part 2 - alternatively, you can use a (long) stitch holder or scrap yarn
  • at least 2 stitch markers (plus optional 8 stitch markers)
  • a third needle for three-needle BO
  • a tapestry needle to weave in ends
Helgoland Mitts - free knitting pattern by Knitting and so on


Techniques and Notation
  • Knitted Cast-On: http://youtu.be/-nJKC2xT0Q4 
  • Picking up stitches from a gap or ditch: After both three needle bind-offs there is one left over stitch which tends to have a distance to the stitches next to it. To avoid holes, I usually pick up one stitch from the gap and decrease over the new stitch in the following row (see also this YouTube video where it is shown on the example of a thumb gusset). In my experience (or the way I knit :) it's even better to pick up two stitches and knit decreases over them in the following two rows.
  • Three-Needle BO: The three needle bind-off is used to attach two pieces of knitting (or to ends of one piece of knitting) to one another - this technique is shown in this YouTube Video by planetpurl.
  • [X] y times: means knit whatever is written within the brackets y times
  • There are also abbreviations for the wave sequences that are repeated throughout the pattern, namely:
    • A = ssk, k3, kfb, kfb, k3, ssk
    • B = kfb, k3, k2tog, k2tog, k3, kfb 
Helgoland Mitts - free knitting pattern by Knitting and so on


Gauge and Measurements

In garter stitch 5 ridges (i.e. 10 rows) gave 2 cm in height, and 5 stitches gave 2 cm in width.
The finished mitts are 20 cm high (at their highest point) and measure about 16 cm circumference at the cuff. However, the circumference is adaptable by knitting more or fewer rows in part 3).


General Construction
Helgoland Mitts - free knitting pattern by Knitting and so on
These fingerless gloves are knitted in one piece - the instructions are written in three parts.
Part 1 - the thumb - is knitted in the round. Part 2 starts with a knitted cast on and is then knitted back and forth - up the shaft,  around the thumb and down the shaft. Around the thumb there will be increases to create a flat circle (or rather upper part of a circle - a general formula to knit a circle can be found here).
Part 2 ends with a bind off at the top and half of the remaining stitches being kept on a stitch marker (or a spare knitting needle). Part 3 - also knitted flat - widens the mitt to fit your hands and ends with a three-needle bind off.
The second mitt is the mirror image of the first one. That's why there are different instructions for the second mitt.


Instructions

First Mitt

Part 1 - Thumb
With C1:
CO18 and join in round
Rounds 1 to 10: *p1 k1 p1 repeat from * to end
Round 11: *p1 k1 p1 mk1 repeat from * to end
Rounds 12 to 14: *p1 k1 repeat from * to end

Helgoland Mitts - free knitting pattern by Knitting and so on
Illustrations
Part 2
Row 1 (C1, RS): Place marker and with knitted cast on CO36. The piece now looks like a thumb part with a tail (see illustration 1). Now it is knitted back up that "tail", around the thumb and then back down at the underside of the "tail".
Row 2 (C1, WS): k to m, [k1, kfb, k1] 8 times, place marker, pick up 1 sts from the gap between the last stitch and the underside of the knitted CO, then pick up 36 sts from the underside of the knitted CO of row 1 - your piece should now look like in illustration 2.

One row now starts at the bottom of the shaft, leads around the thumb and down the shaft again. The two markers divide one row into 3 parts: the upwards shaft, the part around the thumb, and the downwards shaft.
In the upwards shaft a wave pattern will be knitted, a mirror image of this wave pattern will be knitted in the downwards shaft part, and around the thumb there will be increases in every 2nd row. These markers will be called "divider markers". As you can see on the illustrations, I've also put in stitch markers between the wave sequences on the shaft parts. Strictly speaking, these markers are not necessary, but helpful to keep your stitch count correct - however, they won't be mentioned in the pattern text.

Row 3 (C2, RS): k35, k2tog, k to end
Row 4 (C2, WS): [A] 3 times (you've reached the 1st dividing marker), [kfb, k3] 8 times, (you've reached the 2nd dividing marker), [B] 3 times

Row 5 (C1, RS): k to 1st marker remove marker, k6, replace marker, k to end
Row 6 (C1, WS): [A] 3 times, remove marker, k6, replace marker, [k2, kfb, k2] until there are 2 sts or fewer before the 2nd marker, k to marker, k6, [B] 3 times

Row 7 (C2, RS): k to 1st marker, ssk, k to 2 sts before 2nd marker, k2tog, k to end
Row 8 (C2, WS): [A] 3 times, k to 1st marker, k6, [k4, kbf, k1] until there are 4 sts or fewer before the 2nd marker, k to marker, k6, [B] 3 times

Row 9 (C1, RS): k to 1st marker, ssk, k to 2 sts before 2nd marker, k2tog, k to end
Row 10 (C1, WS): [A] 3 times, k to 2 sts bef 1st marker, ssk, [k3, kbf, k3] until there are 3 sts or fewer before the 2nd marker, k to marker marker, k2tog, k6, [B] 3 times

Row 11 (C2, RS): k to 1st marker, ssk, k to 2 sts before 2nd marker, k2tog, k to end
Row 12 (C2, WS): [A] 3 times, ssk, k3, kfb, [k2, kfb, k5] until there are 2 sts or fewer before 2nd marker, k to marker, k2tog, k3, kfb, [B] 3 times
Your piece should now look similar to illustration 3.

Row 13 (C1, RS): k to 1st marker remove marker, k6, replace marker, k to 2nd marker, remove marker, k to end
Row 14 (C1, WS): [A] 3 times, ssk, k3, kfb, k6, replace marker, [k6, kfb, k1] until there are 6 sts or fewer before the 2nd marker, k to marker, k6, k2tog, k3, kfb, [B] 3 times

Row 15 (C2, RS): k all sts
Row 16 (C2, WS): [A] 4 times, [k1, kfb, k8] until there is 1 sts or no stitch left before marker , B [4 times]

Row 17 (C1, RS): k all sts
Row 18 (C1, WS): [A] 4 times, [k3, kfb, k7] until there are 3 sts or fewer left before marker , B [4 times]

Row 19 (C2, RS): k to marker, remove marker, k12, replace marker, k to end
Row 20 (C2, WS), [A] 5 times (you can remove the stitch marker when you reach it), BO all sts to marker, [B] 5 times - if you're using a second 3mm needle you can knit the first part of the round (5*A) with the second needle. Alternatively, you can put these 60 sts on a stitch holder or scrap yarn afterwards after finishing row 20.

Part 3
Row 21 (C1, RS): k all sts
Row 22 (C1, WS): [B] 5 times
Row 23 (C2, RS): k all sts
Row 24 (C2, WS): [B] 5 times
Your piece should now look similar to illustration 4.
Repeat rows 21 to 24 until the mitt fits around your hands. Make sure to finish with a C2 row.

Put the stitches from the stitch holder back on a knitting needle - hold both edges right sides together and do a three needle BO in C2. 

Break yarn and weave in ends.


Second Mitt

In order to have the second mitt mirror the wave pattern of the first mitt, the waves need to be in opposite direction. That means that everytime the pattern for the first mitt states to knit sequence A, it needs to be replaced by B, and vice versa.

So, the first part (thumb) is knitted without any changes.
During the second part, the upwards part (on WS) is always knitted with sequence B and the downwards part with sequence A.
And during the third part, only sequence A is knitted.