Sonntag, 9. November 2014

Data Center Mitts

Sometimes when external contractors have to do stuff in one of the high-security rooms of a data centre, my colleagues have to chaperone them. These rooms tend to be well air-conditioned, i.e. it gets cold after a while.

That’s why, a few weeks ago I received a “distress call” via chat from a work mate – to please bring him fingerless gloves the next day. He had been sitting and freezing there for a whole day and didn’t want to repeat that experience unprotected. When I looked through all the fingerless gloves in my wardrobe (many), I noticed that they were all made for women’s hands – and too slim to fit over male hands. Furthermore, many of my designs are rather feminine … So, I brought him my widest ones but promised to knit him a new pair – more suitable for his hands and less girly. A week later his own special pair was ready. Here they are - the data centre mitts :)


Creative Commons License
This work by Knitting and so on is licensed under a Creative Commons Attribution-NonCommercial-ShareAlike 4.0 International License.

Materials
  • 70 grams of 6-ply yarn
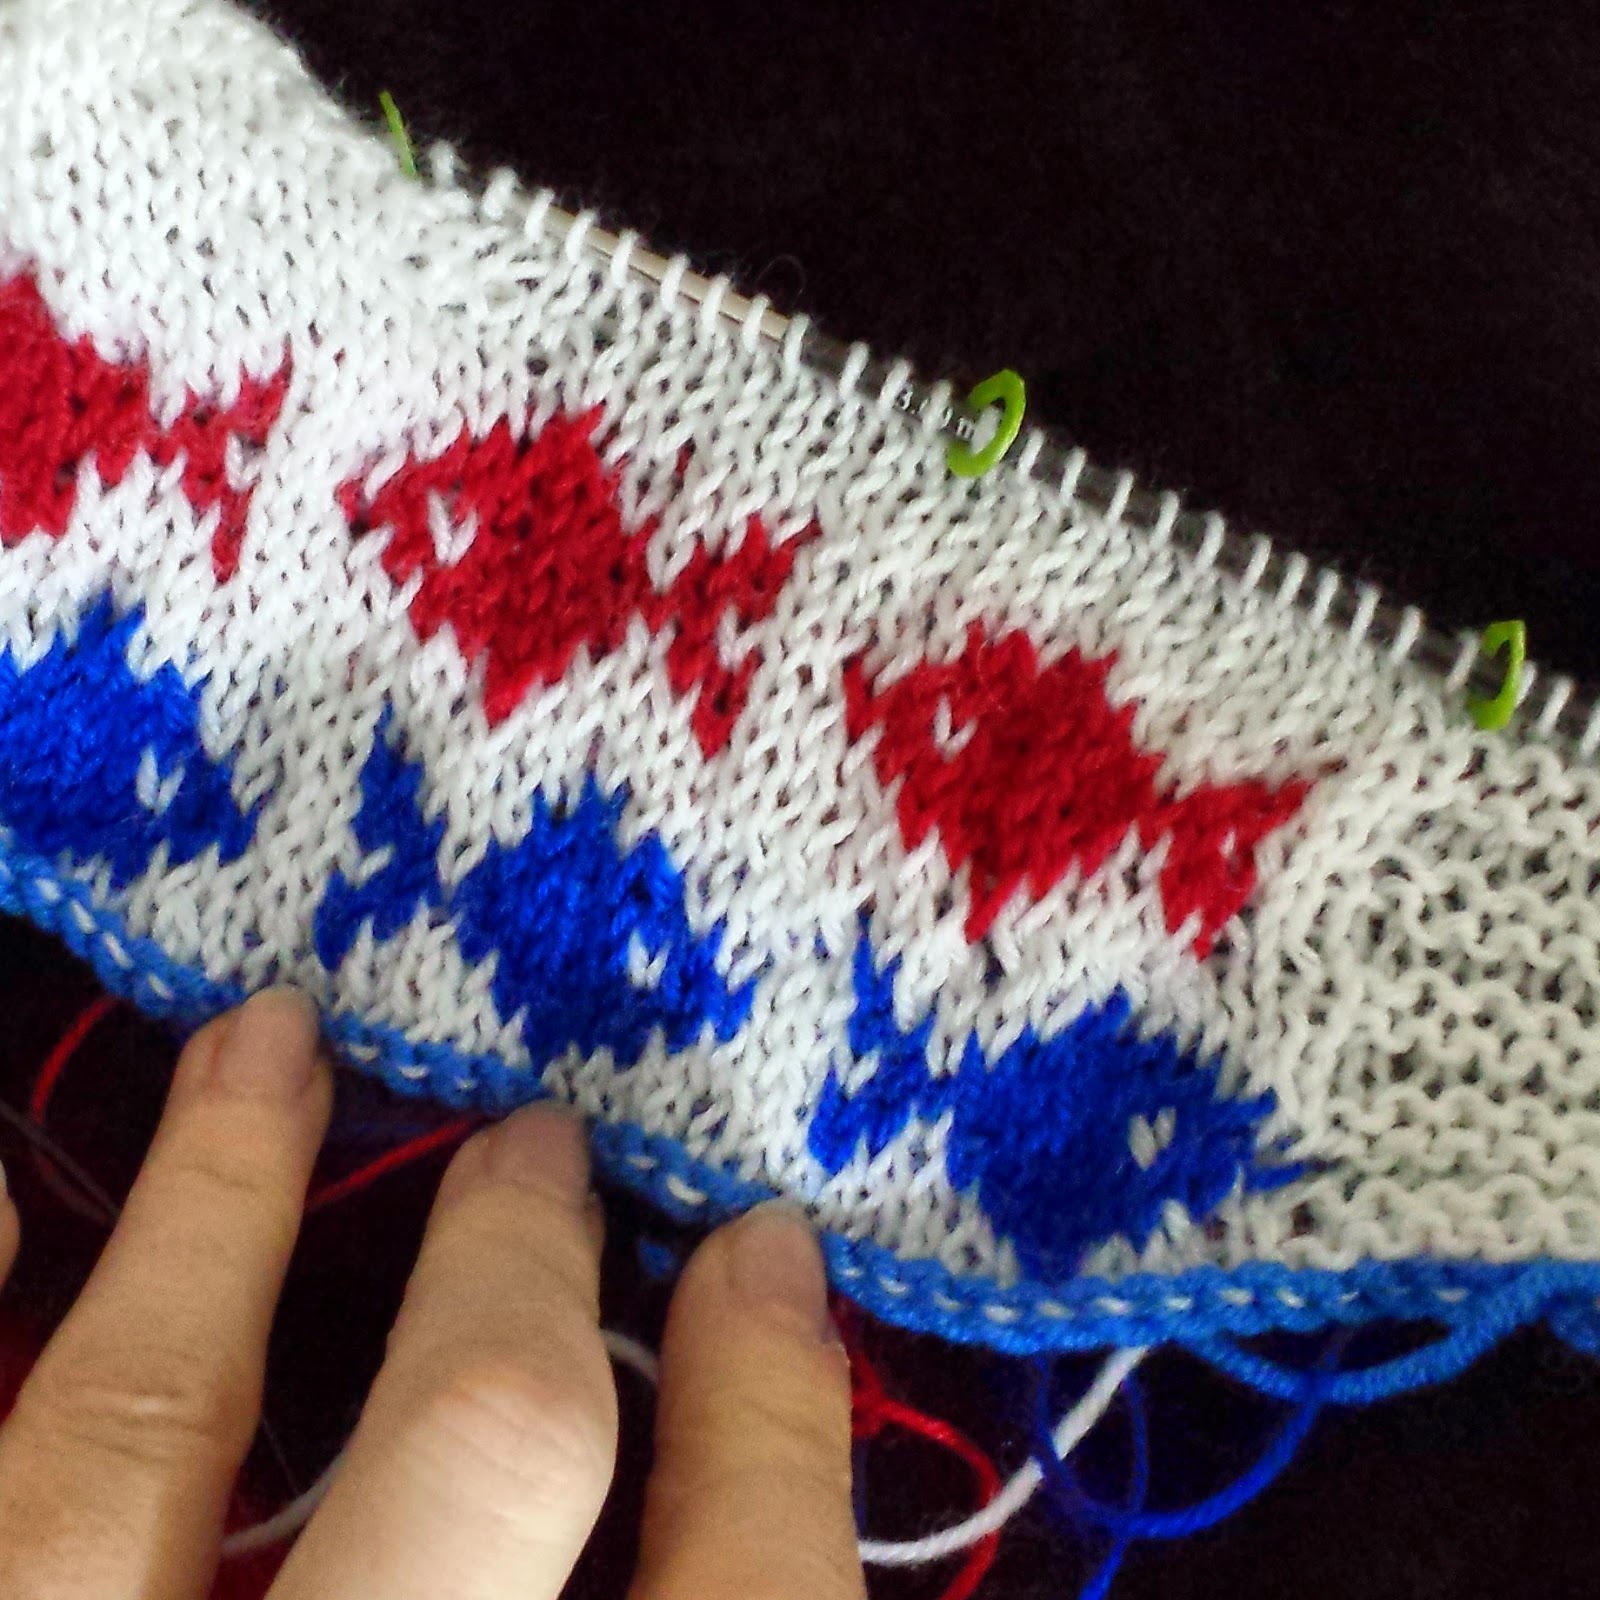
  • 3.5 mm dpns
  • 2 stitch markers
  • Stitch holder or scrap yarn
  • Tapestry needle to weave in ends

Abbreviations & Special Techniques
  • mk1p: make 1 purl stitch (as shown in this video, the first two ways are OK for this pattern)
  • C2B: cable 2 back, e.g. like shown in the this video. For me (unlike for the lady who provided the video, C2B is easier to do than C2F - choose for yourself but use the same stitch throughout the pattern :)  
  • pm: place marker
  • sm: slip marker
  • Backwards loop cast-on: shown in this video 
  • Pick up and knit: shown in this video

Instructions

CO56 sts and join in round
Knit 6 rounds of ribbing: *p2 k2 repeat from * to end of round

Start with cable pattern
Round 1 and 2: *p2 k2 repeat from * to end of round
Round 3: *p2 k2 p2 C2F repeat from * to end of round
Round 4-5: *p2 k2 repeat from * to end of round
Round 6: *p2 C2F p2 k2 repeat from * to end of round
Knit rounds 1-6 a total of 5 times and start thumb gusset

Thumb gusset and upper part of mitt
(Thumb increases are knitted every 2nd round while the pattern of cabling once per 3 rounds is kept.)
Round 1: p2 k2 p2 k2, p1, pm mk1p pm, p1, k2, *p2 k2 repeat from * to end of round
Round 2: p2 k2 p2 k2, p1, sm, p to next marker, sm, p1, *p2 k2 repeat from * to end of round
Round 3: p2 k2 p2 C2F, p1, sm, mk1p, p to 1 st before next marker, mk1p, sm, p1 k2 *p2 k2 p2 C2F repeat from * to end of round
Round 4: p2 k2 p2 k2, p1, sm , p to next marker, sm, p1, *p2 k2 repeat from * to end of round
Round 5: p2 k2 p2 k2, p1,sm, mk1p, p to 1 st before next marker, mk1p, sm, p1, *p2 k2 repeat from * to end of round
Round 6: p2 C2F p2 k2 p1, sm , p to next marker, sm, p1, k2 *p2 k2 p2 C2F repeat from * to end of round
Round 7:  p2 k2 p2 k2, p1,sm, mk1p, p to 1 st before next marker, mk1p, sm, p1, *p2 k2 repeat from * to end of round
Round 8: p2 k2 p2 k2, p1, sm, p to next marker, sm, p1, *p2 k2 repeat from * to end of round
Round 9: p2 k2 p2 C2F, sm, mk1p, p to 1 st before next marker, mk1p, sm, p1 k2 *p2 k2 p2 C2F repeat from * to end of round
Round 10: p2 k2 p2 k2, p1, sm, p to next marker, sm, p1, *p2 k2 repeat from * to end of round
Round 11: p2 k2 p2 k2, p1,sm, mk1p, p to 1 st before next marker, mk1p, sm, p1, *p2 k2 repeat from * to end of round
Round 12: p2 C2F p2 k2 p1, sm , p to next marker, sm, p1, k2 *p2 k2 p2 C2F repeat from * to end of round
Round 13: p2 k2 p2 k2, p1,sm, mk1p, p to 1 st before next marker, mk1p, sm, p1, *p2 k2 repeat from * to end of round
Round 14: p2 k2 p2 k2, p1, sm, p to next marker, sm, p1, *p2 k2 repeat from * to end of round
Round 15: p2 k2 p2 C2F, sm, mk1p, p to 1 st before next marker, mk1p, sm, p1 k2 *p2 k2 p2 C2F repeat from * to end of round
Round 16:  p2 k2 p2 k2, p1, sm, p to next marker, sm, p1, *p2 k2 repeat from * to end of round
Round 17: p2 k2 p2 k2, put the next 17 stitches on a stitch holder or on scrap yarn (removing the markers), CO2 (with backwards loop cast-on), *p2 k2 repeat from * to end of round
Round 18:  *p2 C2F p2 k2 repeat from * to end of round
Rounds 19 and 20:  *p2 k2 repeat from * to end of round
Round 21: *p2 C2F p2 k2 repeat from * to end of round
Round 22 and 23: *p2 k2 repeat from * to end of round
Round 24: *p2 k2 p2 C2F repeat from * to end of round
Round 25 and 26: 4-5: *p2 k2 repeat from * to end of round
Round 27: *p2 C2F p2 k2 repeat from * to end of round

Knit 6 rounds of ribbing: *p2 k2 repeat from * to end of round
Bind-off loosely.

Thumb
Remove 17 thumb stitches from stitch holder and distribute them on 2 dpns. From the sides and above the thumb hole pick up and knit 5 stitches. with a third needle. (There are now 22 sts on your needles, the next needle to knit is the first one with the stitches from the stitch holder)

Row 1: p16 p2tog p3 p2tog (the p2togs are to close the gap between the stitches from above the thumb with the thumb gusset stitches - the last p2tog connects the last stitch of the first row with the first stitch of the next row - now there are only 20 stitches on your needles)
Rows 2-4: purl
Rows 5-8: *p1 k2 p1 repeat from * to end of round
Bind off loosely in pattern

Weave in ends.

Make two.

Samstag, 8. November 2014

Something Fishy

This is the first time, I tried to knit a fair isle pattern ... I clearly need some more practice before I can produce something better ... ;)

Sonntag, 2. November 2014

Scrunchies Again

These are scrunchies that I made from "hosiery yarn", i.e.  strips of cut up pantyhose.

Free DIY Tutorial: Knitted Pantyhose Scrunchies; http://knitting-and-so-on.blogspot.com

I used old "hosiery yarn" I made a few years ago (see blog post here) using the method described here.


Creative Commons License
This work by Knitting and so on is licensed under a Creative Commons Attribution-NonCommercial-ShareAlike 4.0 International License.

Materials
  • to balls of hosiery yarn (in two colors) - one ball equals the yarn you get from one leg
  • one piece of hair elastic
  • rather big dpns - I used 12mm dpns, but other sizes will do as well
  • a tapestry needle for finishing

Instructions

The numbers in brackets refer to the numbers in the picture. Basically, you'll be knitting a tube around the hair elastic.

(1) With yarn A (beige in the picture) cast on 3 stitches (-> needle A)
On a second needle (-> needle B) cast on 3 stitches with yarn B (black in the picture)

(2) With yarn A knit all stitches from the needle B, the working yarn of both colors is now at the same place.

(3) Slip the hair elastic over needle A and the stitches on this needle. The elastic ends up between the needles. Turn work and knit all stitches on needle A with yarn B, slip the stitches on this needle back, and knit them with yarn A. There are now three rows on needle A (cast on with yarn A, one row with yarn B, and one row with yarn A) and two rows on needle B (cast on with yarn B, and one row of yarn A)

(4) Slip both balls of yarn through the ring, i.e. through the hair elastic and turn work. On needle B first knit all stitches with yarn B, then slip the stitches back and knit one row with yarn A. Turn work and repeat on needle A (i.e. knit one row with yarn B, slip the stitches back and knit them with yarn A). 

(5) Repeat step 4 until your knitted tube is long enough to fit around your hair elastic. Don't forget to slip the balls of yarn through the elastic ring at the beginning of each round.

(6) When the tube is long enough, prepare for finishing, i.e. slip only yarn B through the elastic and knit the three stitches on needle B with this yarn. Now the cast on and the last row on each needle are knitted in the same colour. Cut yarn but leave a tail of about 20 cm. Turn work - you're now facing needle A. with a tapestry needle and yarn B sew the stitches of the last row to the cast on - stitch by stitch, Turn work and do the same with yarn A for the stitches on needle B.

Knot the ends together and use the flat end of the tapestry needle to hide ends inside the tube. Whatever you do, the end will look a bit messy, but once you wear it in your hair, these irregularities will not be visible.

Free DIY Tutorial: Knitted Pantyhose Scrunchies; http://knitting-and-so-on.blogspot.com

Sonntag, 5. Oktober 2014

Circle Mitts - Aran Weight Version

A while ago I knitted the Swiss Cheese Scarf by Winnie Shih from really old yarn that I had bought some time in the 80ies. At that time it had been knitted into a sweater and been frogged several years later. Photos of this scarf project are on its Ravelry page.

I decided to knit a new pair of Circle Mitts (original pattern on my blog) but with the heavier yarn. I had one hank left with a label - from that I infered that the yarn was Aran weight.

This is a short version - for the general construction etc., please refer to the original Circle Mitts pattern.


Creative Commons License
This work by Knitting and so on is licensed under a Creative Commons Attribution-NonCommercial-ShareAlike 4.0 International License.


Materials
  • 4.5mm needles (I switched from dpns to circulars and back - even if you use circulars, you will need a third needle for the three-needle BO)
  • about 50 grams of aran weight yarn
  • a tapestry needle to weave in ends

Abbreviations
  • kfb: knit front & back
  • mk1: make 1 knit stitch
  • ssk: slip slip knit
  • k2tog: knit 2 sts together
  • p2tog: purl 2 sts together
  • mk1p: make 1 purl stitch
  • p2tog: purl 2 sts together through the back loop
  • wrap and turn: a method for short rows

Instructions

Part 1 - Thumb

CO12 and join in round (I used this strechy cast-on method, but other CO methods are fine as well)
Knit 5 rounds of k1 p1-ribbing
Knit 3 rounds of plain stockinette stitch
Row 9: *k2 kfb repeat from * (you have increased by 4 sts => 16 sts on your needles)
Knit 2 more rounds of plain stockinette stitch

Part 2
(basically, you'll increase by 8 sts every other row)
Row 1: *k2 mk1 repeat from * (+8 => 24 sts)
Row 2 (and every other even row during part 2): k
Row 3:  *k1 mk1 k2 repeat from *
Row 5: *mk1 k4 repeat from *
Row 7: *k3 mk1 k2 repeat from *
Row 9: *k5 mk1 k1 repeat from *
BO 5 and continue knitting the round to end

Part 3
Turn work
Row 1: p2tog, * p3 mk1p p4 repeat from * until there are less than 7 sts left, p to last 2 sts, p2togtbl
Row 2: ssk, k to last 2 sts, k2tog
Row 3: p2tog, * p5 mk1p p3 repeat from * until there are less than 8 sts left, p to last 2 sts, p2togtbl
Rows 4 & 5: ssk, k6, wrap and turn, p to last 2 sts , p2togtbl
Row 6: ssk, k to last 2 sts, k2tog
Rows 7 & 8: p2tog, p6, wrap and turn, k to last 2 sts, k2tog
Row 9: p2tog, *p6, mk1p, p3 repeat from * until there are less than 9 sts left, p to last 2 sts, p2togtbl
Row 10: ssk, k to last 2 sts, k2tog
Row 11: p2tog, *p3, mk1p, p7 repeat from * until there are less than 10 sts left, p to last 2 sts, p2togtbl
Row 12: ssk, k to last 2 sts, k2tog

You should now have something like 54 sts on your needles. Hold the sides together and with a three-needle bind-off, BO 15 sts.

If you  want the upper edge to be wider, just insert a few more of the short row sequences (Rows 4 & 5, and 7 & 8). For a more detailed explanations (as well as how to calculate the number of stitches to bind off if the mitts are wider), please read the original pattern.

Part 4
Distribute the remaining 24 stitches on your needles and put the stitch that remained from BO on the first needle. The remaining sts will be knitted in the round.

Round 1: sl1, pick up 2 sts from the gap between the first st and the next one (this will avoid holes), k10, mk1, k4, mk1, k to end, pick up 2 sts from gap between the stitch you just knitted and the first in the round (=> now there are 6 sts more on your needles, i.e. 30)
Row 2: (RS) k12, wrap and turn,
    (WS): p12, p12, wrap and turn (or use another method for short rows, e.g. this)
    (RS): k12
Row 3: (RS) k9, wrap and turn
     (WS): p7 p2tog, p2tog, p7, wrap and turn
     (RS); k9
Row 34 (RS) k5, wrap and turn
     (WS): p5, p5, wrap and turn
     (RS); k5
Round 25: k one round (picking up all wrapped sts).

Part 5
Knit 3 more rounds
Knit 6 rounds of k1 p1-ribbing
Bind-off loosely in pattern

Weave in ends.
Make two.

Samstag, 4. Oktober 2014

How to Use This Yarn?

In June I bought a skein of variegated yarn - with colours ranging from white over yellow, orange and red to light- and dark-blue. Here's a selection of my failed attempts, i.e. ideas that I didn't really like - another one is in this blog post :/


Yesterday, I decided that I would try something modular - that way yarn of one colour would be close :) For the modules, I basically used the same almond shape as in the Almendra scarf. But I added a little hole (4 stitches wide) in the center of each "almond". So far, it's the best I've tried with this yarn ... now I only have to decide whether it will be a triangular shawl or a rhomboid wrap ... hmm, difficult ...

Montag, 15. September 2014

Almendra Cowl

Free Knitting Pattern: Almendra Cowl This cowl is made up of almond shaped short row sequences - with full rows in a contrast colour inbetween.

I like my cowls to fit around my neck twice. Threrefore this cowl is double-length, with a circumference of 140 cm - after blocking. It measures between 20 and 25 cm in height.


Creative Commons License
This work by Knitting and so on is licensed under a Creative Commons Attribution-NonCommercial-ShareAlike 4.0 International License.


A Czech translation has been provided by Raveler Nemravka. It is available here. Děkuju mnohokrát!


Materials
  • 150 grams of worsted weight yarn in Main Colour (MC)
  • 50 grams of worsted weight yarn in Contrast Colour (CC, beige on the photos)
  • 5.5mm circular knitting needles
  • 11 stitch markers (one different from the others)
  • tapestry needle to weave in ends

I used some Noro Kurayon (Colourway 40 as MC and Colourway 211E as CC) that I've had in my stash for quite a while.

General Construction
Knitted in the round, this cowl consist of almond shaped short row sequences that are knitted one after another. When one layer is finished,  two full rows are knitted in a contrast colour. The next layer starts with an offset of 10 stitches.

Almendra Cowl - General Construction


Techniques
  • Short rows with double stitches (German short rows, t+p): when you turn, bring yarn to the front and pull it back so that a sort of "double-stitch" is created, then knit back as usual - when you have to knit the double-stitch, be careful to knit it as one stitch (see also https://www.youtube.com/watch?v=P6n561SMZXQ); this method has the advantage the no picking up of stitches is necessary. In the pattern, this stitch will be called t+p (turn and pull).
  • Cheats to avoid cutting yarn: Since I try out a lot (and consequently frog a lot), I avoid cutting yarn at all costs. That's why I'd rather strand yarn over a few stitches (or more) or slip a few stitches. In case of this pattern, this is necessary to get either MC or CC yarn to the start of the new row.
    The picture below shows how this stranding looks from the WS. The encircled numbers show where a new layer starts ("1" = start of first layer, "2" = start of second layer etc.)
Almendra Cowl - how to strand the yarn


Instructions
With CC CO 200 putting a stitch marker after every 20th stitch
Place last stitch marker and join in round (careful not to twist the stitches)
Purl one round, place a different marker to mark the end or round (this marker ("end marker") will be moved).

First Layer (Odd-numbered Layers)
Attach MC and with MC knit the first almond-section as follows
R1 (RS): k20 (i.e. to next marker, left border marker), t+p (turn and pull, see Techniques section)
R2 (WS): k20 (i.e. back to last marker and one stitch further), t+p
R3 (RS): k18, t+p
R4 (WS): k16, t+p
R5 (RS): k14, t+p
R6 (WS): k12, t+p
R7 (RS): k10, t+p
R8 (WS): k8, t+p
R9 (RS): k6, t+p
R10 (WS): k4, t+p
R11 (RS): k5, t+p
R12 (WS): k6, t+p
R13 (RS): k8, t+p
R14 (WS): k10, t+p
R15 (RS): k12, t+p
R16 (WS): k14, t+p
R17 (RS): k16, t+p
R18 (WS): k18, t+p
R19 (RS): k19 (i.e. to left border marker), and DON'T TURN
Continue from Row 1 and knit the next almond-section.

The picture below gives a sketch of the rows in relation to the stitch markers in odd numbered layers.


When you have finished the "almond section" that reaches the end marker or after you have knitted 10 "almonds" switch to CC.

With CC knit one round (stranding MC over the first 10 stitches) - please be careful to knit the double-stitches as one stitch (here the double stitches are the one just before and just after the stitch marker)
Purl one round. Remove the end marker, slip ten stitches, place the end marker.
(If - unlike me - you haven't got a problem with cutting yarn, you can alternatively break MC, knit one round in CC, purl one round in CC, cut CC, remove end marker, slip ten stitches, place end marker and then attach MC to start again.)

Second Layer (Even-Numbered Layers)
With MC start knitting the next almond - however, it is not knitted in the 20 sts between two stitch markers, but around one stitch marker (10 stitches on the left hand side and 10 stitches on the right hand side of the stitch marker).

R1 (RS): k20 (i.e. to next marker, left border marker), t+p (turn and pull, see Techniques section)
R2 (WS): k20 (i.e. back to last marker and one stitch further), t+p
R3 (RS): k18, t+p
R4 (WS): k16, t+p
R5 (RS): k14, t+p
R6 (WS): k12, t+p
R7 (RS): k10, t+p
R8 (WS): k8, t+p
R9 (RS): k6, t+p
R10 (WS): k4, t+p
R11 (RS): k5, t+p
R12 (WS): k6, t+p
R13 (RS): k8, t+p
R14 (WS): k10, t+p
R15 (RS): k12, t+p
R16 (WS): k14, t+p
R17 (RS): k16, t+p
R18 (WS): k18, t+p
R19 (RS): k19 (i.e. to left border marker), and DON'T TURN
Continue from Row 1 and knit the next almond-section.

Almendra Cowl - free knitting pattern by Knitting and so on


When you have finished the "almond section" that reaches the end marker or after you have knitted 10 "almonds" switch to CC.

With CC knit one round (stranding MC over the first 10 stitches) - please be careful to knit the double-stitches as one stitch (here the double stitches are the one just before and just after the stitch marker)
Purl one round. Remove the end marker, slip ten stitches, place the end marker.
(If - unlike me - you haven't got a problem with cutting yarn, you can alternatively break MC, knit one round in CC, purl one round in CC, cut CC, remove the end marker, slip ten stitches , place the end marker, and then attach MC to start again.)

The picture below gives a sketch of the rows in relation to the stitch markers in even numbered layers.


Repeat first and second layer until the cowl is wide enough for you. I knitted a total of 5 layers (3x odd-numbered layers and 2x even-numbered layers).

Finish with one knit row in CC and bind off purling in CC.

Free Knitting Pattern - Almendra Cowl

Montag, 1. September 2014

Playing around with Short-Rows ... and Frogging them

I suppose I'm the queen of frogging ... for every piece I knit, I probably try out three to five different designs until I like it. It's a good thing then, that I usually buy yarn, that can be treated that way (like Noro Kurayon, that doesn't look worse for being ribbed back a few times).

But I guess, I've got it right this time - and I hope I will write up the pattern eventually :)

Freitag, 29. August 2014

Knitted Food

In one of the advertising "newspapers" (you know, the ones you get, if you have a store-card for the supermarket etc.) there was an article about a lady who creates knitted food installations. The article is available online (in german).


That made me google for her - and I found her website and her blog. I do love some of the photos there - there is even a free (german) pattern for a knitted sausage :)

I apologize that all the links are to german-speaking webpages, but really like the idea - and I like her knitting philosophy as expressed in the article: "[Stricken ...] helfe, ein Trauma zu verarbeiten, und tue auch Depressiven gut. Am besten sei Stricken ohne eigentlichen Zweck, .... Wenn man wie sie ohne Muster oder Vorlage arbeitet und sich das Objekt einfach vorstellt, fokussiert sich der Geist aufs innere Bild und lässt schlechte Gedanken vorbeiziehen."
Roughly translated: "Knitting helps to coping with trauma and is even good for depressive people. The best is knitting without a purpose ... When one works like her without patterns and just imagines the object, the mind focuses on an inner picture and lets bad thoughts disappear."

Sonntag, 24. August 2014

"Through Thick and Thin"-Schal

Gratis-Strickanleitung: "Through Thick and Thin" SchalDieser leichte Schal besteht nur aus
rechten Maschen und wird von Spitze zu Spitze gestrickt. Die Form entsteht durch Dreiecke, die mit verkürzten Reihen gebildet werden. Der Unterschied in der Struktur kommt durch die Verwendung von verschieden dicken Nadeln (3mm und 6mm). Daher auch der Name ("Through Thick and Thin" = durch dick und dünn).

The English version of this pattern can be found here.
Eine englische Version dieser Anleitung findet sich hier.

Nach dem Spannen ist der Schal ca. 170 cm lang und an der breitesten Stelle ca. 24 cm breit.


Creative Commons Lizenzvertrag
Dieses Werk von Knitting and so on ist lizenziert unter einer Creative Commons Namensnennung - Nicht-kommerziell - Weitergabe unter gleichen Bedingungen 4.0 International Lizenz.

Materialien
ca. 80g 4-fädiges Garn
3mm Stricknadeln
6mm Stricknadeln
Nähnadel, um die Fadenenden zu vernähen

Techniken und Notation

  • Ausser rechten Maschen musst du für diesen Schal fast nur verkürzte Reihen mit Doppelmasche stricken können. Dies funktioniert so: Man strickt bis zu der in der Anleitung angegebenen Masche und dreht die Arbeit. Das Garn liegt jetzt vor der Arbeit. Mit der rechten Nadel wird in die letzte Masche wie zum linksstricken eingestoche und das Garn wird dabei vollständig nach hinten gezogen, so dass es auf der Nadel wie doppelt aussieht (daher "Doppelmasche"). Eine sehr gute Erläuterung dieser Technik mit Fotos gibt es hier: http://alpistrickbuch.blogspot.ch/2009/09/verkurzte-reihen.html. Diese beiden Videos zeigen verkürzte Reihen mit Doppelmasche: http://www.youtube.com/watch?v=n-cVsSgT-E4 und http://www.youtube.com/watch?v=uDN4zGqjBf0
    In der Anleitung wird dafür jeweils die Abkürzung d+z (drehen und ziehen) verwendet. Die dabei entstehende Doppelmasche wird in der Folgereihe nicht gezählt.
  • Hier noch die anderen Abkürzungen, die in der Anleitung verwendet werden.
    HR: Hinreihe
    RR: Rückreihe
    kfb: aus einer Masche zwei herausstricken, indem man zuerst eine Masche aus dem vorderen, dann eine aus dem hinteren Maschenglied strickt (ein Video hierzu gibt es bei Drops Design)


Anleitung

Mit den 3mm Nadeln 10 Maschen anschlagen

Erstes Dreieck (3mm Nadeln)
Generell wird in den 3mm-Dreiecken jede verkürzte Reihe um 4 Maschen kürzer als die Vorreihe gestrickt.
Reihe 1 (HR): re. M.
Reihe 2 (RR): re. M.
Reihe 3 (HR): re. M. bis 3 M. vor dem Ende der Reihe (d.h. Es sind noch 3 Maschen auf der linken Nadel) , d+z (=drehen und ziehen, siehe Abschnitt „Techniken und Notation“)
Reihe 4 (RR): re. M.
Reihe 5 (HR): re. M. bis 4 M. vor der letzten Doppelmasche; d+z
Reihe 6 (RR): re. M.
Reihe 7 (HR): re. M.
Reihe 8 (RR): re. M.
Reihe 9 (HR): re. M.
Zu 6mm Nadeln wechseln, d.h. die nächste Reihe wird mit 6mm Nadeln abgestrickt.

6mm-Dreieck (6mm-Nadeln)
Reihe 1 (RR): re. M.
Reihe 2 (HR): re. M.
Reihe 3 (RR): re. M. bis 2 vor Ende der Reihe, d+z
Reihe 4 (HR): re. M.
Reihe 5 (RR): re. M. bis 3 vor der letzten Doppelmasche d+z
Reihe 6 (HR): re. M.
Reihen 5 and 6 so lange wiederholen bis nur noch 3 Maschen oder weniger auf dem Rückweg gestrickt werden (HR Reihe).
Weitere 3 Reihen stricken - zu 3mm Nadeln wechseln

3mm-Dreieck (3mm Nadeln) - zunehmend
Reihe 1 (HR): (5 re. M, kfb) wiederholen bis nur noch 5 M. oder weniger übrig sind, bis zum Ende  re. M. stricken
Reihe 2 (RR): re. M.
Reihe 3 (HR): re. M. bis 3 vor dem Ende der Reihe; d+z
Reihe 4 (RR): re. M.
Reihe 5 (HR): re. M. bis 4 vor der letzten Doppelmasche; d+z
Reihe 6 (RR): re. M.
Reihen 5 and 6 so lange wiederholen bis nur noch 4 Maschen oder weniger auf dem Rückweg gestrickt werden(RR Reihe)
Weitere 3 Reihen stricken - zu 6mm Nadeln wechseln

Das 6mm-Dreieck und das 3mm-Dreieck (zunehmend) insgesamt 11 mal wiederholen, d.h. es wurden insgesamt 12 3mm-Dreiecke und 11 6mm-Dreiecke gestrickt.
Ein weiteres 6mm-Dreieck stricken – und wieder zu 3mm-Nadeln wechseln.

3mm-Dreieck (3mm-Nadeln) - neutral
Reihe 1 (HR): (5 re. M, kfb) wiederholen bis nur noch 5 M. oder weniger übrig sind, bis zum Ende  re. M. stricken
Reihe 2 (RR): re. M.
Reihe 3 (HR): re. M. bis 3 vor dem Ende der Reihe, d+z
Reihe 4 (RR): re. M.
Reihe 5 (HR): re. M. bis 4 vor der letzten Doppelmasche d+z
Reihe 6 (RR): re. M.
Reihen 5 and 6 so lange wiederholen bis nur noch 4 Maschen oder weniger auf dem Rückweg gestrickt werden(RR Reihe)
2 Reihen re. M. stricken
Letzte Reihe (HR): (5 re. M., 2 M. zs.stricken) wiederholen bis nur noch 5 M. oder weniger übrig sind, bis zum Ende  re. M. stricken
Zu 6mm-Nadeln wechseln

6mm-Dreieck (6mm Nadeln) (gleich dem 6mm-Dreieck im zunehmenden Teil)
Reihe 1 (RR): re. M.
Reihe 2 (HR): re. M.
Reihe 3 (RR): re. M. bis 2 vor dem Ende der Reihe, d+z
Reihe 4 (HR): re. M.
Reihe 5 (RR): re. M. bis 3 vor der letzten Doppelmasche, d+z
Reihe 6 (HR): re. M.
Reihen 5 and 6 so lange wiederholen bis nur noch 3 Maschen oder weniger auf dem Rückweg gestrickt werden (HR Reihe).
3 Reihen rechte Maschen stricken – zu 3mm Nadeln wechseln.

3mm Dreieck (3mm Nadeln) - abnehmend
Reihe 1 (HR): re. M.
Reihe 2 (RR): re. M.
Reihe 3 (HR): re. M. bis 3 vor dem Ende der Reihe, d+z
Reihe 4 (RR): re. M.
Reihe 5 (HR): re. M. bis 4 vor der letzten Doppelmasche d+z
Reihe 6 (RR): re. M.
Reihen 5 and 6 so lange wiederholen bis nur noch 4 Maschen oder weniger auf dem Rückweg gestrickt werden(RR Reihe)
Knit 2 Reihen,
Letzte Reihe: (5 re. M., 2 M. zs.stricken) wiederholen bis nur noch 5 M. oder weniger übrig sind, bis zum Ende  re. M. stricken
Zu 6mm-Nadeln wechseln

Die 6mm- und 3mm-Dreiecke (abnehmend) abwechseln so lange wiederholen bis nur noch 10 Maschen auf den Nadeln sind.
Ein weiteres 6mm-Dreieck stricken.

3mm Dreieck (3mm needles) - Letztes Dreieck
Reihe 1 (HR): re. M.
Reihe 2 (RR): re. M.
Reihe 3 (HR): re. M. bis 3 vor end d+z
Reihe 4 (RR): re. M.
Reihe 5 (HR): re. M. bis 4 vor der letzten Doppelmasche d+z
Reihe 6 (RR): re. M.
Reihen 5 and 6 so lange wiederholen bis nur noch 4 Maschen oder weniger auf dem Rückweg gestrickt werden(RR Reihe)
2 weitere Reihen re. M. stricken
letzte Reihe: locker abketten

Die Enden vernähen und den Schal spannen.

Gratis-Strickanleitung: Through Thick and Thin Schal


Wenn du die Anleitung oben befolgst, sollte die Maschenanzahl und die Anzahl der gestrickten Reihen im zunehmenden Teil grösser werden (erst sehr langsam, dann schneller), und im abnehmenden Teil umgekehrt kleiner werden. Die Tabelle unten listet die genauen Zahlen auf.


Freitag, 22. August 2014

Through Thick and Thin

Free Knitting Pattern: Through Thick and Thin Scarf
This light-weight "garter-stitch
only" scarf - knitted from side to side and shaped with short row triangles. The difference in texture is achieved by switching needle sizes between
triangles.

After blocking the finished scarf measures about 170 cm from side to side and 24 cm at its widest point.

Eine deutsche Version dieser Anleitung gibt es hier.
A German version of this pattern can be found here.


Creative Commons License
This work by Knitting and so on is licensed under a Creative Commons Attribution-NonCommercial-ShareAlike 4.0 International License.


Materials
  • about 80 grams of fingering weight yarn
  • 3mm knitting needles
  • 6mm knitting needles
  • a tapestry needle to weave in ends

Techniques

Aside from knit stitches, all you need to know is how to knit short rows. Currently, my favorite technique are "German short rows": when you turn, bring yarn to the front and pull it back so that a sort of "double-stitch" is created, then knit back as usual - when you have to knit the double-stitch, be careful to knit it as one stitch (see also https://www.youtube.com/watch?v=P6n561SMZXQ); this method has the advantage the no picking up of stitches is necessary. In the pattern, this stitch will be called t+p (turn and pull).
Here's a video that shows how to work double stitches in garter stitch: http://youtu.be/PsBkXPmjgaE


Instructions

With 3mm needles CO10.

Set-up wedge (3mm needles):

Generally in 3mm-wedges, rows are shortened by 4 sts, i.e. each row is 4 sts shorter than the one before.
Row 1 (RS): k to end
Row 2 (WS): k to end
Row 3 (RS): k to 3 sts before end (i.e. there are still 3 stitches on your left-hand needle), t+p (=turn and pull, see Techniques section)
Row 4 (WS): k to end
Row 5 (RS): k to 4 sts before last double stitch; t+p
Row 6 (WS): k to end
Row 7 (RS): k to end
Row 8 (WS): k to end
Row 9 (RS): k to end
Switch to 6mm needles

6mm-Wedge (6mm needles)
Generally in 6mm-wedges, rows are shortened by 3 sts, i.e. each row is 3 sts shorter than the one before.
Row 1 (WS): k to end
Row 2 (RS): k to end
Row 3 (WS): k to 2 before end t+p
Row 4 (RS): k to end
Row 5 (WS): k to 3 before last double-stitch t+p
Row 6 (RS): k to end
Repeat rows 5 and 6 until there are 3 sts or less on the row back (RS row)
Knit 3 rows - switch to 3mm needles

3mm-Wedge (3mm needles) - Increasing
During the increasing part, at the beginning of a 3mm wedge each 6th sts is doubled.
Row 1 (RS): * k5 kfb repeat from * until there are 5 sts or less left, k to end
Row 2 (WS): k to end
Row 3 (RS): k to 3 before end t+p
Row 4 (WS): k to end
Row 5 (RS): k to 4 before last double-stitch t+p
Row 6 (WS): k to end
Repeat rows 5 and 6 until there are 4 sts or less on the row back (WS row)
Knit 3 rows - switch to 6mm needles

Repeat 6mm-wegde and 3mm-wegde (increasing) 11 times (i.e. you have 12 3mm-wedges and 11 6mm-wedges)

Knit another 6mm-wedge

3mm-Wedge (3mm-needles) - Neutral
Row 1 (RS): * k5 kfb repeat from * until there are 5 sts or less left, k to end
Row 2 (WS): k to end
Row 3 (RS): k to 3 before end t+p
Row 4 (WS): k to end
Row 5 (RS): k to 4 before last double-stitch t+p
Row 6 (WS): k to end
Repeat rows 5 and 6 until there are 4 sts or less on the row back (WS row)
Knit 2 rows
Last row (RS): *k 5 ssk repeat from * until there are 5 sts or less left, k to end
Switch to 6mm needles

Free Knitting Pattern: Through Thick and Thin Scarf


6mm-Wedge (6mm needles) (No change to the increasing part)
Row 1 (WS): k to end
Row 2 (RS): k to end
Row 3 (WS): k to 2 before end t+p
Row 4 (RS): k to end
Row 5 (WS): k to 3 before last double-stitch t+p
Row 6 (RS): k to end
Repeat rows 5 and 6 until there are 3 sts or less on the row back (RS row)
Knit 3 rows - switch to 3mm needles

3mm Wedge (knitted with 3mm needles) - Decreasing
During the decreasing part, at the end of a 3mm wedge each 7 sts are reduced to 6.
Row 1 (RS): k
Row 2 (WS): k to end
Row 3 (RS): k to 3 before end t+p
Row 4 (WS): k to end
Row 5 (RS): k to 4 before last double-stitch t+p
Row 6 (WS): k to end
Repeat rows 5 and 6 until there are 4 sts or less on the row back (WS row)
Knit 2 rows,
Last row: *k 5 ssk repeat from * until there are 5 sts or less left, k to end
Switch to 6mm needles

Repeat 6mm-wedge and 3mm-wedge (decreasing) until there are only 10 stitches on your needles.
Knit one more 6mm-wedge

3mm Wedge (knitted with 3mm needles) - Last Wedge
Row 1 (RS): k
Row 2 (WS): k to end
Row 3 (RS): k to 3 before end t+p
Row 4 (WS): k to end
Row 5 (RS): k to 4 before last double-stitch t+p
Row 6 (WS): k to end
Repeat rows 5 and 6 until there are 4 sts or less on the row back (WS row)
Knit 2 rows,
Last row: bind off loosely

Weave in ends and block.

If you follow the instructions above, your stitch count will increase up to the neutral wedge as well as the number of rows per wedge - afterwards both will decrease. The table on the right lists the number of stitches and ridges that should appear.


Sonntag, 10. August 2014

Shaping with Short Rows

I'm really looking forward to have it finished and blocked ... and to see how it looks then. I quite like how the triangles add up to the crescent shape.

Samstag, 2. August 2014

Wellengang Short Row Scarf

This slim elegant scarf is made from one skein of fingering weight yarn. It's easy to knit - the pattern consists of only 8 rows to repeat. The wave pattern is achieved by stacks of short rows - with an offset of two stitches for each row. "Wellengang" is the german word for sea state or swell.

Wellengang Short Row Scarf: Free Knitting Pattern by Knitting and so on


Creative Commons License
This work by Kntting and so on is licensed under a Creative Commons Attribution-NonCommercial-ShareAlike 4.0 International License.


A German version of this pattern can be found here.
Diese Anleitung gibt es hier auch auf Deutsch.

Materials
  • 100 grams of fingering weight yarn
  • 3.75mm needles (3.5mm or 4mm needles will do as well)
  • stitch markers
  • a tapestry needle to weave in ends
Knitting and so on: Wellengang Short Row Scarf - Free Knitting Pattern

Techniques and Notation
  • German short rows: when you turn, bring yarn to the front and pull it back so that a sort of double-stitch is created, then knit back as usual - when you have to knit the double-stitch, be careful to knit it as one stitch (see also https://www.youtube.com/watch?v=P6n561SMZXQ); this method has the advantage the no picking up of stitches is necessary. In the pattern, this stitch will be called t+p (turn and pull).
    For purposes of this pattern, this pulled stitch will NOT be counted after turning.
  • Drop Stitches/Elongated Stitches: In the first row insert the right hand needle into the next stitch and wrap the yarn around it 3 times - in the next row drop all your extra wraps, i.e. only knit one stitch per three wraps. Here are some YouTube videos that show this technique see http://www.youtube.com/watch?v=D_PtbMLkty4 or http://www.youtube.com/watch?v=NN0sbky-3IE)
    I personally prefer the method of doing yarn overs (2 yo's in case of this pattern) inbetween the stitches - the result is the same. Unfortunately, I couldn't find a video in English for this - this one is in German: http://www.youtube.com/watch?v=fqcnTlwYzTQ
  • Since both sides look the same, it may be helpful to mark the RS.
  • Notations: Since I'm lazy, I will use the following abbreviations - please note that this refers to the current knitting direction, i.e. on RS M2+1 is a different stitch than on WS. 
    • "k to M2+1" means: nit to M2 and then k1 
    • "k to M2-4" means: knit to four stitches before M2

Instructions

CO52
Set-up row: k6 pm (this marker will be called M5) k10 pm (this marker will be called M4) k10 pm  (this marker will be called M3) k10 pm  (this marker will be called M2) k10 pm  (this marker will be called M1) k6

Row 1: (RS) k all stitches
Row 2: (WS) k to M4, t+p
  (RS) k to end
  (WS) k to M4-2, t+p
  (RS) k to end
  (WS) k to M4-4, t+p
  (RS) k to end
  (WS) k to M4-6, t+p
  (RS) k to end
  (WS) k to M4-8, t+p
  (RS) k to end
  (WS) k to M5 (i.e. k M4-10), t+p
  (RS) k to end;

  (WS) k to M2, t+p
  (RS) k10 (i.e. k to M3+1) t+p
  (WS) k8 (i.e. k to M2-2) t+p
  (RS) k10 (i.e. k to M3+3) t+p
  (WS) k8 (i.e. k to M2-4) t+p
  (RS) k10 (i.e. k to M3+5) t+p
  (WS) k8 (i.e. k to M2-6) t+p
  (RS) k10 (i.e. k to M3+7) t+p
  (WS) k8 (i.e. k to M2-8) t+p
  (RS) k10 (i.e. k to M3+9) t+p
  (WS) k8 (i.e. k to M2-10 = M3) t+p
  (RS) k10 (i.3. k to M3+11 = M4+1) t+p

  (WS) k to end
  (RS) k to M1+1, t+p
  (WS) k to end
  (RS) k to M1+3, t+p
  (WS) k to end
  (RS) k to M1+5, t+p
  (WS) k to end
  (RS) k to M1+7, t+p
  (WS) k to end
  (RS) k to M1+9, t+p
  (WS) k to end
  (RS) k to M1+11 (i.e. to M2+1), t+p
  (WS) k to end;


Row 3: (RS) k all stitches as elongated stitches
Row 4: (WS) k all stitches dropping all additonal wraps


Row 5: (RS) k to M3+1, t+p
  (WS) k10 (i.e. k to M2), t+p
  (RS) k8 (i.e. k to M3-1), t+p
  (WS) k10 (i.e. k to M2+2), t+p
  (RS) k8, (i.e. to M3-3), t+p
  (WS) k10 (i.e. k to M2+4), t+p
  (RS) k8 (i.e. to M3-5), t+p
  (WS) k10 (i.e. k to M2+6), t+p
  (RS) k8 (i.e. to M3-7), t+p
  (WS) k10 (i.e. k to M2+8), t+p
  (RS) k8 (i.e. k to M3-9), t+p
  (WS) k10 (i.e. k to M2+10 = M1), t+p

  (RS) k to M5+1, t+p
  (WS) k10 (i.e. k to M4), t+p
  (RS) k8 (i.e. to M5-1), t+p
  (WS) k10 (i.e. k to M4+2), t+p
  (RS) k8, (i.e. k to M5-3), t+p
  (WS) k10 (i.e. k to M4+4), t+p
  (RS) k8 (i.e. to M5-5), t+p
  (WS) k10 (i.e. k to M4+6), t+p
  (RS) k8 (i.e. to M5-7), t+p
  (WS) k10 (i.e. k to M4+8), t+p
  (RS) k8 (i.e. k to M5-9), t+p
  (WS) k10 (i.e. k to M4+10 = M3), t+p
  (RS) k to end

Row 6: (WS) k all stitches

Row 7 = Row 3
Row 8 = Row 4

Repeat rows 1 to 8 until you run out of yarn or until your scarf is long enough. To make both ends look alike, end with rows 1 and 2; then BO loosely.

Weave in ends and block.

Free knitting pattern: Wellengang Short Row Scarf (http://knitting-and-so-on.blogspot.com)


This pattern has been featured on the Pinbellish Link Party #43. Thank you!