Posts mit dem Label Recycling werden angezeigt. Alle Posts anzeigen

Sonntag, 2. November 2014

Scrunchies Again

These are scrunchies that I made from "hosiery yarn", i.e.  strips of cut up pantyhose.

Free DIY Tutorial: Knitted Pantyhose Scrunchies; http://knitting-and-so-on.blogspot.com

I used old "hosiery yarn" I made a few years ago (see blog post here) using the method described here.


Creative Commons License
This work by Knitting and so on is licensed under a Creative Commons Attribution-NonCommercial-ShareAlike 4.0 International License.

Materials
  • to balls of hosiery yarn (in two colors) - one ball equals the yarn you get from one leg
  • one piece of hair elastic
  • rather big dpns - I used 12mm dpns, but other sizes will do as well
  • a tapestry needle for finishing

Instructions

The numbers in brackets refer to the numbers in the picture. Basically, you'll be knitting a tube around the hair elastic.

(1) With yarn A (beige in the picture) cast on 3 stitches (-> needle A)
On a second needle (-> needle B) cast on 3 stitches with yarn B (black in the picture)

(2) With yarn A knit all stitches from the needle B, the working yarn of both colors is now at the same place.

(3) Slip the hair elastic over needle A and the stitches on this needle. The elastic ends up between the needles. Turn work and knit all stitches on needle A with yarn B, slip the stitches on this needle back, and knit them with yarn A. There are now three rows on needle A (cast on with yarn A, one row with yarn B, and one row with yarn A) and two rows on needle B (cast on with yarn B, and one row of yarn A)

(4) Slip both balls of yarn through the ring, i.e. through the hair elastic and turn work. On needle B first knit all stitches with yarn B, then slip the stitches back and knit one row with yarn A. Turn work and repeat on needle A (i.e. knit one row with yarn B, slip the stitches back and knit them with yarn A). 

(5) Repeat step 4 until your knitted tube is long enough to fit around your hair elastic. Don't forget to slip the balls of yarn through the elastic ring at the beginning of each round.

(6) When the tube is long enough, prepare for finishing, i.e. slip only yarn B through the elastic and knit the three stitches on needle B with this yarn. Now the cast on and the last row on each needle are knitted in the same colour. Cut yarn but leave a tail of about 20 cm. Turn work - you're now facing needle A. with a tapestry needle and yarn B sew the stitches of the last row to the cast on - stitch by stitch, Turn work and do the same with yarn A for the stitches on needle B.

Knot the ends together and use the flat end of the tapestry needle to hide ends inside the tube. Whatever you do, the end will look a bit messy, but once you wear it in your hair, these irregularities will not be visible.

Free DIY Tutorial: Knitted Pantyhose Scrunchies; http://knitting-and-so-on.blogspot.com

Dienstag, 18. Juni 2013

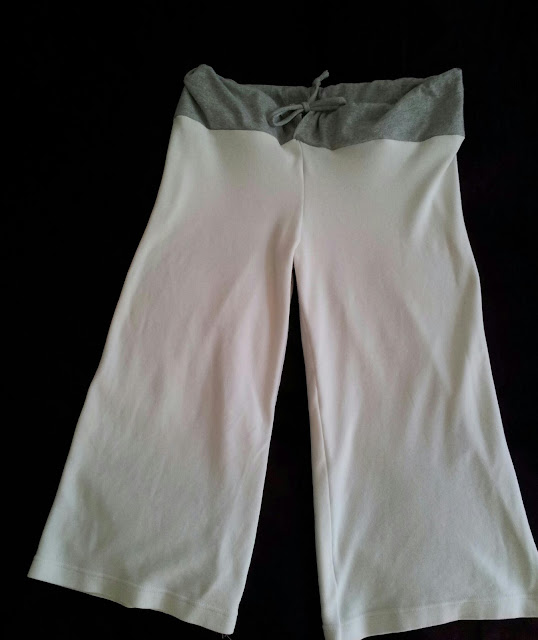
Yoga Pants

Considering that this is my first EVER sewing project,  I'm quite pleased with myself even though the seams are not really straight and there are some parts that I'd do differently next time - but they fit! I used the method from this wonderful video tutorial.

Sonntag, 16. Juni 2013

Earring Organizer

Only vaguely related to knitting and yarn ... This earring organizer is made of a cardboard cone, that was used for yarn.
I drilled holes into the cardboard and painted it with acrylic paint - voilà.

Dienstag, 2. April 2013

Chair Cover

Free Tutorial: Chair Cover knitted from an old blanket
Upcycle your old blankets by cutting them into strips and knit a comfortable chair cover ... to sit a bit warmer on cool spring days.

I used an old fitted sheet (i.e. elastic material) and cut it in a spiral (as described here), except that I didn't tear the material, but used scissors. Afterwards I stretched the material a bit (as you do when making t-shirt yarn) while I wound it up into a big ball.

This chair cover is knitted along the lines of Frankie Brown's Ten Stitch Blanket pattern. However, it's not worked as a spiral.


I used 25mm needles and cut up sheets as yarn, but I guess T-shirt yarn will work fine, as well.

Here's how I did it:

Provisionally cast on 10 stitches,
Row 1: sl1 k9
Row 2: sl1 k8 w+t
Row 3: sl1 k to end
Row 4: sl1 k7 w+t
Row 5: sl1 k to end
Row 6: sl1 k6 w+t
Row 7: sl1 k to end
Row 8: sl1 k5 w+t
Row 9: sl1 k to end
Row 10: sl1 k4 w+t
Row 11: sl1 k to end
Row 12: sl1 k3 w+t
Row 13: sl1 k to end
Row 14: sl1 k2 w+t
Row 15: sl1 k to end
Row 16: sl1 k1 w+t
Row 17: sl1 k to end
Row 18: sl1 w+t
Row 19: k1
Row 20: sl1 k1 (picking up the wrapped stitch)
Row 21: sl1 k to end
Row 22: sl1 k2 (picking up the wrapped stitch)
Row 23: sl1 k to end
Row 24: sl1 k3 (picking up the wrapped stitch)
Row 25: sl1 k to end
Row 26: sl1 k4 (picking up the wrapped stitch)
Row 27: sl1 k to end
Row 28: sl1 k5 (picking up the wrapped stitch)
Row 29: sl1 k to end
Row 30: sl1 k6 (picking up the wrapped stitch)
Row 31: sl1 k to end
Row 32: sl1 k7 (picking up the wrapped stitch)
Row 33: sl1 k to end
Row 34: sl1 k8 (picking up the wrapped stitch)
Row 35: sl1 k to end
Row 36: sl1 k7 (picking up the wrapped stitch)
Row 37: sl1 k to end

Repeat Rows 1 to 37 a total of 3 times, then knit rows 1 to 36.
Graft ends together in garter stitch, i.e.
  • setup: Front purl, back purl.
  • front needle: knit slip, purl leave.
  • back needle: knit slip, purl leave.

Samstag, 18. August 2012

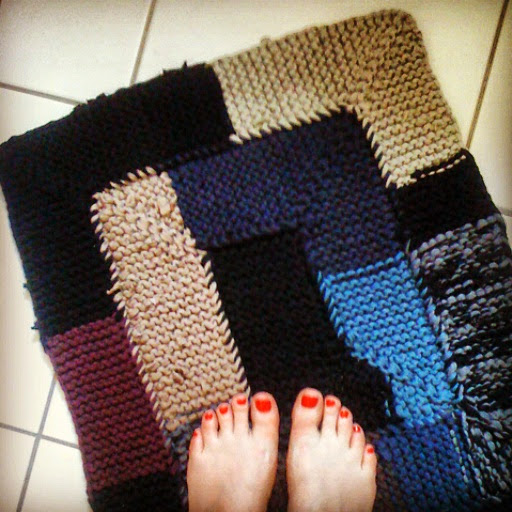
Ten-Stitch Bath Rug

I knitted a rug for my new bathroom out of t-shirt yarn. I love how it feels under my feet. The pattern is called "Ten Stitch Blanket" by Frankie Brown.


Sonntag, 29. April 2012

Tarn Scrunchy

If there's anything I should have lying around, it's scrunchies. Unfortunately, I seem to "distribute" them all over the place, so that I usually don't find any of them. That's why I buy more and more of them - only to discover later that there were some in the pocket of a winter coat or in a bag that I hadn't used for ages.
By chance I found on ravelry a pattern for one ... before, it had never occured to me that this could be a knitting or crochet project.

So, this weekend I went to the supermarket and bought cheap hair rubber bands.

First I tried with thin cotton yarn - and it looked just fine. Then I thought that this might be something to use my tarn for. (How to make tarn: here.)

It took me several times, to get it right. Since tarn is quite thick, it was necessary to use it in a way that the scrunchy wouldn't get to heavy. For example, loops of chain stitches were just to thick and unelastic.


Creative Commons License
This work by Knitting and so on is licensed under a Creative Commons Attribution-NonCommercial-ShareAlike 3.0 Unported License.


Here's how I did it ...

Material:
  • less then 1 t-shirt's worth of tarn
  • one elastic hair band
  • 5mm crochet hook
Instructions:
  1. to start do a slip stitch and fix yarn to hair band with another slip stitch
  2. wrap yarn twice around your index finger, insert hook into these loops, yarn over and pull through, but leave the loops on your finger (you have now 2 loops on your hook)
  3. again wrap yarn twice around your index finger insert hook into these loops, yarn over and pull through, but leave the loops on your finger (you have now 3 loops on your hook)
  4. yarn over and pull yarn through all three loops on your hook
  5. slip stitch around the elastic hair band and remove the loops from your index finger
  6. repeat steps 2 to 5 round
  7. join with slip stitch and weave in ends

Freitag, 23. Dezember 2011

Velvet Cowl

I made a cowl from a pair of old velvet trousers my mum wanted to throw away. I cut the trousers into stripes (just like making t-shirt yarn, but with only about 1cm width, because the material is rather heavy), tugged the stripes (very gently) and started knitting.

The cowl is knit diagonally.

I used 12mm needles, but thicker needles can be used as well.

CO18
Row 1: ssk k until last stitch kfb
Row 2: purl
Row 3: ssk k until last stitch kfb
Row 4: *knit yo* repeat
Row 5: ssk knit (dropping all yo's) until last stitch kfb
Row 6: ssk k until last stitch kfb

Knit until you run out of material - ideally until the cowl would fit nicely over your head. Then connect the ends by grafting or sewing.

Montag, 24. Oktober 2011

From Pantyhose to Phone Sock

This phone sock is made from old pantyhose cut into yarn. The material is quite flexible and - in knitted form -  makes a good protective layer around electronic equipment.

It's not much of a fancy pattern, but maybe an interesting idea for recycling.


Material:
  • 8mm dpns (or 8mm circular knitting needles using magic loop technique)
  • about two pairs of pantyhose cut into yarn (a tutorial can be found here).
  • tapistry needle
Instructions:
  • CO24 sts (I used knitted cast on to minimize the tail)
  • join in round
  • knit 35 rounds (depending on the size of your phone)
  • bind off using kitchener stitch (a tutorial can be found here)
  • weave in ends
I experimented a bit with different colours (stripes from light to dark) or patterns (e.g. k3 p1), but in the end I like the plain stockinette stitch best - without stripes or colourwork.

Sonntag, 23. Oktober 2011

Hosiery Yarn

After clearing out my closet, I had a heap of socks and pantyhose that I knew I wouldn't wear anymore.


So, I started to cut it into yarn. First I made "hosiery yarn".

Sonntag, 18. September 2011

Creativity ... or something


I don't know what made me cut up three t-shirts to make some t-shirt yarn and finally a scarf ...